Hints and Tips Page 12
Click on any of the thumbnails below for a more detailed photo
![]()
Hints and Tips Page 12
Click on any of the thumbnails
below for a more detailed photo
|
Leather Washer Handles In terms of comfort and non-slip functionality, you can't beat the feel of a stacked leather washer handle. The handle just feels soft , warm and comfortable in your hand but still offers a durable handle that won't slip in your hand, even in the most inclement, cold or wet weather. Leather washers, by the way, can be found on the Handle Supplies Page |
|
|
|
Perhaps one of the best known leather washer handled knives is the venerable Ka-Bar WWII Marine survival knife. This hard working knife became the best friend of thousands of our enlisted men . Stories, anecdotes and legends about this knife abound. |
|
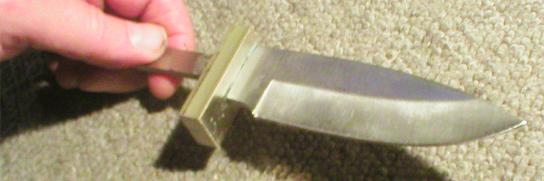
Stacked leather washers are designed to work on hidden tang knives. I start by soldering on a nickel silver guard. The premade washers are oval in shape and have a slot that slides over the tang. |
|
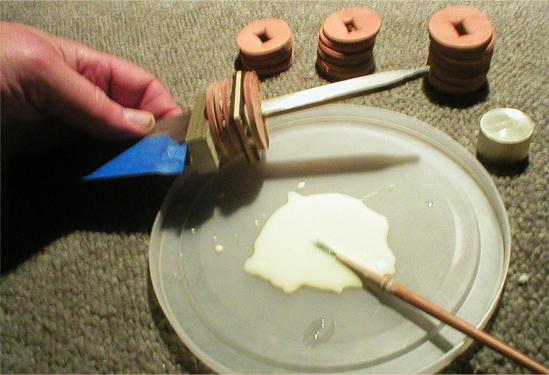
Start sliding the washers on the tang, coating each with a watered down carpenter's glue. The glue will help adhere the washers and add a lot of strength and stability. The black/white/black ebony and maple spacer is just something I'm adding fordecoration. |
|
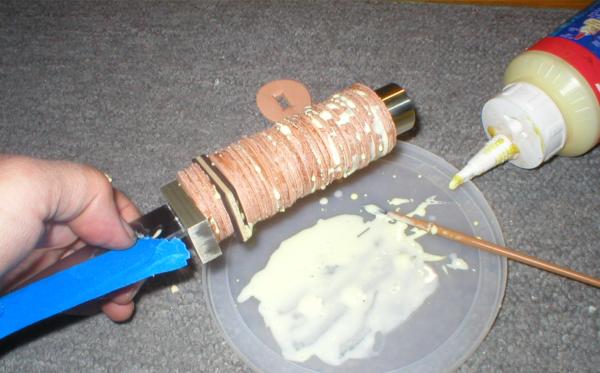
When done adding all of the washers, screw on the threaded pommel to compress them. I added a few drops of super glue to the threads to lock the pommel in place. You'll know it's tight enough when the glue starts to squeeze out. |
|
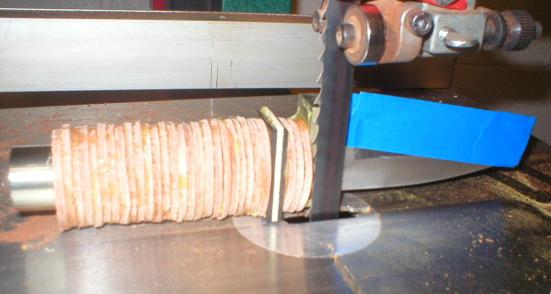
I pass it through the bandsaw to give me a good flat side that I can use for reference in starting to define to side profile |

|
I worked the profile out on paper first, but this is what it looks like after transferring it the knife handle. |
|
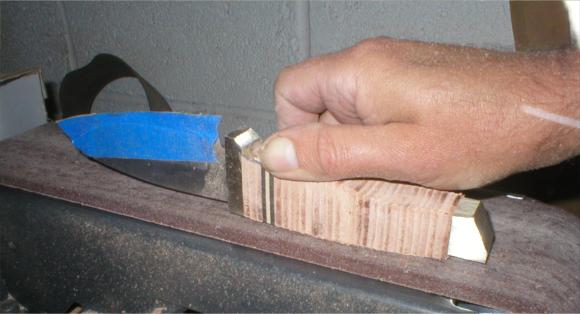
Shaping the stacked leather washer handle at this point is done just as you would shape any other handle material. I use the belt sander to do most of the work establishing the shape and finish it by hand with a medium grit sandpaper. Cover the leather washers with tape to protect the bare leather if you're going to buff the guard and pommel. |
|
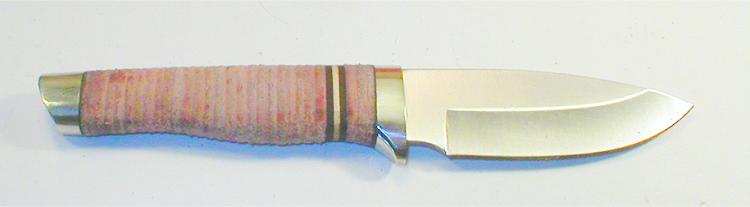
And this is what it ended up like. I applied one liberal coat of Neatsfoot Oil on the washers to add a degree of protection. I Think this is a keeper. |
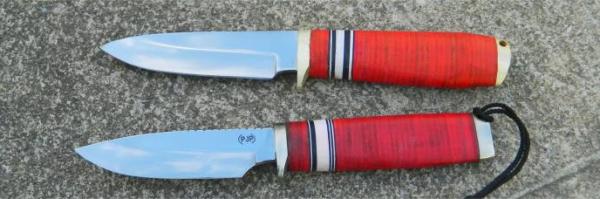 |
Here's a couple of blades where I dyed the leather washers after shaping and used several layers of fiber spacing material for accent. The butt caps were bar stock drilled and tapped with a 6x1mm thread and then screwed on the threaded tang and shaped. |
|
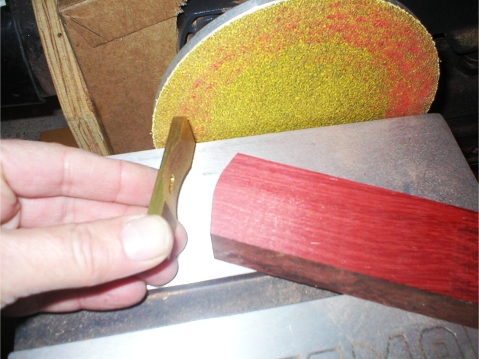
Curved Guards This technique is a simple way to add an attractive custom look to your knives and, and is a great way to reduce the heavy weight of overly thick guards, making your knife more comfortable and easier to handle. |
|
|
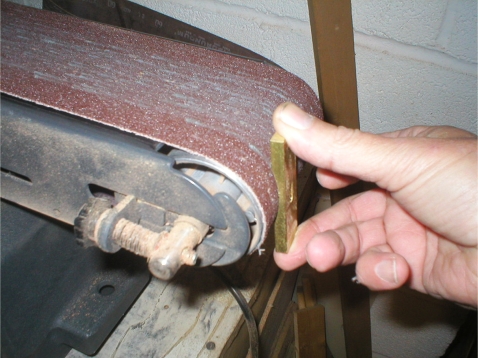
I start by sanding down the inside edge of the guard on my bench belt sander. It goes fast but remember that this thing is going to get very hot. Do this in steps letting it cool in between. |
|
I use a disk sander to shape the front of the block that will be the handle to fit the back of the guard. Trial and error is the way to go. Test fit often until you have a perfect fit. |
|
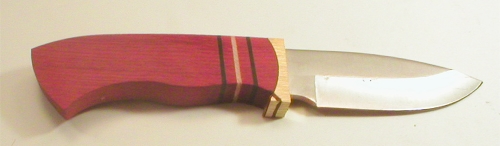
This is what it looks like after mounting and initial profile shaping. The blade, by the way, is the Nova, done up with a bloodwood handle and ebony and maple spacers. |
|
|
Shaped and finished. I think this adds a really classy, custom touch that's easy to do. |
|
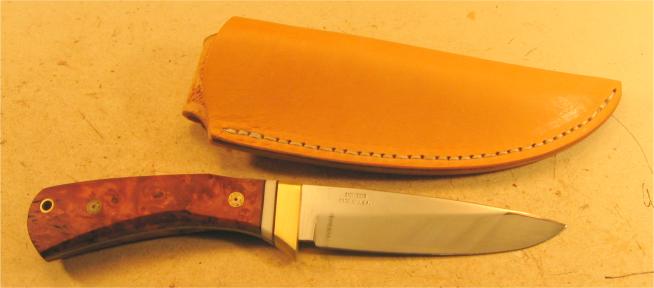
Custom Sizing A Leather
Sheath Starting with a standard, off the shelf ready made sheath, you can custom fit it to fit like a glove on any of your prized blades, giving it a good, tight friction fit that looks custom made. The process is called "caseing" a sheath. Here's how. |
|
|
Start with an off-the-shelf general sheath that is a close fit to your blade size. This one ,made from 8-9 oz. unfinished tooling leather, looks pretty good |
|
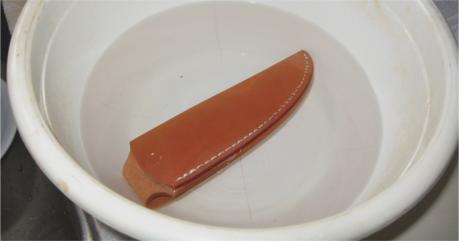
Leather is slightly elastic when it's wet so the first step is going to be thoroughly soaking the sheath in warm water. I'd let it soak for maybe an hour or so to make sure it's totally saturated all the way through. |
|
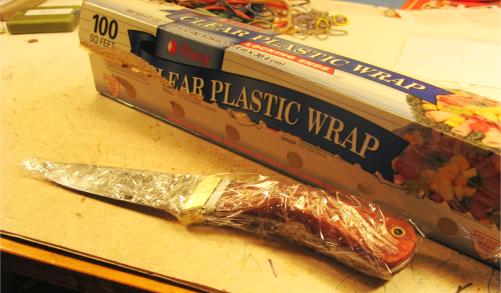
While you're waiting, wrap your blade in clear plastic wrap. This is to protect the blade and is especially important if your blade is high carbon or not stainless. Sitting tightly wrapped inside layers of wet, dead animal skin for a few hours is tough on any blade. |
|
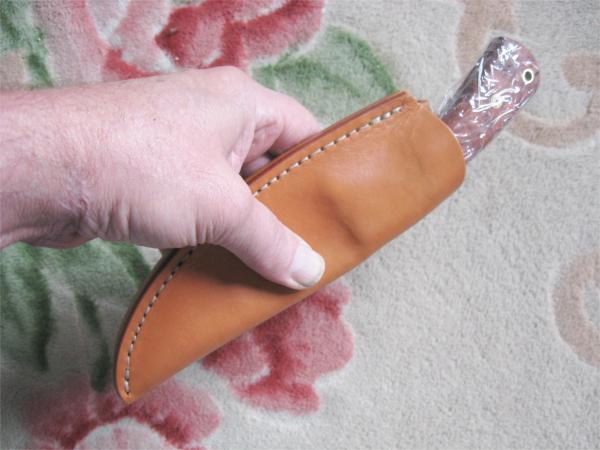
Slide the blade into the wet sheath and spend of few minutes pushing and forming the leather into a tight fit around the blade paying special attention to the guard area. Don't press the sheath area behind the guard too tight so it will still be easy to withdraw the blade. |
|
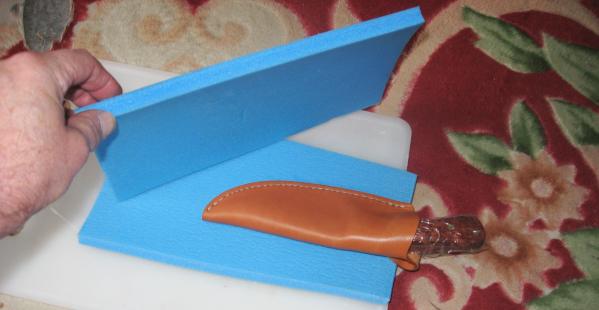
To hold the sheath in shape as it dries I use two small pieces of foam rubber. These were cut from an inexpensive sleeping bag mat, available at any store with a sporting goods department. This will compress the sheath into a tight fit. I use two kitchen cutting boards--one above, one below--for rigidity. |

|
A large coffee can filled with pennies ( last weeks profits) is placed on top to keep the pressure strong while the sheath dries in this shape. One hour should be enough--do not leave it like this overnight or any longer periods of time for fear of staining or corroding your blade. This is especially true with non-stainless blades. Just set the sheath aside to dry in the air overnight |
|
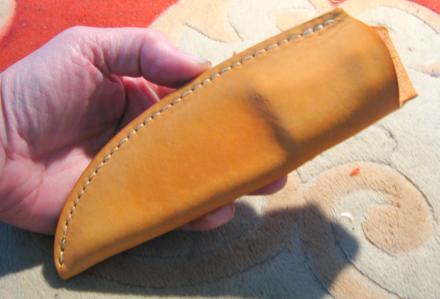
And this is what it should look like. If the belt loop was deformed or flattened during this process, dampen it slightly and reshape. When dry you can now dye the sheath or , for a more natural appearance, just apply a few coats of Neatsfoot Oil. This will provide a good, waterproof finish. |

|
Here's a shot of a few sheaths that were completed earlier. This caseing process gives the sheaths an internal shoulder that the blade guard will fit tightly against and will provide a tighter fit for the blade itself. Not to mention looking like it was custom made to fit like a glove |
Hints and Tips Page [1] [2]
[3] [4]
[5] [6]
[7] [8]
[9] [10]
[11] [12]
[13] [14]
[15] [16]
[17]
Next
Got a good tip that you think your fellow knifemakers would like to know about? Drop me a note at pjp2@northcoastknives.com
