![]()
Tutorials
Hints and Tips Page
4
Click on any of the thumbnails
below for a more detailed photo
|
Mosaic Pins |
|
|
|
A trip to the hobby shop will reveal several sizes of telescopic tubing, square or round, usually available in aluminum or brass. Start with tuning 1/4' outside diameter, and try several sizes that will slip into it. Not expensive, $3 will give you enough tubing to make 5-6 pair of mosaic pins. |
|
Assemble bits of solid copper electrical wiring, this brass rod, paperclips, etc. Any small diameter wire will do. Choose different materials for contrast. |
|
Cut the larger tubing in 2" lengths. You'll cut this in half when complete for a pair pf mosaic pins. Use a small round file to clean p the inside edges. Slip them together and use a very small drop of water thin super glue to hold them together. |
|
Use your wire bits to populate the open areas of the mosiac pin making sure to keep it symmetrical. Different types of wire ( copper, brass, aluminum and steel) to add contrast. Push the wire in far enough to make sure it goes all the way. Lot of combinations available--use your imagination. |
|
My close up photography really sucks so I used the computer to enhance this view. You get the idea. I used a fiberglass disk to cut off the wires evenly. The two inch piece will be cut in half for two 1" pins. |
|
Cut he 2" pin in two, in a length that will extend about 1/16" above the scales. Should be a very snug fit in the 1'4" hole you drilled through the scales |
|
Normally you really whack the pins to get them to compress and hold the scales tight. The idea is the same here, but do it gently so you don't distort the mosaic pins. Rotate the sides often and check for symmetry. Sand and finish like normal when complete. |
|
|
Again, not a great photo, but I think you get the idea about how mosaic pins can really dress up a handle and add a truly custom look. |
|
|
I've been experimenting with ways to colorfully fill some of the voids and have had pretty good luck using epoxy, colored with india inks and injected with a hypodermic needle. The inks ( black seems to work best) mix with the epoxy well and thin it enough to get through a hypo. |
|
Another Way To Do
Leather Washer Handles A customer wrote to tell me how he did leather washer handles and I really liked his method, as opposed to the way I had been doing it ( to see my "old" way of doing it, click HERE ). After trying it this way, I'm never going back. Here's how |
|
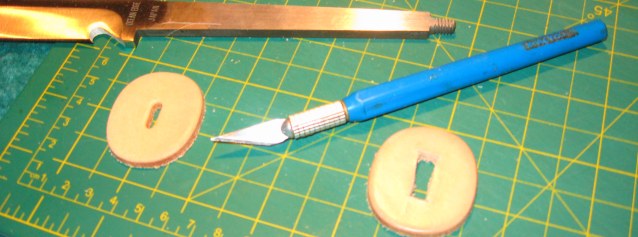 |
The slot that comes in the washers is a trifle small and I need to spend a few minutes with an X-Acto blade cutting a wider one on about three dozen. I'm just eyeballing the slot size --- a little bit too large is OK at this point |
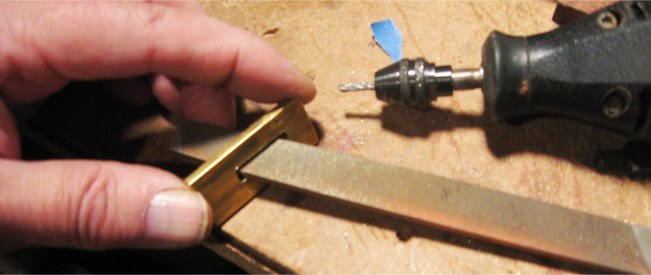 |
Working on the brass guard . Here, I'm filing the slot size so it will be a snug fit against the blade when slipped on over the tang. Do a lot of trial fits. |
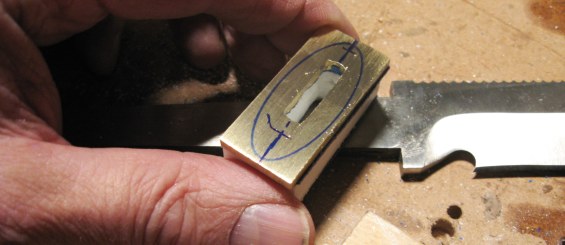 |
For this design, I glued the guard to a corian spacer and then use a fine, felt tip marker to mark the final shape of the guard that I'm making |
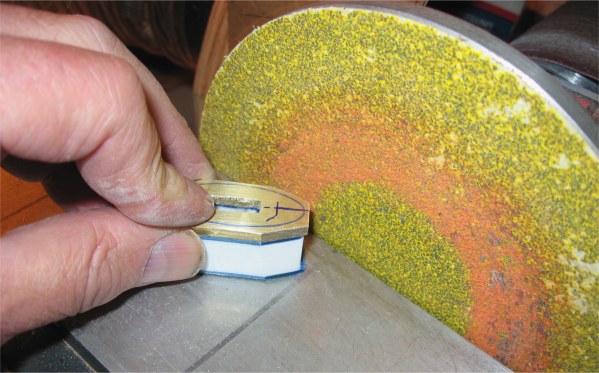 |
I'm going to use my bench disk sander to shape the guard to the correct profile |
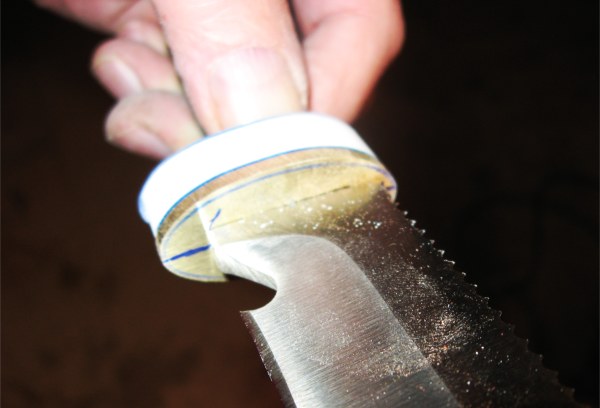 |
Test fit the guard by sliding it onto the tang from the back. Take special note to make sure it fits snugly up against the shoulders of the blade. |
 |
When you're satisfied that you have a good tight fit, go ahead and use a little bit of epoxy to hold it in place. I file the slot a little bit wider at the back to let some epoxy seep into the slot |
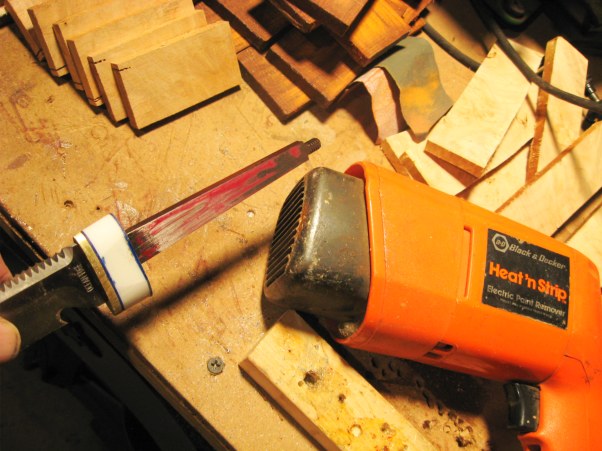 |
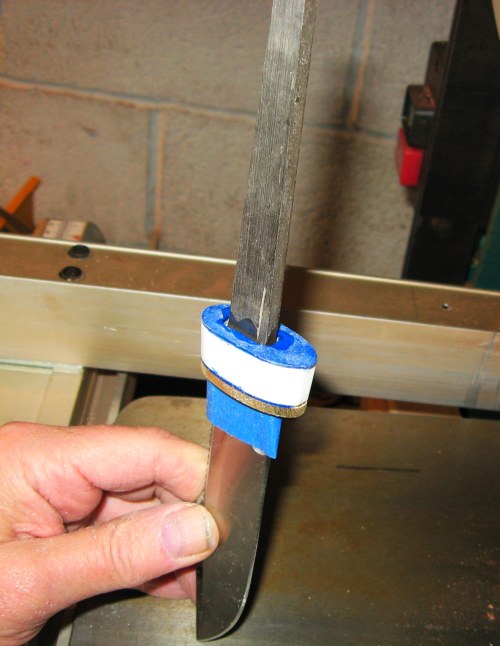
For now, I don't want the leather washers to stick to the tang. The easiest way to do this is to apply a light coat of wax -- a red crayon works perfectly. A heat gun turns this into a nice, thin wax film |
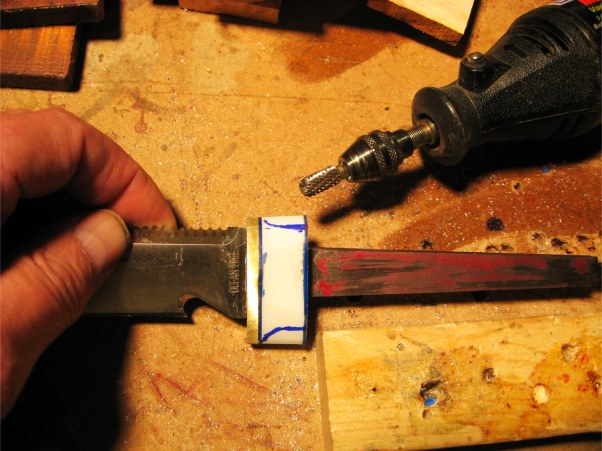 |
I use a carbide rasp in my rotary tool to do the shaping on the guard. I use a magic marker to give me some guidelines for shaping. Concentrate on establishing the basic shape -- we'll do the final shaping with sandpaper later. |
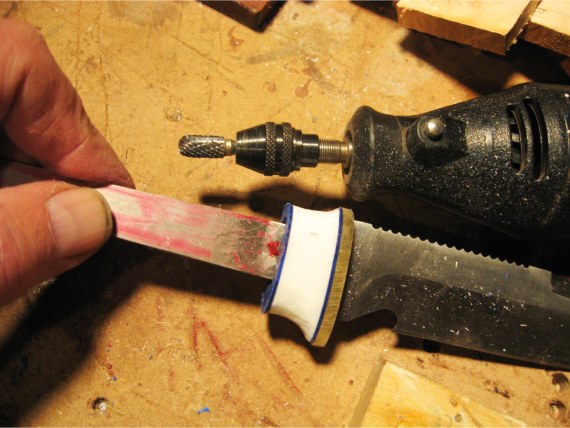 |
This is what the guard looks like after initial shaping. Get it close but we can always tweak it a little bit later |
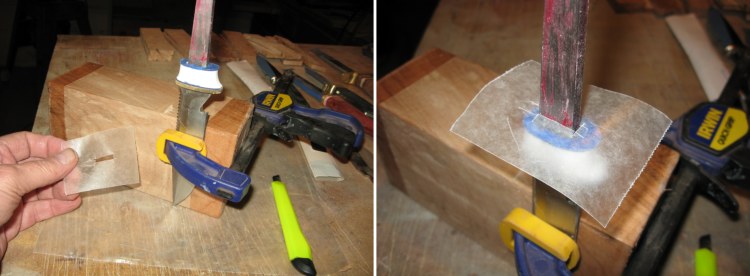 |
Getting ready to add the leather washers, I clamp the blade to a large block of wood. To keep the glues leather washers from sticking to the guard for now, I cut a small piece of wax paper that I slip over the tang |
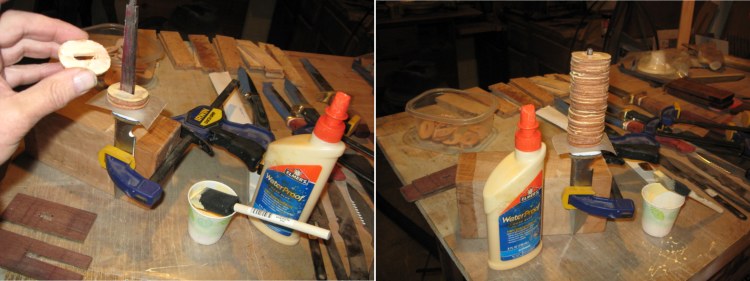 |
I use a waterproof carpenters glue applied uniformly with a foam brush in a thin layer on each washer as I slide it down over the tang. Back when I used to be stupid, I tried to do this with epoxy. |
 |
To compress the washers tightly while the glue cures, I clamp it up like this. Notice the this scrap wood spacers at the front and back to make sure the clamps go on straight. |
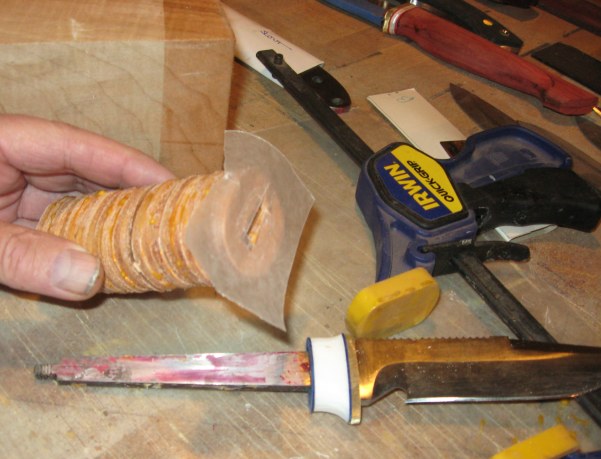 |
After the glue cures, the leather washer knife handle should pop right off. Holy cow, it worked! That crayon trick really works! |
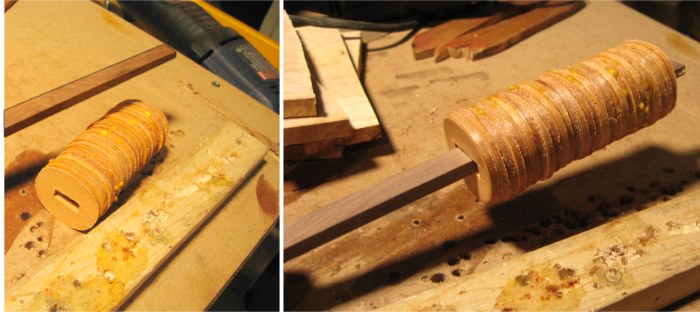 |
I cut a piece of scrap wood to insert into the center slot to act as a handle during the shaping process |
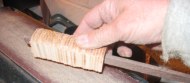 |
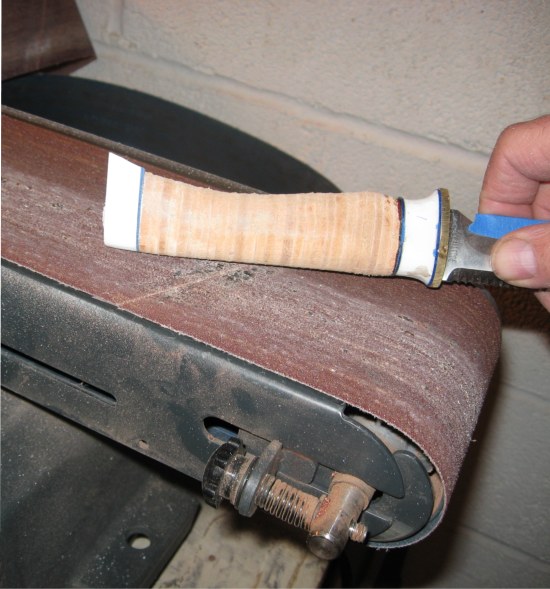
The first step in shaping is to use the belt sander to give our handle two flat sides. These will be useful for reference and orientation during the remainder of the shaping steps |
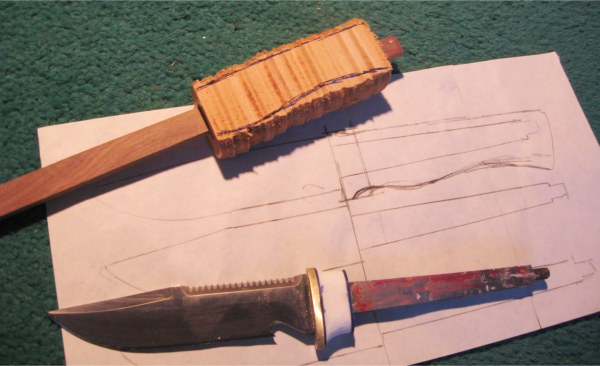 |
Using a sketch that I had made earlier of what I wanted the finished knife to look like , I draw the profile on the flat sides of the handle |
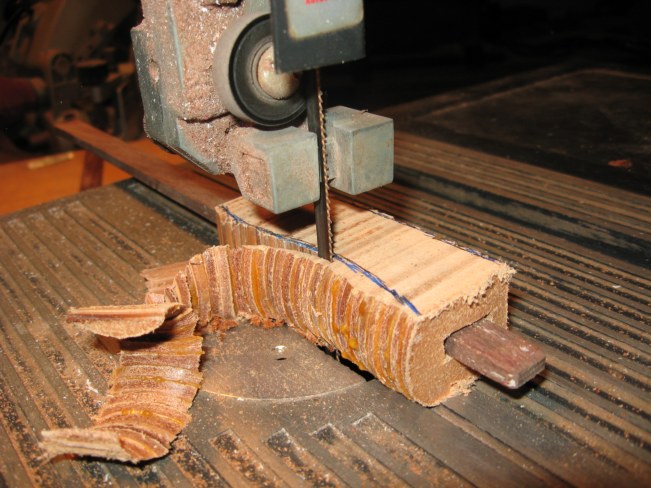 |
A bandsaw is the quickest way to cut the rough profile. A jig saw or coping saw would work fine also. |
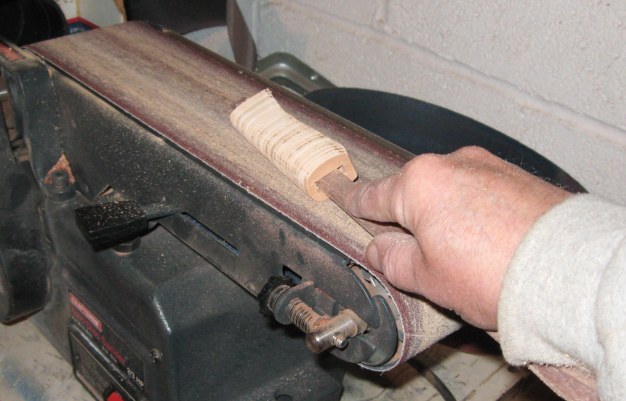 |
Back to the belt sander to start doing the shaping. You can see how that hardwood handle simplifies the shaping by giving you an easy way to control the handle against the belt without sanding your knuckles |
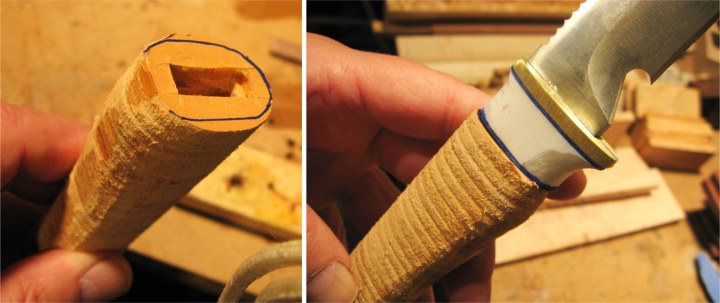 |
Prior to do a test fit for final shaping, I use a fine tip magic marker to trace the profile of the guard on the handle. Slip the washers on the tang to see how it fits. |
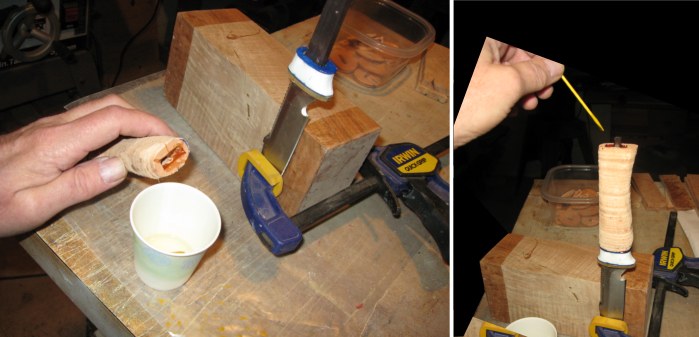 |
I clamp the blade vertically to a block of wood while we use epoxy to glue the handle on. Use a toothpick to fill the inside of the handle and then slide it into place. Use the same toothpick to put a few more drops of epoxy in from the back to completely fill the inside of the washers |
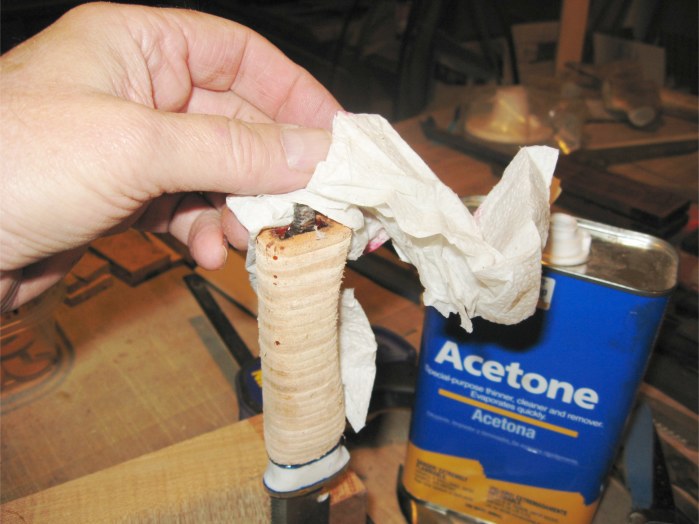 |
Before the epoxy cures, use some acetone to wipe off the nut at the back of the tang. We'll need this clean for the next step |
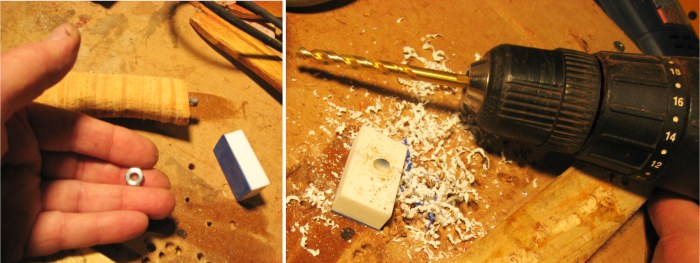 |
I have no clue what the threading on the tang is but by trial and error, I found a nut that will fit in my scrap drawer. I'm going to use a piece of corian as a pommel, and I drill it to fit over the threaded tang. The hole is countersunk for the nut |
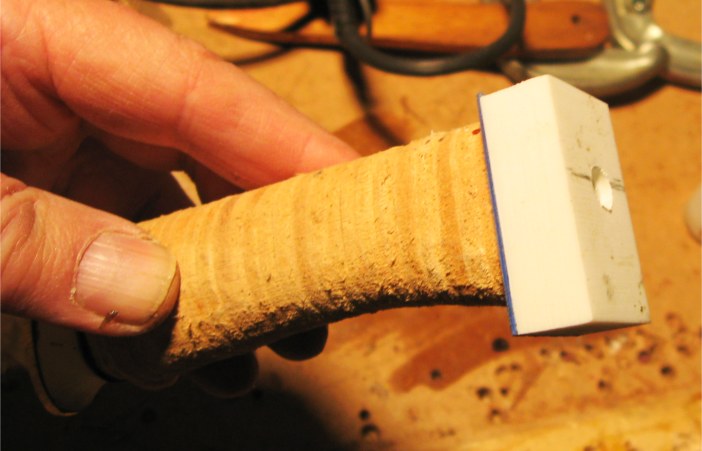 |
Use a little bit of epoxy on the base of the pommel when using the nut to attach it to the knife handle |
 |
After the epoxy cures, a few minutes on the belt sander starts to shape the pommel |
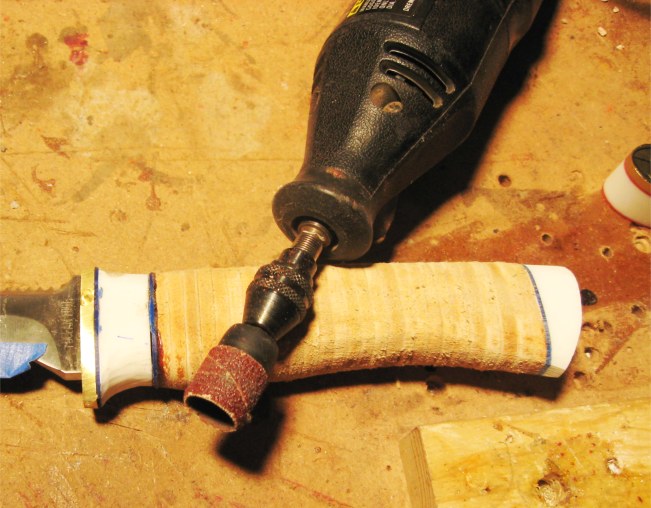 |
A sanding drum on a rotary tool is perfect for doing the final tweaking on the handle shape and blending the guard with the handle with the pommel. I used a small piece of 240 grit sandpaper as a last step and then polished the guard. |
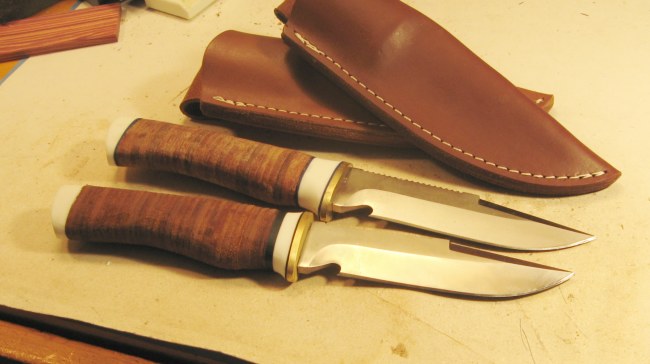 |
I actually made two knives for this tutorial to try out two finishes : Neatsfool Oil and Tung Oil. The Tung Oil gave a harder finish but I prefer the darker look and softer feel of the Neatsfool Oil. Whichever you use, several coats will be needed -- the leather is thristy. |
Hints and Tips Page [1] [2]
[3] [4]
[5] [6]
[7] [8]
[9] [10]
[11] [12]
[13] [14]
[15] [16]
[17]
Next
Got a good tip that you think your fellow knifemakers would like to know about?
Drop me a note at pjp2@northcoastknives.com