Hints and Tips Page 14
Click on any of the thumbnails below for a more detailed photo
![]()
Hints and Tips Page 14
Click on any of the thumbnails
below for a more detailed photo
| Homemade "Micarta" Scales | |
| This technique comes to us from knifemaker Joel Bolden of Halfmoon Knives in Port Matilda, Pa. (Thanks, Joel). If you want to try something really attractive and different, Joel shows us how he makes his own micarta-like slabs out of an old pair of jeans. Yes, you heard me right, an old pair of jeans. This is a pretty cool and unique treatment which just cries out for experimentation. | |
|
|
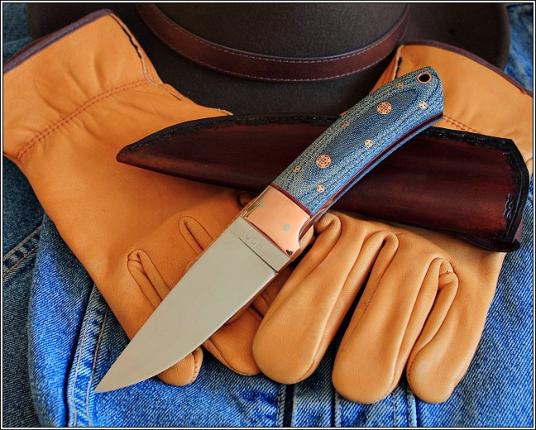
This is one of Joel's beautiful creations using his home made bluejean micarta. See what I mean? Pretty neat, huh? Makes me want to run out and try this technique this afternoon. This is how Joel does it: |
|
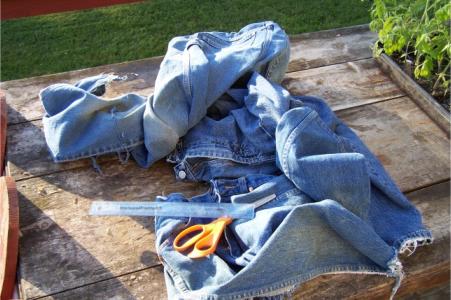
See I told you. This is where it all starts: an old pair of bluejeans. You might also want to visit your local fabric store to see what other colors they have. |
|
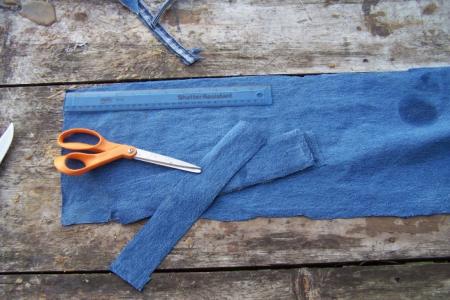
Joel starts to cut the jeans material into 2" x 11" strips and says that 22 layers will end up giving you a 3/8" slab when complete. |
|
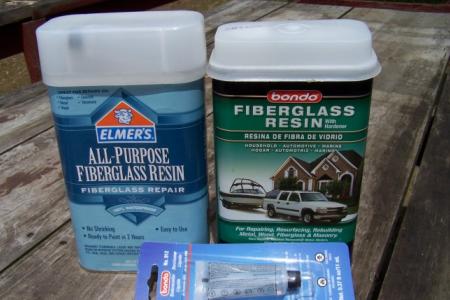
Joel has used both Elmer's and Bondo
fiberglass resin. Any good marine grade resin should work. Joel suggests
buying an extra tube of hardener. Read directions carefully: mixing ratio
may be different depending on brand. |
|
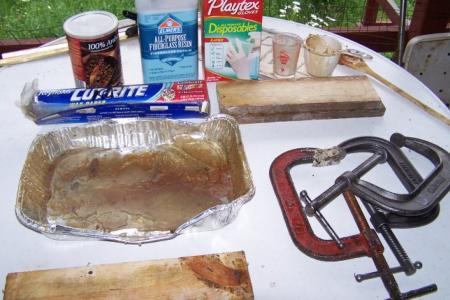
Here's what you need to start out: plenty of wax paper to keep the slabs from sticking to the boards, two boards, C-clamp, mixing cups and containers, and most important: disposable gloves. Have everything ready to go before you start since the resin, once mixed, sets up in 15 minutes or so. Joel also advises that due to the obnoxious odors, this is best done outside if possible. |

|
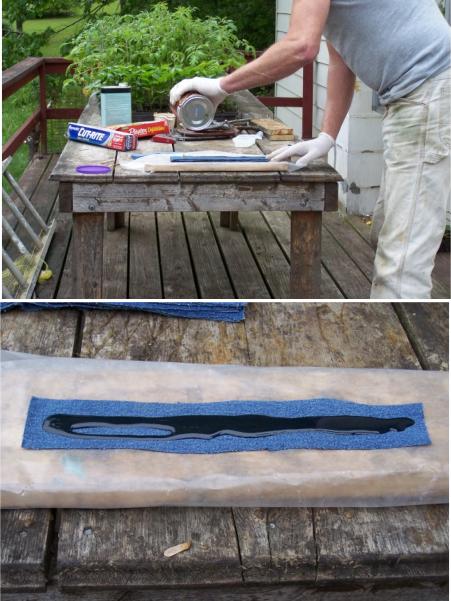
Measuring, mixing, measuring, mixing. |
|
The moment of truth: applying the resin to the first strip of jean material. Please notice the waxed paper--very important. Might not be a bad idea to have a cheap foam brush on hand to spread the resin. repeat for all 22 strips. |
|
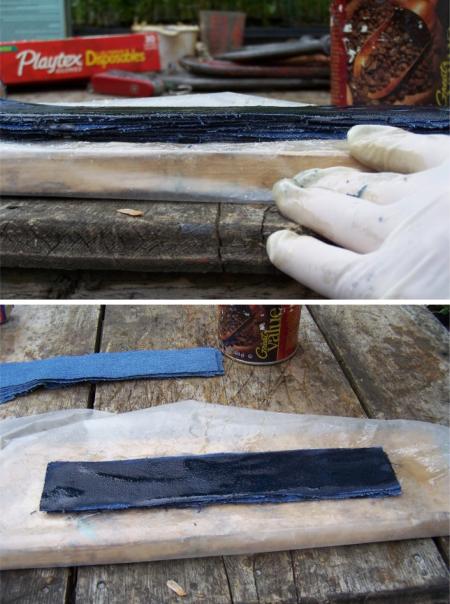
After all of the resin is applied, it should look like this. |
|
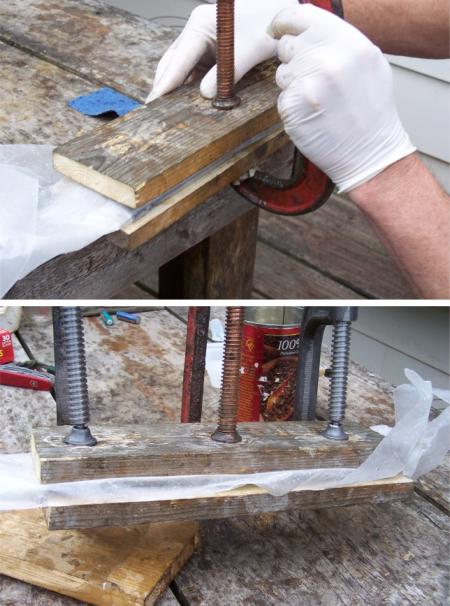
Lay another sheet of wax paper on top and put the top board in place in preparation for clamping. |
|
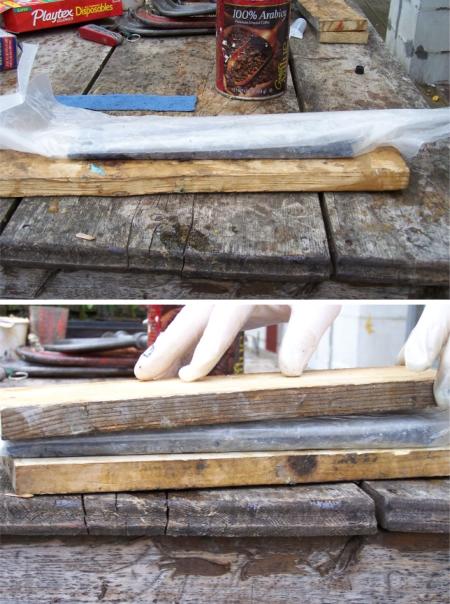
According to Joel, this stuff is slippery so be careful in clamping. Start in the center so you get good, uniform pressure. Keep checking that the boards are parallel so the slab is even. |
|
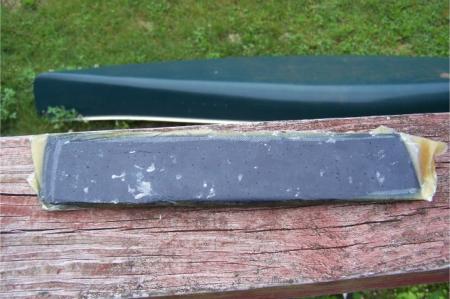
And this is what the finished slab looks like just before a quick rip to the bandsaw. |
|
Buffing About time that I wrote a tutorial on buffing, isn't it? Before we get started, I have to throw out this word of caution: As I've stated before, the buffing operation, believe it or not, is the one workshop technique that has resulted in more injuries than any others combined. It's not that all unusual for the buffing wheel to grab the knife out of your hands and throw it across the room. Always plan one step ahead, use common sense and caution, and make sure that you're not standing in front of it. |
|
 |
Buffing is most commonly done on the guards and bolsters of a knife to give them a professional, finished look after you've done doing the initial shaping with carbide burrs and small Dremel sanding drums. The final step before buffing should be a hand sanding with 400 and 600 grit wet or dry sandpaper. Buffing takes out small scratches, not large ones! |
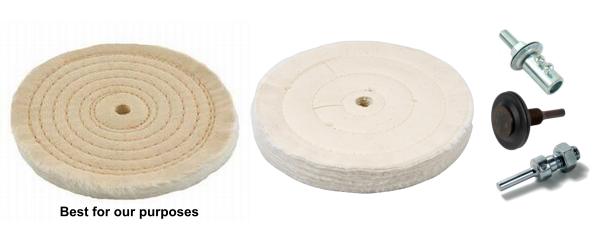 |
There are a variety of buffing wheels available, all with their own purpose. I'm assuming that you'll being buffing some of the softer metals like brass or nickel silver where the stitched buffing wheel will provide the appropriate stiffness and support. Softer buffing wheels would be good for putting a luster on wood while harder and more aggressive wheels can actually be used for shaping. Some machines have washers on the shaft to allow you to attach the buffing wheels; if you have a drill chuck type setup, you'll need to pick up an inexpensive arbor |
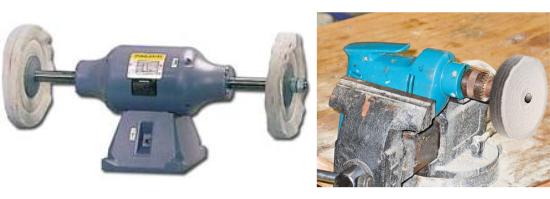 |
A buffing machine is like a bench grinder but with a slightly longer shaft. They are usually slower (1750 RPM, rather that the faster 3700 RPM that bench grinders go at). I would recommend heavily against using a standard high speed grinder for safety sake. I also saw a guy that gets good results with a hand drill mounted in a vise. |
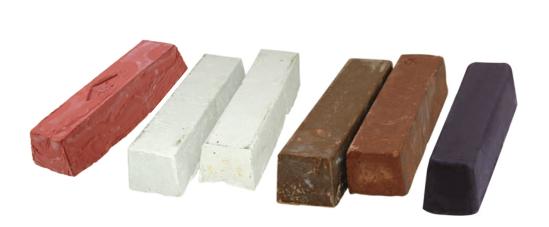 |
Wow, there are lots of different types of buffing compounds with different types of grit. For the soft metals like brass or nickel silver, I find that the brown , or Tripoli compounds are best. White is good for stainless and the green ones are good for a light wood polish. If in doubt, read the label on the package. |
| Note: If you're going to be using different types of buffing compounds, be sure to use a different buffing wheel for each! | |
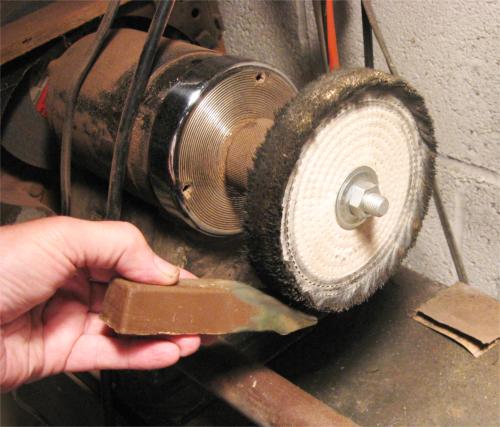 |
Apply the compound to the wheel while it's spinning ( I turned it off to take the photo) to rub some of the compound onto the wheel. You can tell I've used this wheel before. |
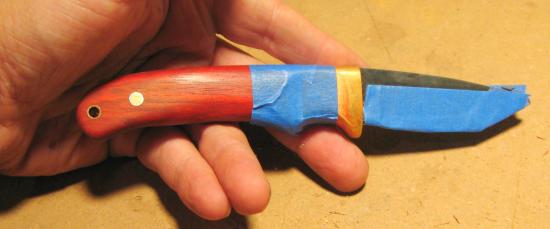 |
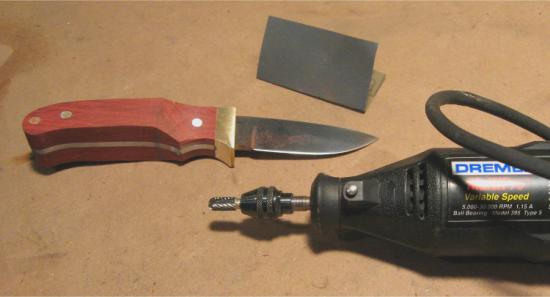
Please, I beg of you, tape the edges of the blade so you don't die from blood loss while handling the blade during the buffing process. I use the low-tack blue painters tape so it comes off neatly and cleanly when done. Also tape up any adjoining wood surfaces so you don't grind any compound into the wood ( very hard to remove later !!) |
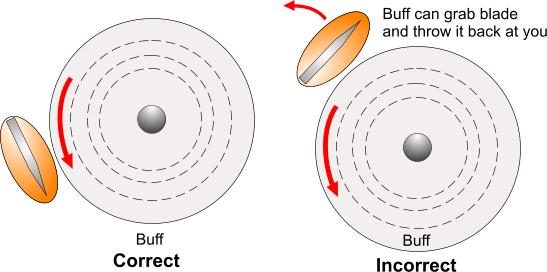 |
Buffing angles are also another VERY important safety consideration. Buff on the slight underside of the wheel. Trying to buff on the upperside may put you in the line of flight for the blade if the wheel grabs it and throws it. |
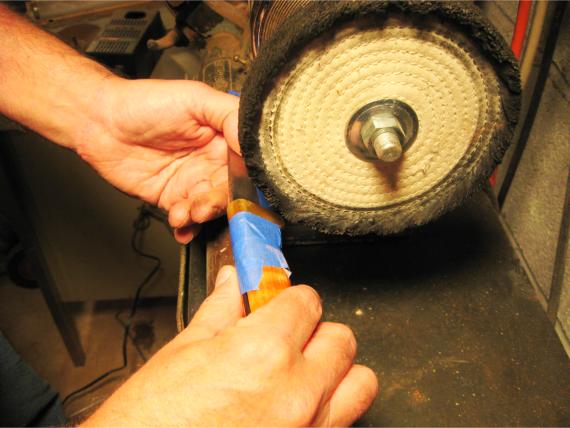 |
OK, here we go. Use light pressure and don't worry about breaking any speed records ( once you get the hang of it and feel safer later, you can apply just a little more pressure). Keep rotating the guard that you're buffing to get even coverage. Take frequent breaks to inspect your progress and use good lighting. Never, EVER, take your eyes off your work and never get sloppy and complacent !! That's when it will bite you! Don't let the the buff catch the edge of the blade! (and yes, I know this particular buffing wheel is due for replacement soon) |
|
|
A light wipe down with acetone will remove any of the waxy residue that might be left on the guard and blade |
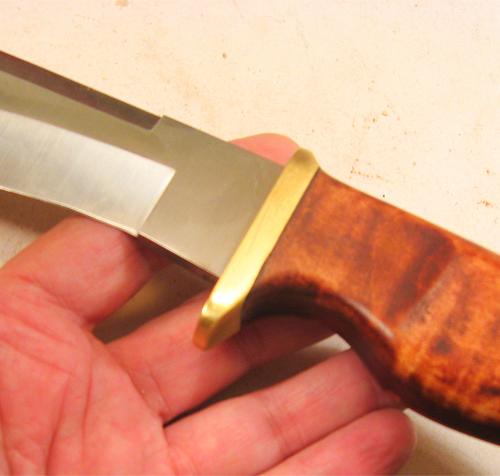 |
And this is what it should look like when you're done buffing and have the tape removed: all nice and shiny! |
| If you'd like to go into more detail on the techniques of buffing, the nice folks at Caswell Electroplating of Lyons, NY have a very nice PDF file available for your download. Click HERE | |
Hints and Tips Page [1] [2]
[3] [4]
[5] [6]
[7] [8]
[9] [10]
[11] [12]
[13] [14]
[15] [16]
[17]
Next
Got a good tip that you think your fellow knifemakers would like to know about? Drop me a note at pjp2@northcoastknives.com