![]()
Tutorials
Hints and Tips Page
6
Click on any of the thumbnails
below for a more detailed photo
|
Training Wheels for Knife
Grinding As I claw my way up the learning scale of blade grinding, I'm finding out a lot of things. On my first few blades, the horizontal grind was erratic and wavy and the depth of grind was inconsistent and appeared sloppy . Although I've seen some of the master's freehand this and was dumbfounded at their skill I knew I had a long way to go. I decided that I needed "training wheels". |
|
|
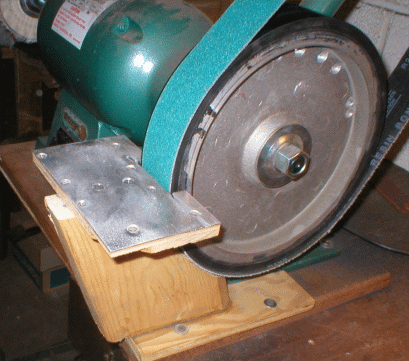
To keep the horizontal grind consistent as you draw the steel bar stock across the grinding wheel, a good table is necessary. This is simply a good piece of plywood with some sheet aluminum on the top mounted to a base made from 2" x 12" stock cut to fit snug against the wheel. The table is held on by two drywall screws for easy removal while changing belts. |
|
|
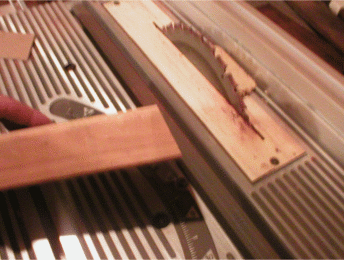
To figure depth and height of the grind line, I i used a sketch of the 10" grinding wheel and used this to figure the angle necessary to make the grind line fall where I needed it to. The closer to 90 degrees that you hold the blank, the higher on the blade the grind line will be. |
|
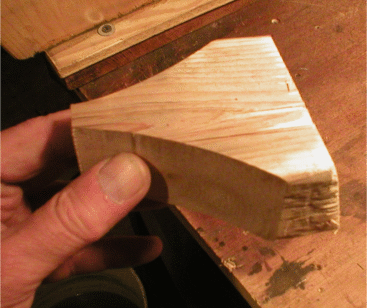
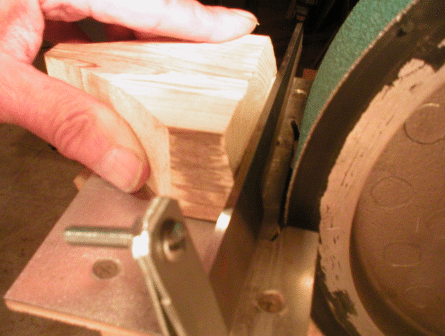
I transfer this angle to a cut made on on a common 2 x 4 |
|
To make this "push stick" easier to work with I cut an easy to use handle on the rear. |

|
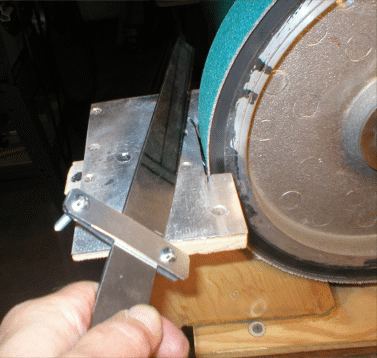
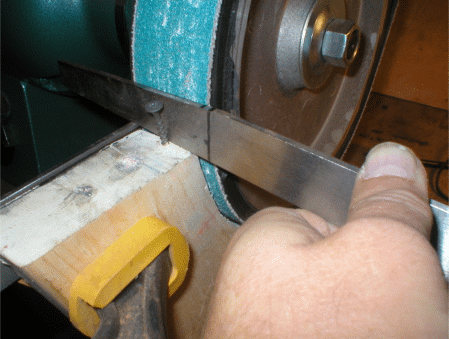
Doubt if I'll win a Nobel prize for this, but this little invention has improved my technique and saves me a lot of time and grief. Two pieces of sheet metal with two screws serve as a stop that attaches to the blade to help determine here the grind begins |
|
The stop installed on a sheet of flat stock steel to be ground. Picture shows how the stop bumps up against edge of sander table to limit where the grind line begins. If you're doing a symmetrical grind, make sure but left and right edges of the table are equally spaced from the edge of the sanding belt. |
|
Hold the steel stock tight against the push block to maintain a constant angle. Hold the push stick still while holding it tight to the grinding wheel. Draw the steel stock horizontally across the grinding belt using the push stick to hold it tight to the belt. |
|
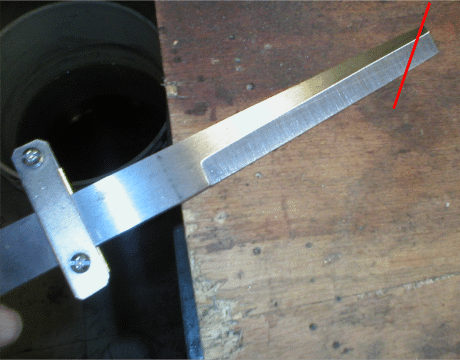
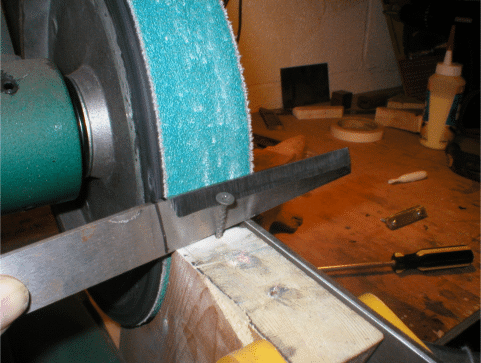
Done: easy and straight grind line. The red line on the enlarged photo will show you how I plan to grind the tip at a geometric angle to make a slim tanto style. |
|
Grinding Knife Blades
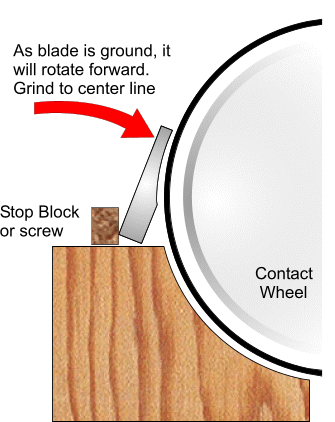
Edge Up; Training Wheels I have always thought that knife blades should be ground edge down, but I have recently been reading more about grinding blades edge up. If you think about it, this does offer some advantages, not the least of which is being able to see the edge and how close to the center line you're getting. |
|
|
Here's the basic idea. the base of the blade is held tight against a base block or screw while drawing the blade steel horizontally across the grinding wheel. As the blade is ground, the edge will rotate into the grinding wheel. Grind this to the center line. |
|
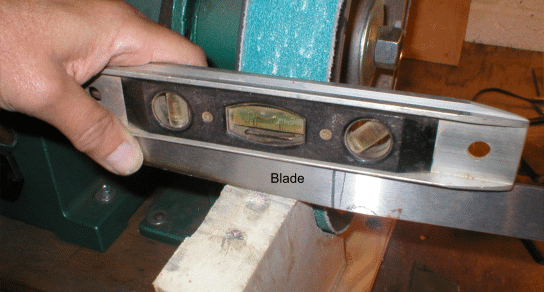
Since the blade is tapered and I want to keep the edge absolutely horizontal in relation to the grinding wheel, I use a level to figure out how much I'll need to raise each side with a spacer to rest the blade on. It turned out to be less than 1/8" |
|
I clamped a scrap piece of metal to the left side to act as a rest to guide the tapered blade over. I also drove a screw into the bottom of the jig to rest the base of the knife against while drawing it horizontally across the grinding wheel. |
|
Reverse the setup by moving the scrap steel rest to the right side of the jig and grind the other side of the blade. Notice that I use a magic market mark to show me where to start the grind. |
|
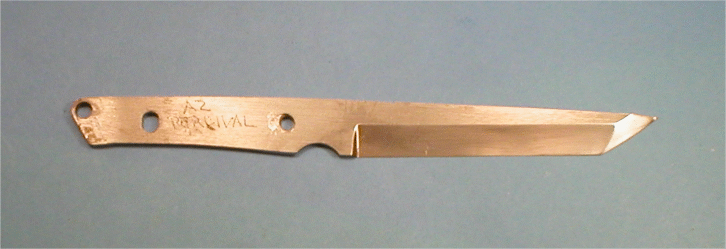
And this is what I ended up with. I did a final few passes with a fine grit belt and did final shaping of the handle on the knife belt grinder . Notice how I engraved my name and type of steel ( A2) on the blade before sending it out for heat treatment. |
| Closing note: grinding blades is an art that takes a lot of practice to get good at . I still ruin about one out of three blades I try to make. I hope that the above techniques help shorten your learning curve, but truth be known, the only way to get good at this is to practice, practice, practice. | |
Hints and Tips Page [1] [2] [3] [4] [5] [6] [7] [8] [9] [10] [11] [12] [13] [14] [15] [16] [17] Next
Got a good tip that you think your fellow knifemakers would like to know about?
Drop me a note at pjp2@northcoastknives.com