Hints and Tips Page 13
Click on any of the thumbnails below for a more detailed photo
![]()
Hints and Tips Page 13
Click on any of the thumbnails
below for a more detailed photo
|
Solderless Guards with J-B
Weld Epoxy Two of my regular customers wrote to me recently to let me know about this technique, and anything that will get me out of soldering a guard, certainly gets my ear. It's not so much that I hate soldering, but the cleanup is time consuming and tedious. They jogged my memory and I remember seeing a web page somewhere a year or two ago talking about this. If anyone knows of the web page, I am certainly willing to give credit where credit is due. Anyway, I decided I have to see for myself if there was a good alternative to soldering . |
|
|
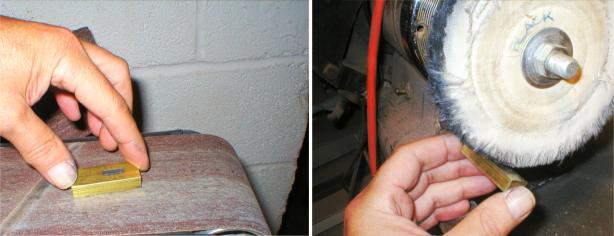
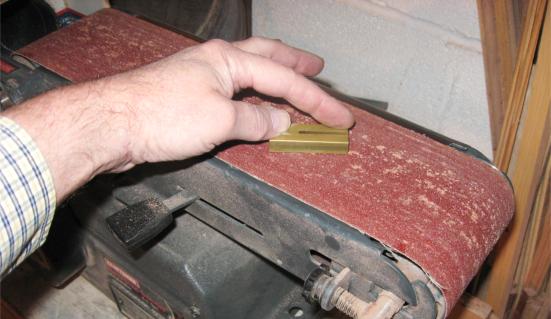
Preparation of the guard is the same as if you were soldering it. I spend a few minutes on a belt sander with a 220 grit sandpaper, a few more minutes with a 400 grit and a few minutes on a buffer. It's a whole lot easier to clean up the front of the guard now than after it's mounted. |
|
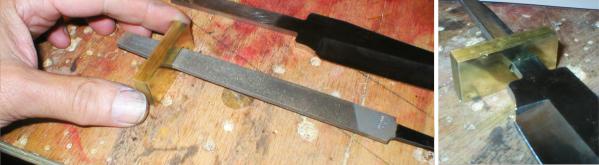
File and fit. File and fit again. When you're done, file and fit some more. Yes, I know this is tedious but it's very important to have a good, tight fit with no gaps. A little extra time spent on this step will pay off handsomely. |
|
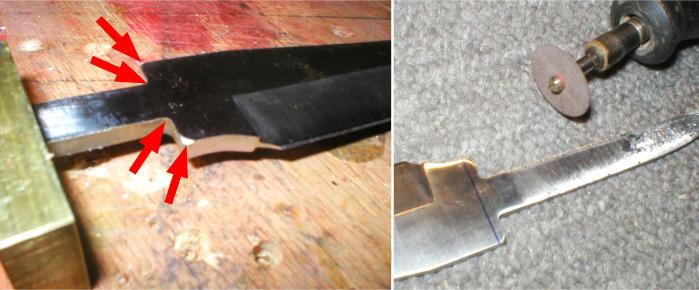
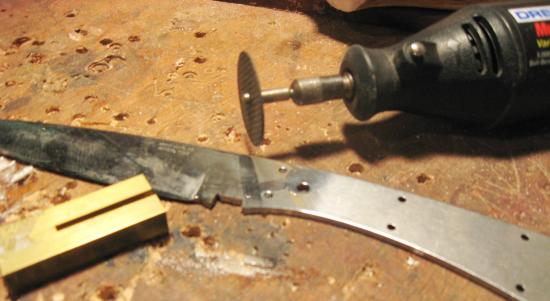
It's a common manufacturing shortcoming that leaves the inside shoulders where the blade meets the tang a little bit rounded. For a perfect fit against the guard, I'm going to square these up by using a cutting disk in a Dremel Moto tool , and do the final fine tuning with a machinist's file. Much trial and error fitting involved. |

|
Here's the star of the show: J-B Weld Epoxy, made by ( who else?) the J-B Weld Company of Sulphur Springs, Texas. Commonly available in auto supply stores, DIY super stores or hardware stores. It's a filled epoxy that calls itself a "cold weld". So let's see how it does.... |
|
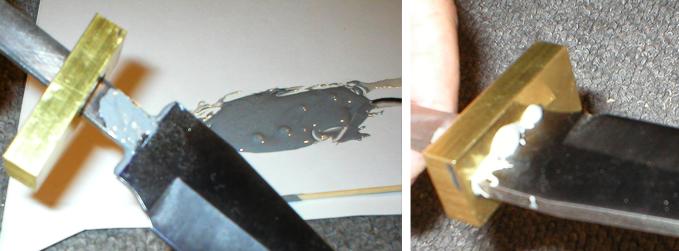
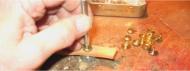
It doesn't take a whole lot since you're only filling that tight gap between the blade and the guard. After mixing 50/50 use a toothpick to smear a little on the tang of the blade in front of the guard. After sliding the guard in place, there should only be a little squeeze out. |
|
The test batch I mixed cured rock hard in about 12 hours. Before it cures this hard, use a piece of hardwood or plastic to scrape off the excess. Probably best done 2-3 hours after you first mixed it. Believe me, it's a whole lot easier to do this now than after the J-B Weld epoxy fully cures. |
| Do you really need a picture of this? | Final clean up is done with a rag and some acetone. Then set it aside overnight to cure. |

|
As long as I had the J-B Weld out, I thought I'd use it when mounting the tang in the block. (You can see the sketch of the knife handle profile here that I'm eventually going to cut out). I'll post another picture when I get the handle shaped. |
| Verdict: This stuff is strong, very strong. I have no worries that this guard is ever going to loosen, even under the hardest of uses. Is it as strong as soldering? Gut instinct says not quite, but it sure is a lot easier. I wouldn't use it for U shaped guards or bolsters, but in a design like this where the guard is trapped between the blade and the handles, I don't think you'll have any problems at all. Stay tuned. This stuff has some potential and I'm going to try a few more experiments. | |
| aa | |
|
Putting a Finish On Your Knife Before I start talking about putting a finish on your knife, I should probably mention that just about everyone out there has their own favorite finish and that this is just my opinion on the way to do it. As with everything else, I would encourage you to experiment and find a finish that that you think will bring out the natural beauty of your creation |
|
| I forgot to take a picture! | No matter how good your finish is, it's not going to cover up a poorly prepared surface. Spend some time with some sandpaper starting with 240 grit. When satisfied, move up to 400 grit. I then wet the surface to raise the fuzz, let it dry overnight and go over it again with 400 grit. |

|
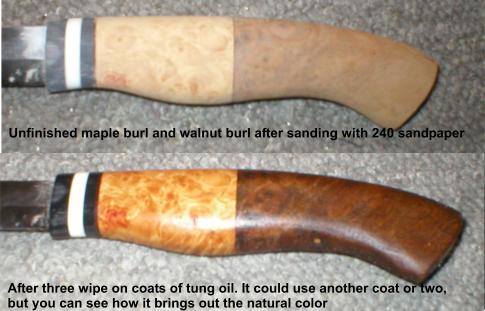
I like to use either Minwax Wood Finish or Tung Oil, but other manufacturers make a good, comparable product. Both are penetrating finishes that can wiped on and soak a little bit into the wood. This strengthens the wood since it's not just a surface coating. You'll want to wipe on several coats, allowing it to dry for about an hour or more . Four to six coats is good, more if you want a higher gloss. |
|
The first thing you'll notice with even a single coat, is how the wood darkens and the grain really pops out. It's like the difference between day and night. You'll never see the real beauty of your wood until you get a couple of coats of finish on. |
|
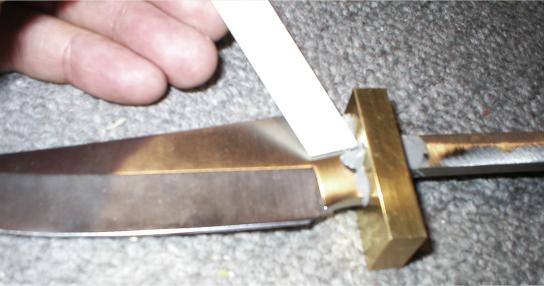
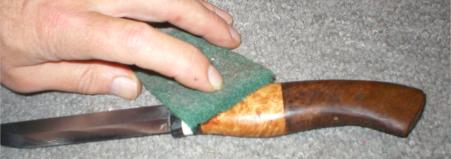
Before you put on the last wipe on coat, buff the finish with wit steel wool ( or a 3M synthetic buffing pad, shown here) to smooth it out. By the way, did you notice that I didn't tape the sharp edge to protect myself? It took me an hour to Photoshop out the bandaid that was needed right after this. |
| After the final wipe on coat, set it aside to filly cure for a day or two. Now you've got a durable finish that will last a good long time. If you scratch or abrade the finish, a simple wipe on touch up restores it nicely | |
|
Decorative Conchos Conchos are decorative items available from leather supply distributors like Tandy, but I've also seen a lot on Ebay. They are designed to dress up your leather work like sheaths, belts and other things, but they can also add a custom look to your knives. |
|
|
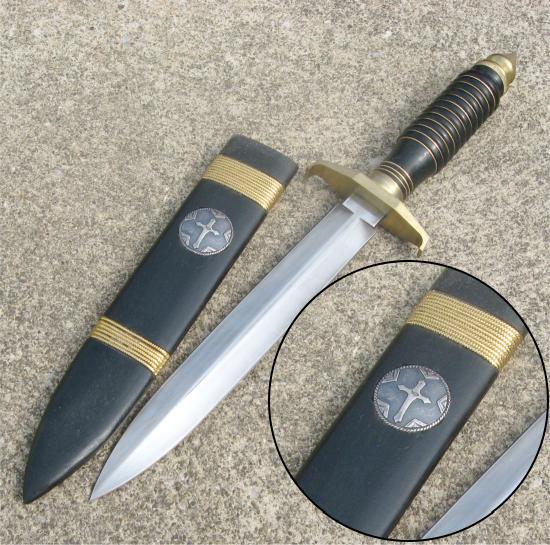
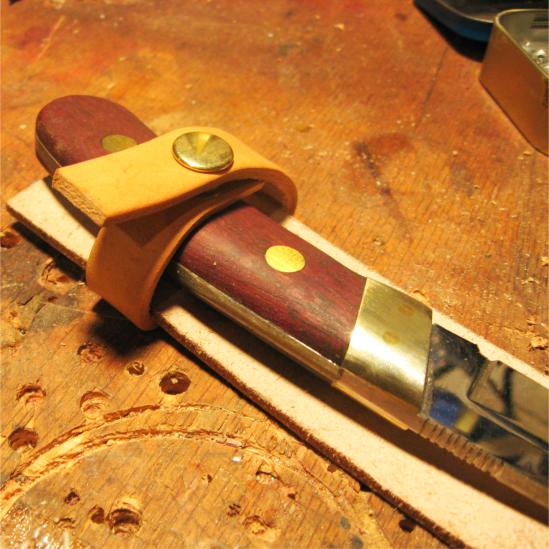
I used a 1" concho to decorate an ebony sheath for this reproduction blade. I used a 1" forsner drill bit to inset the concho a fraction of an inch to make it flush with the surface |

|
Conchos can also add a very decorative touch to your knife handles. I used a short piece of copper tubing for the outside ring |
|
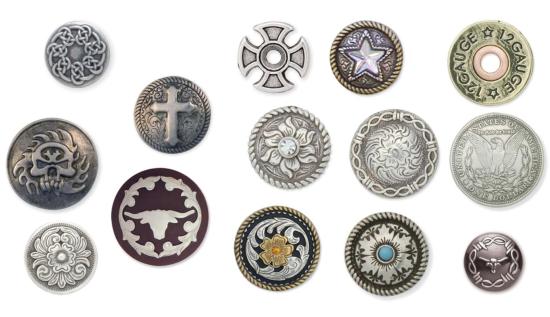
Conchos come in a huge variety of sizes and designs. I just copied a few quick ones to give you an idea what's out there. Use you imagination! Round seems to work best ( for me anyway) but many are square or oval shaped |
 |
One of my customers wrote to me and told me that he's been using military tie-tacks as an inlaid decoration for gift knives given to retiring military or police officers. Do a Google search on military ( or state, or police of fireman whatever) tie-tacks. In many cases, you can probably find specific ships, airbases, departments or states. |
|
Setting a Snap For some reason, I used to hate mounting snaps and had some sort of mental block against it. It's not hard if you plan it out step by step. Practice on a scrap piece of leather, plan on ruining your first half dozen or so, and you'll be an expert in no time. |
|
|
|
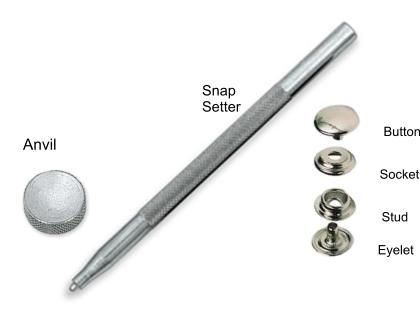
Tools that you'll need: the snaps themselves ( four pieces: stud, socket, eyelet and cap), a snap setter tool and a small concave anvil to keep the rounded face of the of the cap that faces out from deforming during the pin peening process |
|
|
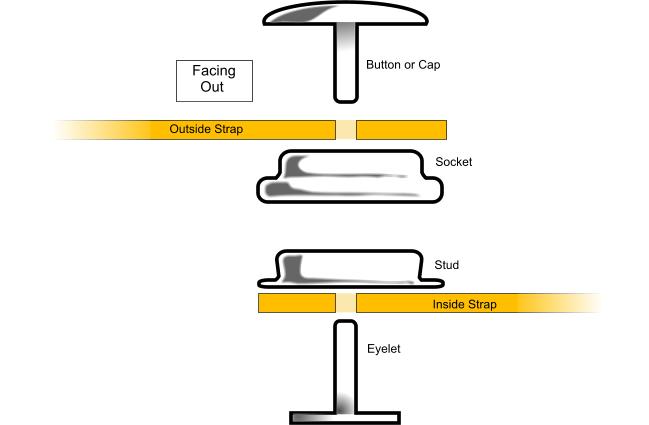
Each side of the snaps are composed of two pieces as shown in this drawing. |
|
Here's another drawing that may help you lay out the male and female halves of the snaps correctly |
|
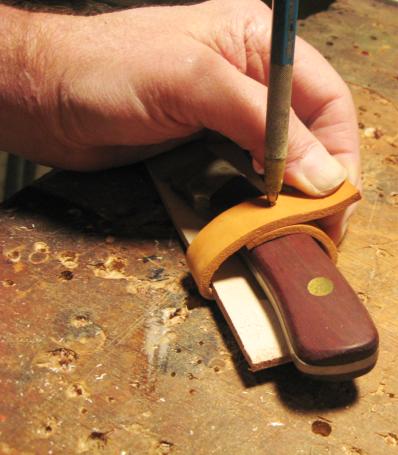
With the knife in the sheath, fold the straps over the knife and hold then in position for a tight fit. I then use a needle to poke through both sides to mark where the holes for the snaps will be made. ( You made sure the outside face of the leather strap is going to be facing out, Right?) By the way, this is just a dummy sheaths setup I concocted to get some photos. Wetting the straps may help to make them more flexible |
|
Use a hole punch or sharp drill to make the holes for the snaps. |
|
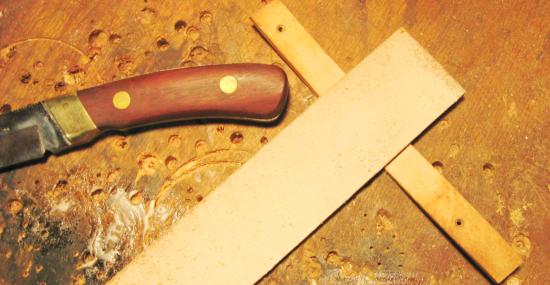
Before you start, lay out the snaps and do a dry run to make sure you have the snaps facing the correct direction. 30 seconds spent planning now van save you hours of grief later, says the voice of experience. |
|
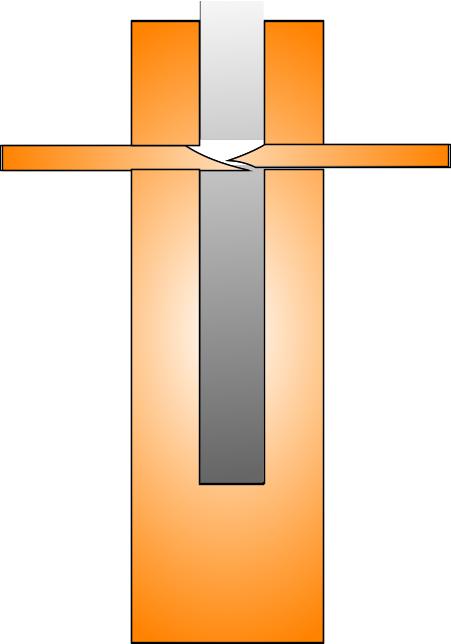
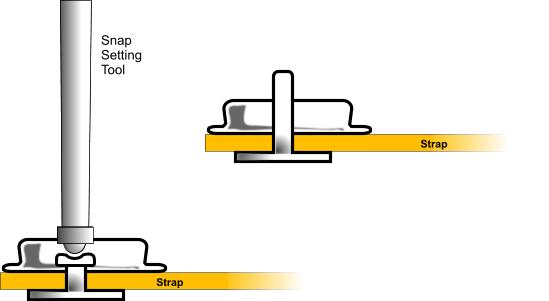
This is what's going on during the peening process. The Snap setting tool deforms the stem of the cap or eyelet to clamp the stud or socket tightly in place. This is identical to a riveting process. |
|
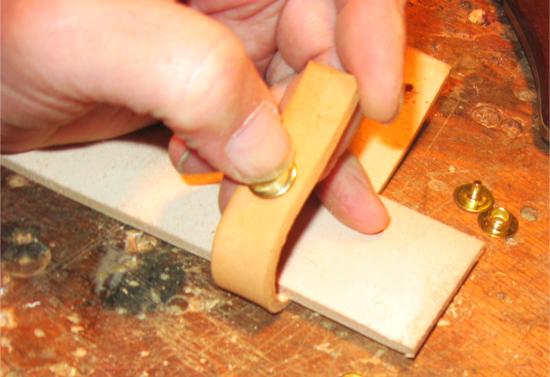
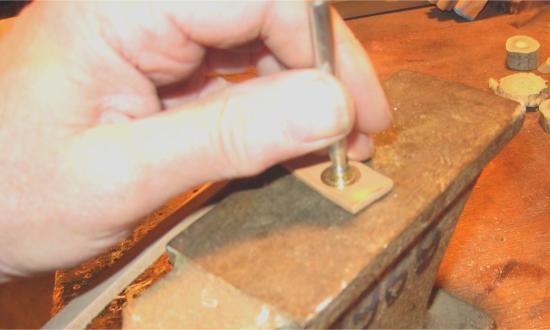
Let's start peening!. For the cap and socket side, use a concave faced anvil to keep from deforming the cap head. Important since this will be the most visible part when you're done. |
|
When you do the other side with the flat backed eyelet, it's easier to peen this on a regular anvil |
|
Done. The excess portion of the strap can now be trimmed to shape. That wasn't too bad, was it? |
|
Drilling and mounting a U shaped
guard Sometimes you're going to want to add a U shaped guard to a blade that hasn't been drilled to accept appropriate pin mounting ( or may want to relocate a guard). This is how you go about it. (Of course, you could also solder the guard instead) |
|
|
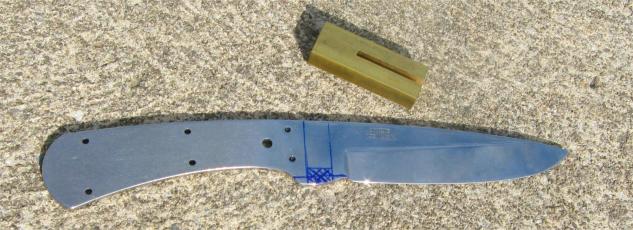
I had a blade I wanted to mount a U shaped brass guard on but the pin holes on the blade didn't match what I wanted to do. First step is figuring where the new guard will go. I marked the new location with a fine tipped magic marker |
|
I used a cutting disk in a Dremel to reshape the belly profile a bit and add a slot where the guard would fit. Final touch up for a snug fit can be done with a file. I was lucky enough to find a brass guard in the "morgue" that had the right size slot. Note: the bottom slot is optional but I believe it adds strength by locking the guard in. |
|
Do your prep work now shining up the front and back of the guard. Much easier to do now than after mounting. I spent a minute with a 120 grit belt, finished with 600 grit. |

|
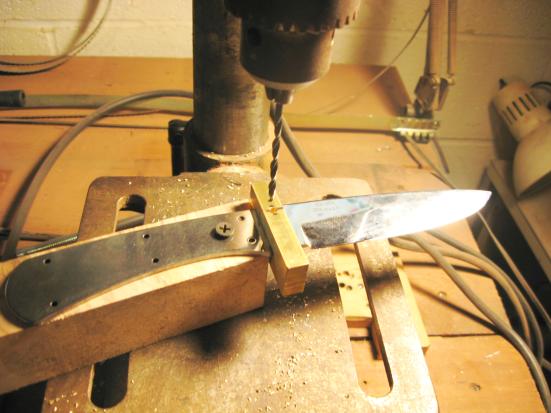
You'll need two drills, a carbide drill to drill the hardened and tempered blade, and a regular high speed drill for the brass. These are 1/8" for 1/8" pins. Don't use the carbide drill on the brass--it's hard but brittle and will more than likely snag and shatter, leaving an annoying little piece embedded in the guard. (Very hard to fix) |
|
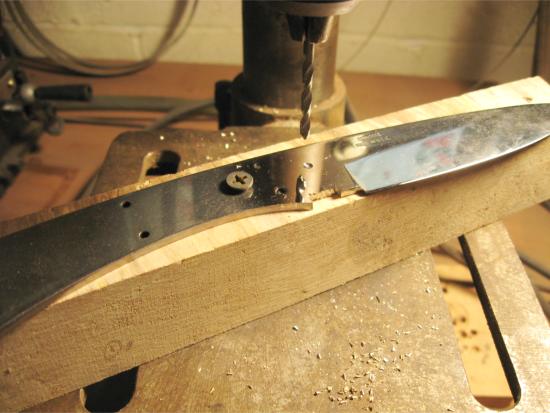
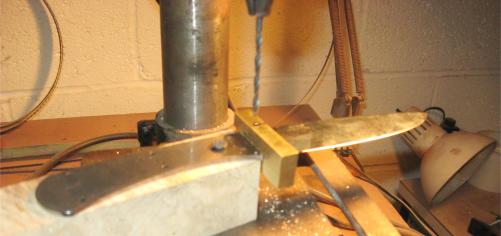
Clamp the guard in place and start drilling the brass guard with your regular drill. Go deep enough to touch the blade itself and stop. You just want to "nick" or mark where the drill will hit the blade. (Actually, I guess there's no reason you couldn't just drill the first half of the guard by itself and then slip into place afterwards) |
|
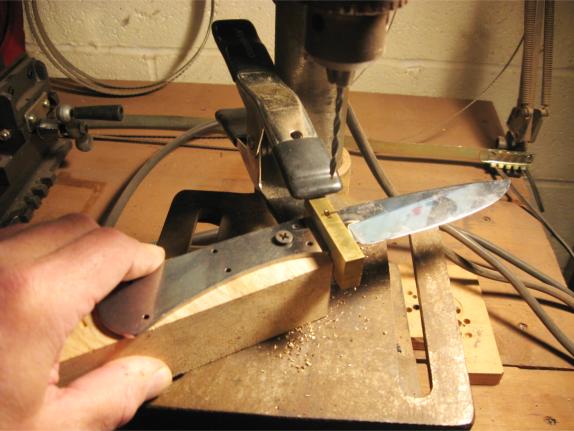
Remove the guard and use you carbide drill now to go through the blade itself, using the nick as a reference point as to where to drill. Also: did you notice the wood screw through the handle holding the blade to the block of wood? This is a safety thing to make sure that the blade doesn't move and that you'll live through the end of today. |
|
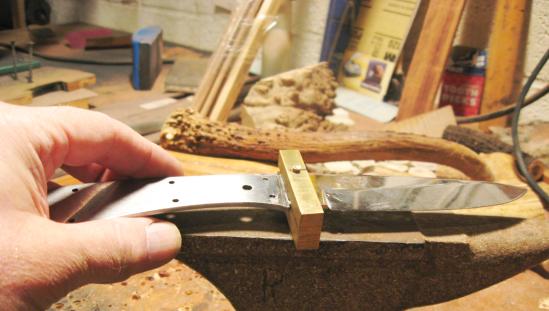
Slip the guard back on the blade making sure you get it in the same place as before to make sure the holes are going to line up. You can use a drop of super glue at this point to hold it in place if you think you won't be removing it again. |
|
Using your regular high speed drill to go through the original hole your drilled in the guard and the hole you just drilled in the blade, to drill all the way through the other side of the guard. |
|
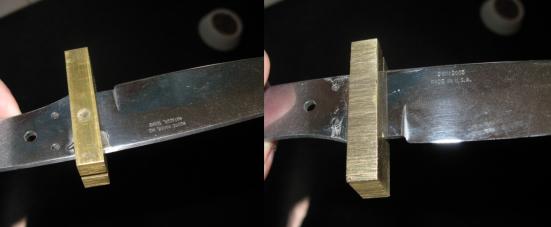
If all went well, you should be able to tap a 1/8" pin all the way through and peen for a tight, permanent fit. |
|
|
Here's a tip that might save you: if the hole in the blade is slightly off from the holes in the guard, you may be able to use two flattened and sharpened pins from each side, tapped to jam against each other as they are hammered in. Note: This will work only if the hole is only slightly off., enopugh to prevent you from getting a pin all the way through. If the hole is off more than that, you're still going to have to redrill. |
|
Done. You can now proceed to shaping, polishing and adding your choice of handle materials. Photos show pin fully peened flush and then sanded flat--it disappears! |
Hints and Tips Page [1] [2]
[3] [4]
[5] [6]
[7] [8]
[9] [10]
[11] [12]
[13] [14]
[15] [16]
[17]
Next
Got a good tip that you think your fellow knifemakers would like to know about? Drop me a note at pjp2@northcoastknives.com