![]()
Tutorials
Hints and Tips Page
5
Click on any of the thumbnails
below for a more detailed photo
|
More Ideas for Decorative
Pins The pins that you use to hold the scales on your blade can be dressed up in a number of ways to add a truly custom look. One of my favorites is the "filled pin" where instead of using a solid piece of round brass or nickel silver , you use a thick walled tubing ( thong tubing is perfect) and fill the center with a colorful and decorative fill. |
|
|
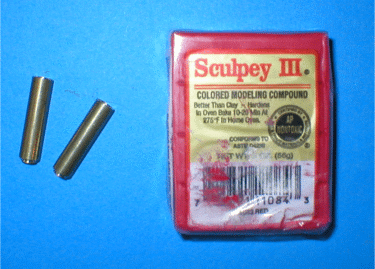
Sculpey is an oven hardening clay that is available in a vast rainbow of colors from many arts and crafts stores. When hardened, it turns into a ceramic type of material that can easily be shaped and sanded with common tools. Shown here with the nickel silver thong tuning I'm going to use. |
|
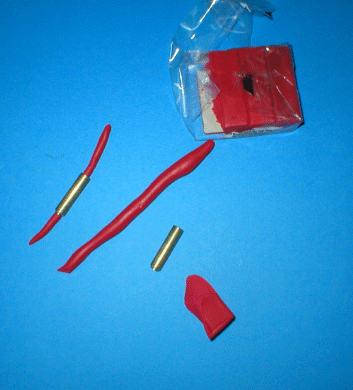
Roll the Sculpey into a thin xxx and stuff it into the thong tubing. Squeeze it from the ends to make sure the thong tubing is completely filled . Pop these into an oven preheated to about 275 degrees for about 15 minutes to harden the Sculpey. |
|
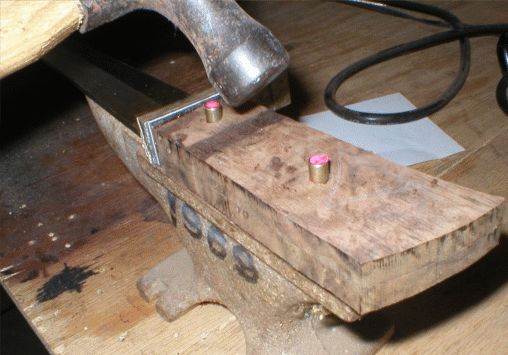
Mount these just like you would with solid pins. Peen this lightly to expand the thong tubing for a tight fit but go lightly so you don't fracture the hardened Sculpey |
|
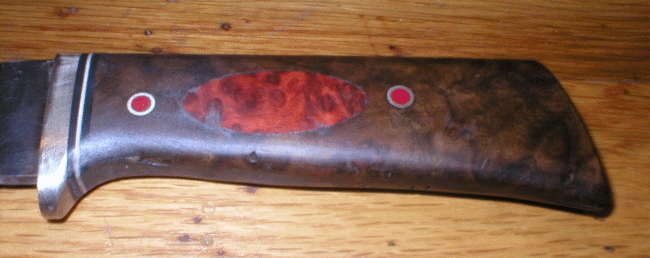
When sanded flush, they should look like this. Notice the Amboyna inlay. I'll do a tutorial on inlays in the near future. This knife still needs to spend a few minutes at the buffer. |
|
|
You can also use this idea to form "caps" adding a decorative touch to hidden pins, as shown in this drawing. Drawinf also shows you a cutaway of what the full depth decorative pins would look like also. |
| You might also think about filling the thong tubing with a contrasting metal such as a nickel silver thong tube with a round brass rod insert. A heavy gauge piece of copper from a ground wire would also look cool. Purchased by the foot, a two foot piece of 6 or 8 gauge ground wire will set you back about a quarter and will last you a long time. Stabilized gemstone or exotic woods would also be a notable consideration | |
|
Hidden Pins The exact opposite of decorative pins is hidden ( sometimes called trapped ) pins. Use these when you don't want the look of pins interupting the visua; appeal of your chosen handlle material. |
|
|
|
Here's the basic idea. Pins go through the blade but not all the way through the scales |
|
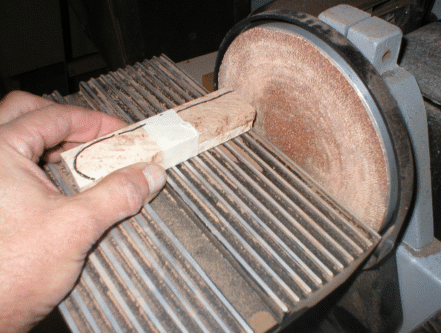
Since I'm doing a simple, bolster-less design, I start by shaping the front of the scales. easier to do it now than after they're mounted. |
|
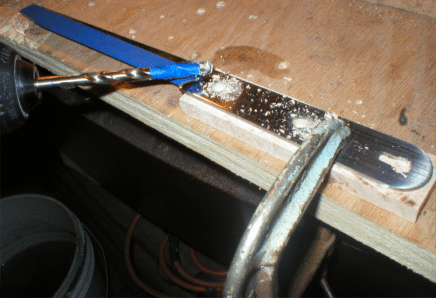
Use a piece of tape to mark the depth on the drill bit. Clamp the blade and the fist set of scales down and drill to the appropriate depth, being careful to watch your depth marker on the drill bit. Go slow so you don't drill all the way through. |
|
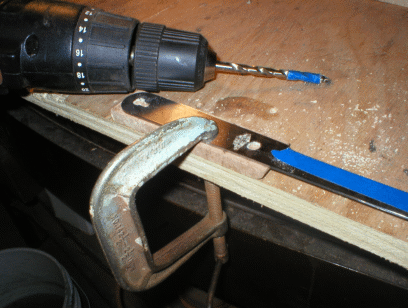
Flip the blade and clamp it down on the other set of scales. Repeat drilling as above, always watching your depth. |
|
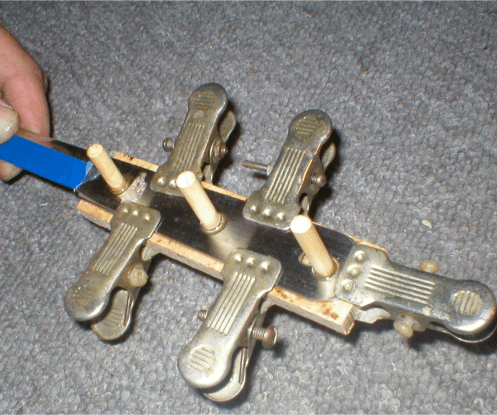
Use epoxy to glue the first set of scales on and clamp in place. Insert 1/4" wooden dowel pins into the epoxy filled holes. I find that an epoxied wood to wood joint is much stronger that an epoxied metal pin to wood joint. |
|
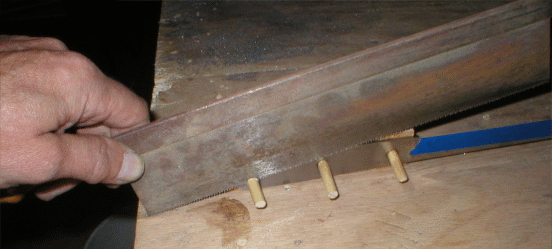
When cured, I use a backsaw to cut the 1/4" wooden dowel pins to appropriate length to fit the holes drilled into the other half of the set of scales |

|
Dry fit the second set of scales to make sure they fit and when satisfied, epoxy and clamp in place. |
|
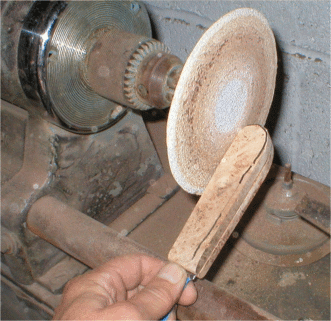
When the epoxy cures, shape the handle with sandpaper. I'm using a disk sander here for rough shaping. Finish by hand working your way through finer grades of sandpaper. I finish with a 400 grit. |
|
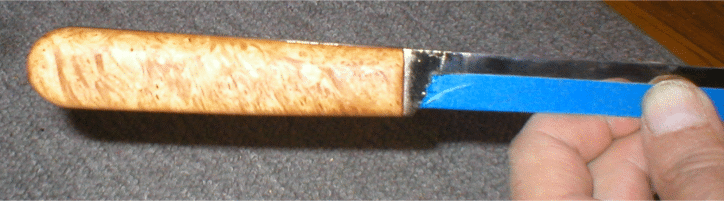
Done. I used a light honey colored stain to make the grain of this beautiful wood stand out. It would have been a shame to have pins interrupt the visual appeal of this handle. |
Hints and Tips Page [1] [2] [3] [4] [5] [6] [7] [8] [9] [10] [11] [12] [13] [14] [15] [16] [17] Next
Got a good tip that you think your fellow knifemakers would like to know about?
Drop me a note at pjp2@northcoastknives.com