Hints and Tips Page 10
Click on any of the thumbnails below for a more detailed photo
![]()
Hints and Tips Page 10
Click on any of the thumbnails
below for a more detailed photo
|
Knife Vises When you're working on your knife, especially if you started with a knife blank, almost all of your efforts are going to be with working on the handle. To hold your creation steady while you work on it and to protect yourself from getting all cut up from handling the blade, a knife vise comes in very, very handy. There are a lot of ways to do this, and every knifemaker seems to have his favorite. This mini-tutorial will try to present some of the common ones and will try to give you several ideas for you to use. Bottom line, experiment and find a system that you're comfortable with. OK,OK, who's going to be the first one to make a joke about my having too many vises? |
|
|
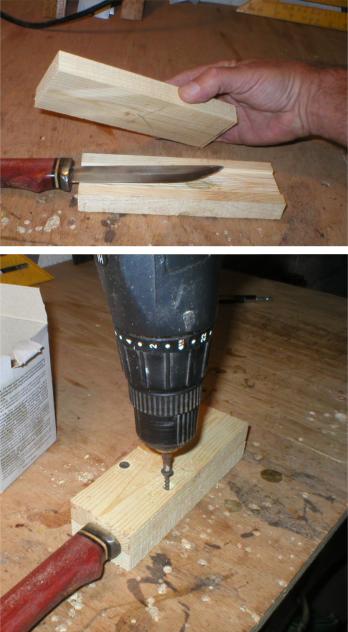
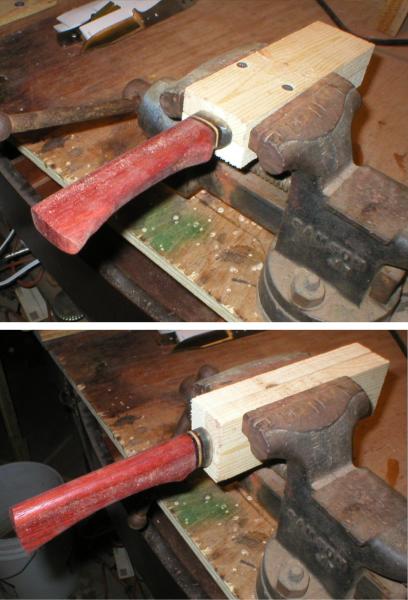
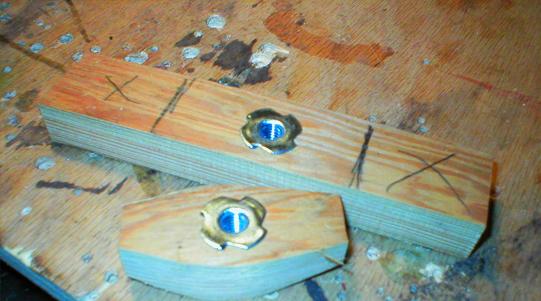
When I started out, I used two 1 x 3's screwed together trapping the blade in between. I then clamped this in a large bench vise I had bought at a garage sale. This worked fine but I only had the choice of vertical or horizontal. |
|
You can see that these are the only two positions available with a limited and simple setup like this. |
|
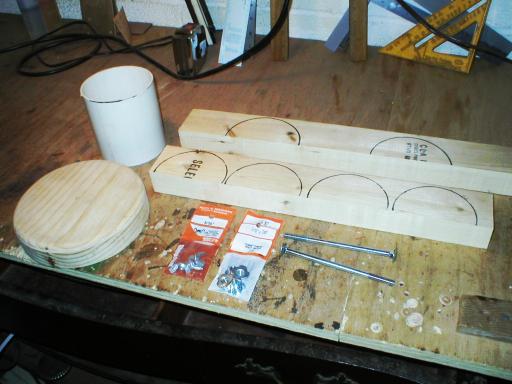
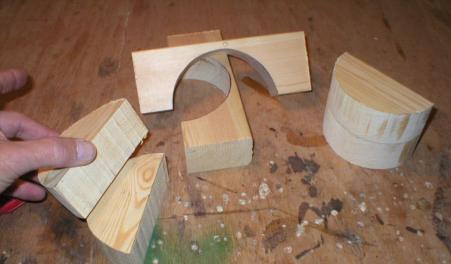
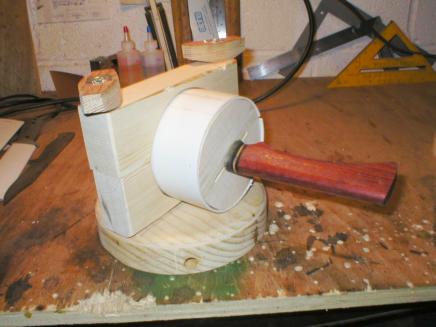
I wanted a little bit more freedom and decided to build a vise that could be clamped securely at any angle. Simple design. Here's the pieces: a short length of 4" PVC pile, a few 2x4's with the half-outline of the PVC pipe traces on it, a scrap piece of wood I found for a base , two 5 1/2" carriage bolts and some matching T-Nuts. |
|
These are the parts cut out with a bandsaw, getting ready for assembly. I stack and glue two of the half disks together that will fit inside the PVC pipe. |
|
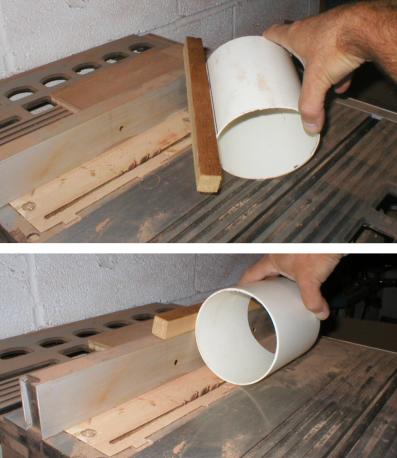
I use the table saw with the blade exposed about 1/8" to cut a slot in the PVC pipe. To keep the slot straight and the PVC pipe from rotating while I push it through, I temporarily super glue a wood scrap on the side which will ride against the rip fence. |

|
I used double stick to to hold the two halves of the inner half cylinders together while I sand them to a round shape. This should be slightly larger than the inside of the PVC pipe and should be tapered slightly toward the inside for a good, snug fit. |
|
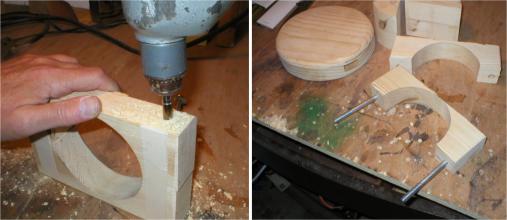
I taped the top and bottom clamp together while I drill through both for the carriage bolt that will clamp them tightly together. |
|
Glue the bottom clamp to the base and use a couple of drywall screws to secure it in place. |
|
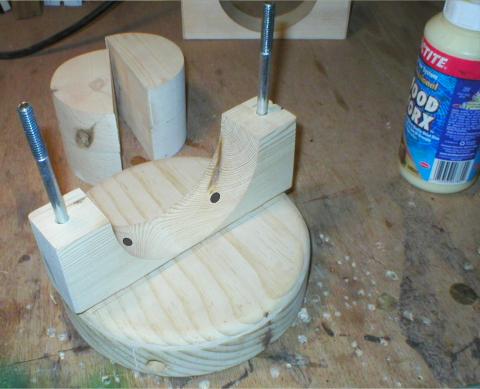
I made my own handles to tighten down the blocks over the PVC pipe by drilling a hole into a scrap piece of hardwood and driving a couple of threaded T-Nuts into the hole. This tightens down over the carriage bolt. |
|
Clamp the knife blade between the two half cylinders, slide this into the PVC pipe and tighten down with the handles to clamp it all firmly together. Now you have a solid and stable base to work on your knife handles in complete safety. To rotate and work on the knife at a different angle, just loosen the handles. Took me a little over two hours and since I used mostly scraps, it cost me about two bucks in materials. |
|
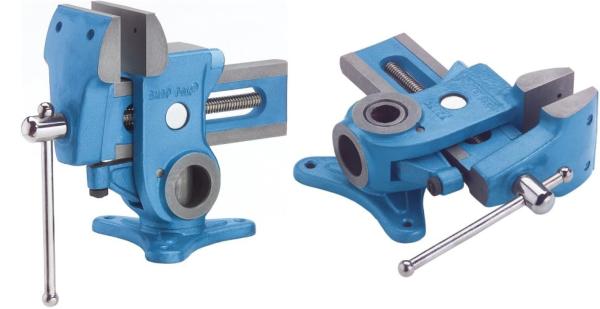
One commercial product that I have been very impressed with is the Parrot Vise by Grizzly. Heavy duty and very versatile. You can take a closer look at this on the Hand Tools Page |
|
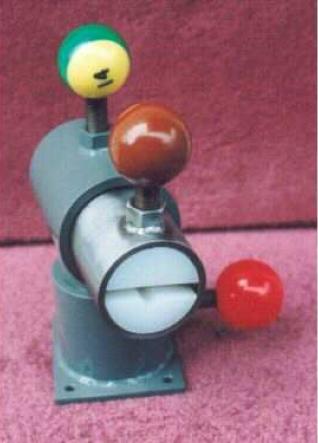
I haven't seen any commercially produced equivalents, but if you have a friend that knows how to weld, he might be able to help you put together something like this. This particular builder used pools table balls for handles. Nice. I also see these show up every once on a while on Ebay. Doesn't hurt to check. |
|
|
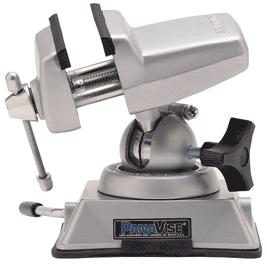
Another candidate to look at is the Panavise. I don't personally have any experience with these but it looks like it would be extremely versatile but might have to be reserved for lighter duty tasks. I've seen them with a vacuum base like this one, or a flanged, mountable base. |
|
Cutting a Slot in a Guard for
Tangs Although there are some brass and nickel silver guards available with machined slots, you may not always be able to find the exact size you need, or you may want to make a guard out of some other material. There are several ways to cut a slot in a guard, and these are some of the more common ways. |
|
|
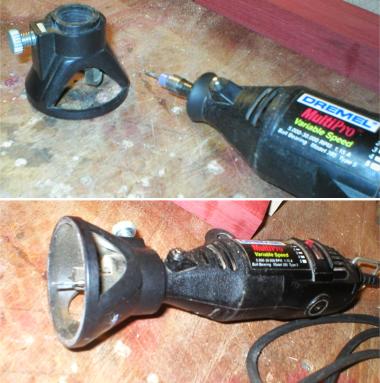
One of the easiest ways I've found is to use a Dremel MotoTool equipped with their optional router base. I use a carbide rasp that is about the same width as the thickness of the blade tang. In this demo, I'm going to make a guard out of black corian for a Swedish Filet knife I want to make. |
|
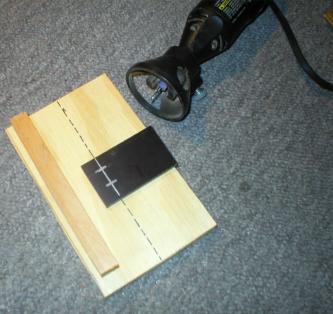
I make a quick jig with a base and fence from scrap wood, hot melt glued together. I also hot melt glue the guard to this jig so it can easily be popped off when I'm done. The dotted line indicates the width from the edge of the router base where it will ride against the fence, to the path of the carbide bit. |
|
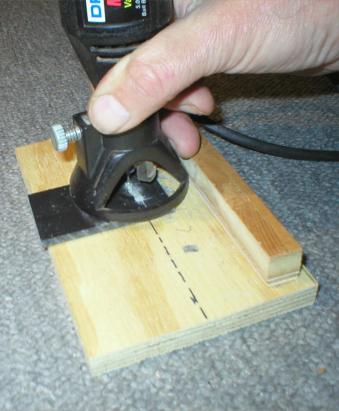
I used a silver pencil to mark the length of the slot and watch the carbide bit as I slide it along the fence, making a perfectly straight slot. If you are using a harder or thicker material for your guard, you may need to do this in several passes, increasing the depth of cut slightly with every pass. |

|
Ant this is what it should look like when complete. Final touch up, if necessary, can be done with fine files . The excess can now be cut off and attached to the handle for final shaping. |
|
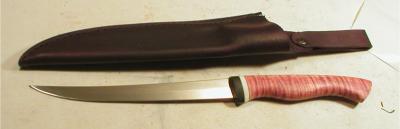
Couldn't help showing a picture of my finished fillet knife with corian guard and tiger maple handle. |
|
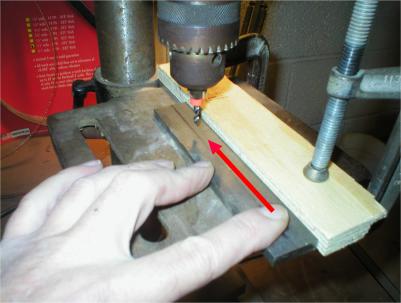
If you have a drill press, you can use a variation of this technique by sliding the guard against a fence, letting the carbide bit rout a slot. Again, several passes may be necessary, increasing the depth of cut with each pass. |

|
Another way to do this is to drill a series of holes in the guard with a drill bit the same size as the thickness of the blade tang and to square the slot up with files afterward. This is the way I used to do it for a long time. |
Hints and Tips Page [1] [2]
[3] [4]
[5] [6]
[7] [8]
[9] [10]
[11] [12]
[13] [14]
[15] [16]
[17] Next
Got a good tip that you think your fellow knifemakers would like to know about?
Drop me a note at pjp2@northcoastknives.com