Hints and Tips Page 15
![]()
Hints and Tips Page 15
What Glue
Should I Use?
Click on any of the thumbnails
below for a more detailed photo
| Adhesives and Glues: Too Many Choices? | |
| I don't know how many times I get asked what the best glue is for knifemakers. I could never give a definitive answer and always had to go back and ask "for what ?". Modern technology has given us a wide range of choices but I still don't believe there is a universal adhesive that is good for every single application. I'll try to give you a broad view by category so you can make the best decision based on what you're doing. Bottom line, you're probably going to want to have several different types on hand for your projects to be able to pick the best for your particular application. | |
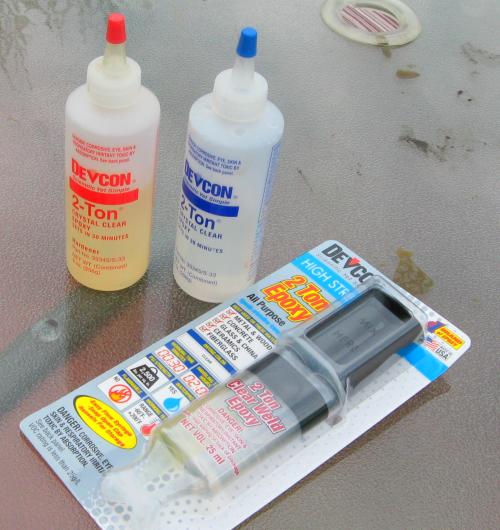
| Epoxiesaaaa | |
| Epoxies | |
|
There is hardly a knifemaker out there who hasn't gone through gallons of this stuff and it's always been the original go-to adhesive for a wide range of high strength applications. Knifemakers have also had a long standing love-hate relationship with epoxies. |

|
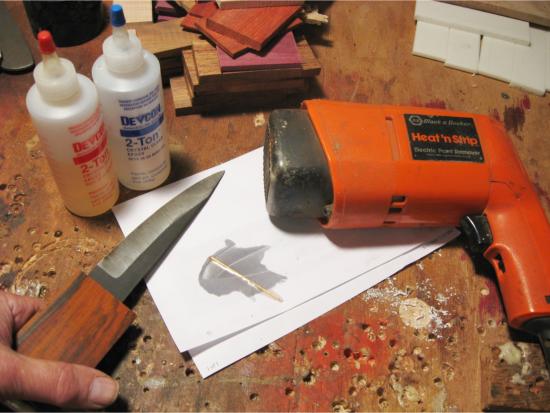
Although there is a small difference between the strength of commercial or industrial brands, the main differences are with curing times. 15 and 30 minute types are common, but I always though the longer set times were stronger. The Two Ton brand by Devcon, 30 minute cure has this cryptic disclaimer: "Sets in 30 minutes, can be handled in two hours, reaches full strength in 8 hours." What the heck, just let it cure overnight. |
|
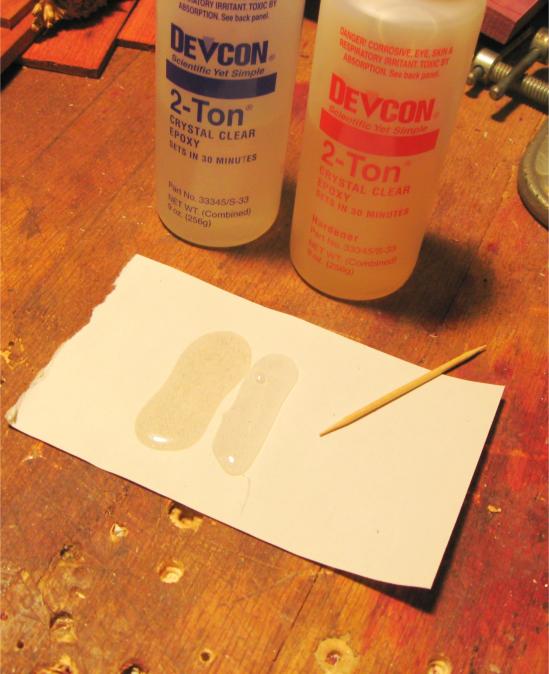
The one common attribute of epoxies is that they are a two part adhesive that have to mixed thoroughly to create a chemical reaction (the "curing") that will cause the epoxy to reach full strength. Mixing ratios usually call for equal parts of A and B, but always read your instructions first--some epoxies may use different ratios. Mix the wrong ratio and it will set up in two minutes--or not at all. |
|
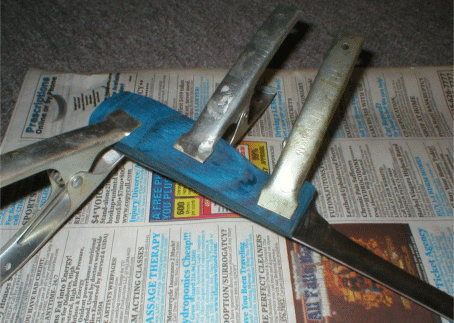
Epoxy has traditionally been used to attach scales to the blade tang. Hint: it helps to rough up the tang with a rasp to give the epoxy more "tooth" to grab onto. Clamp in place for a tight fit until the epoxy cures. |
|
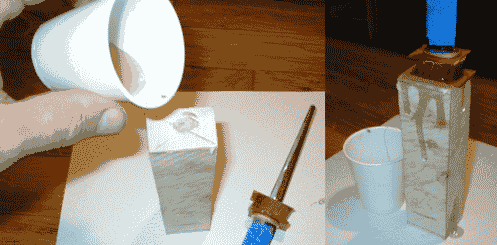
The one place where there is no substitute for a good epoxy is in the mounting of hidden or partial tang knives in their wood block handles. Use a slow set epoxy to give yourself plenty of time to position the parts correctly. |

|
JB Weld is a specialty epoxy, a filled epoxy that provides a "cold weld". Available at auto supply stores, this epoxy can be used for solderless guards in hidden tang knife designs. For more information on how this is done, click HERE. |
|
Applying a little bit of heat helps accelerate the curing process but I would always recommend letting it sit overnight so the epoxy can reach full strength. Yes, even with the 15 minute or half hour varieties. (but, hey, that's just me). A modest application of heat can also temporarily thin the epoxy, making it flow more evenly. (a good tip if you're using epoxy to fill your mosaic pins) |
|
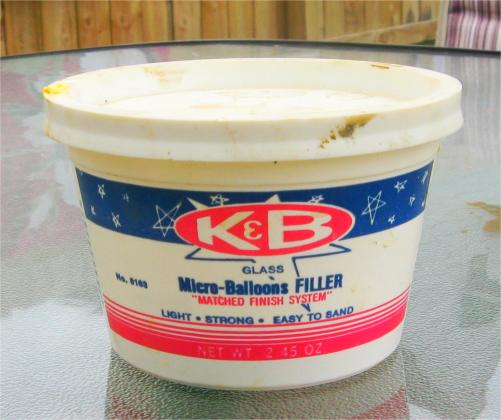
If you need a thicker mixture for some reason, your local hobby shop carries something called micro-balloons. This is like a fine powder that can be mixed in without sacrificing a lot of strength. Talcum powder can be used in a pinch. |
|
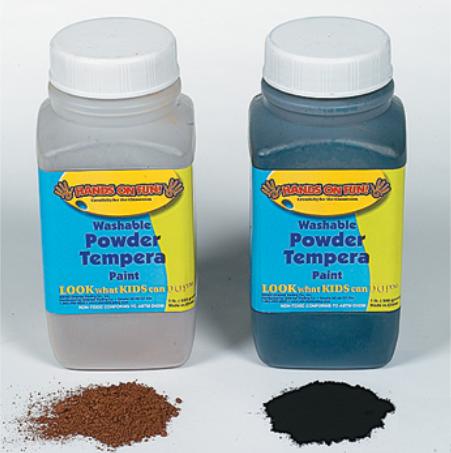
If you want to add color to an epoxy , the best way to do this is with a little bit of powdered tempra paint. I've also used a few drops of India Ink for a black epoxy and this seemed to work OK. You can try adding a few drops of an enamel paint, but you're going to need to allow it to cure for at least a week. |
|
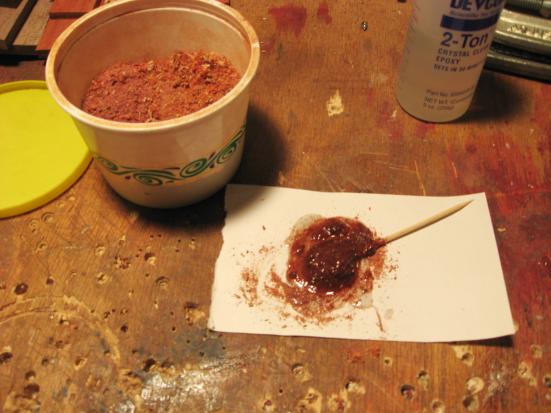
Another trick is to mix a little bit of epoxy with sawdust from the type of wood that you're using to make a strong, stable, color matched filler for small nicks and dings. I usually keep a small container of sawdust on hand just for occasions like this. |
|
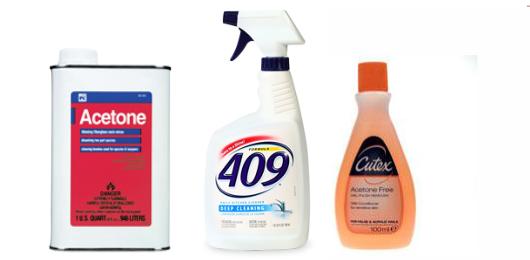
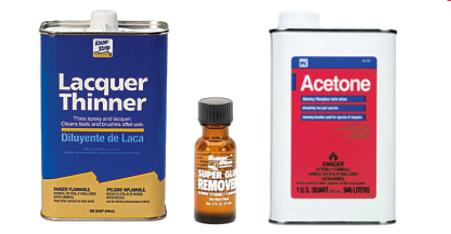
When working with epoxy, even if you're using rubber gloves, it's a universal law that you're going to get it everywhere. Acetone is the best epoxy remover although lacquer thinner works OK too. Ditto, nail polish remover ( just keep in mind that these are might flammable liquids and use appropriate common sense!) When removing it from knife handles' let it set up a bit, but clean it off before it fully cures. 409 or citrus based spray cleaners seem to help get it off your hands. |
|
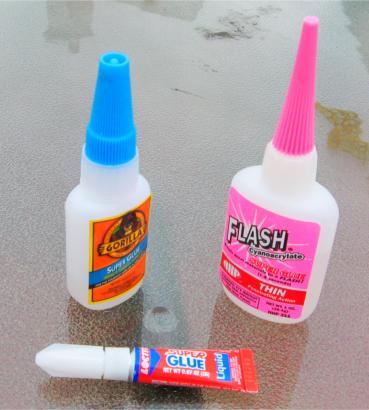
Super Glues Relatively new to the knife making scene, these wonder adhesives provide advantages in many applications. Unfortunately, they don't work in every application. Super glues ( or Cyanoacrylate based adhesives) cure by reacting to the moisture in the air ( or, as you've probably seen, in your fingers). Their main disadvantage is that as strong as they are, they are brittle. The bond can be broken by a sharp blow, such as dropping your Knife. |
|
|
Super glues come in several types: regular ( those little tubes you buy at the drugstore) or the specialty super glues. These could be water-thin, thick gel or rubber reinforced ( Gorilla Super glue is one of these ). The regular super glues will actually work fine for three out of four of typical workshop applications but tend to be brittle. The rubber reinforced super glues are slightly more flexible. |
|
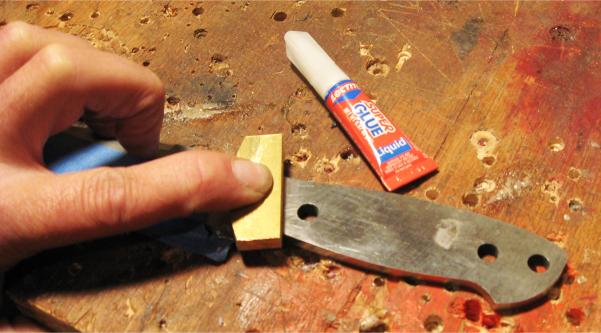
One of the most common uses of super glue is to temporarily hold bolsters in place while you are drilling for pins. Although strong, the super glue doesn't provide enough strength all by itself--use it for temporary situations. Super glue makes attaching the bolsters easier but these will still need to be pinned. |
| I have no idea what kind of picture would be appropriate here. | Super glue is good for solid, non-absorbent materials and would be at a disadvantage with leather or wood where it would just soak in. Works great on solid or synthetic materials like micarta, corain, dymondwood, steel, etc, but I would always recommend the rubber reinforced kind. |
|
|
Super glue works best with metal to metal joints where you have a lot of surface contact because of the shear strength that it has. Despite it's strength, super glue ( other than the reinforced) is brittle and a sharp blow--such as dropping it--can break the bond. |
|
Water thin superglue is excellent for "stabilizing" soft or porous woods or those with an irregular grain that might prove prone to warping. Get your handle to the final shape and apply several light coats. It will soak in and harden the wood. No additional finish will probably be necessary (other than sanding or polishing of course). |
|
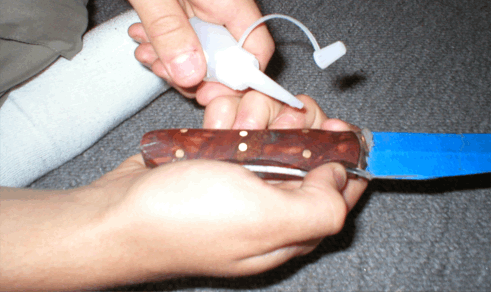
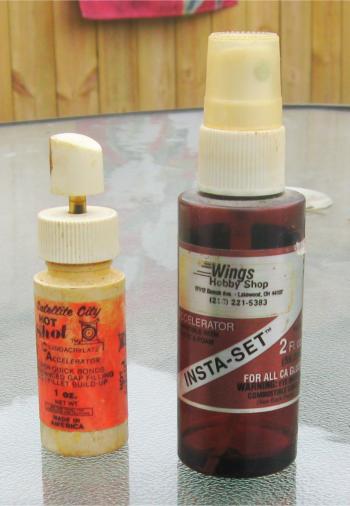
Another advantage of super glue is that the curing process can be speeded up with a spray on accelerator. Although I can usually wait five minutes, I can see where this might be an advantage if you're holding the parts together with your hands. |
|
Clean up can be accomplished using acetone ( or nail polish remover) or lacquer thinner. This works on cured super glue as well but may require more elbow grease and patience. There are super glue removers ( or debonders) available but I never thought they offered that much of an advantage. |
|
Gorilla Glues Another newcomer to the adhesive field is the family of polyurethane adhesives . I call these Gorilla Glues since I think they were the first, but there are now several good manufacturers. Like super glues, they don't "dry", they cure by way of a chemical interaction with the moisture in the air or wood. |
|
|
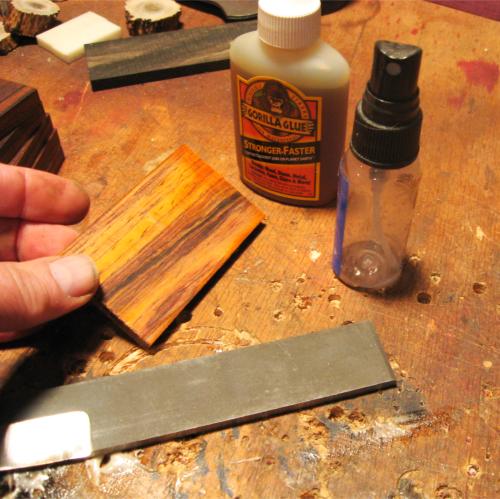
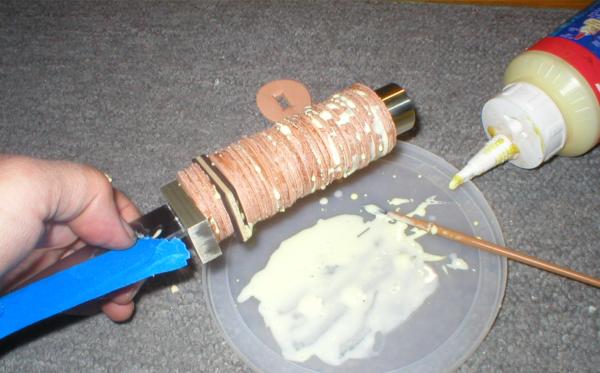
Gorilla Glue is good for dissimilar materials such as wood to metal. It's also good for difficult gluing situations such as oily or dense woods like cocobolo. Here I used it to glue some cocobolo to corian, and the corian to the metal tang. |
|
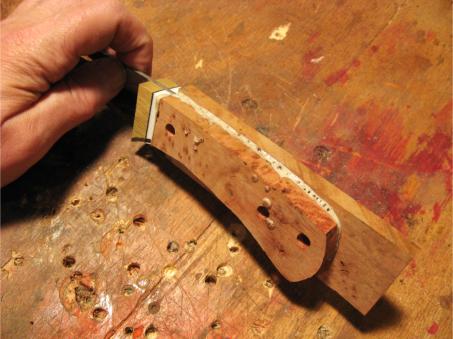
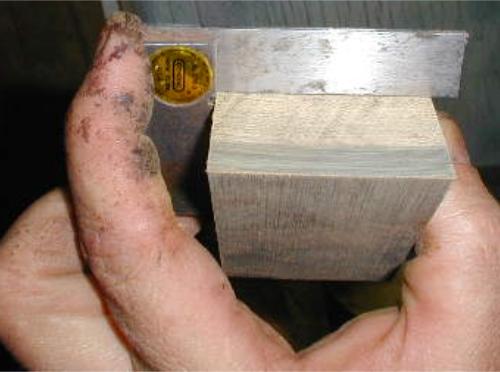
Gorilla Glue expands as it cures in reaction to the moisture in the wood, turning into a hard foam. If you clamped the scales to the tang, this will force the glue into the wood, providing a good stabilization. This is especially useful with soft or irregular grain woods ( like burls) that may be prone to warping. In the case of the maple burl in this photo. the Gorilla Glue has actually expanded into he pores and the outer surface. |

|
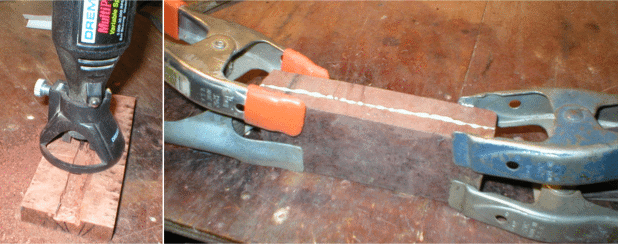
When attaching wood scales to the metal tang, it's going to help a lot to rough up the surface of the tang with a carbide bit or fiberglass cutting wheel in a Dremel. This will give the surface more "tooth" for the glue to grab onto. |
|
Since the Gorilla Glue reacts to moisture, I use a small spray bottle to slightly mist the wood scales to be glued. (If you forget to mist, it's not the end of the world. There is enough moisture in the wood to kick off the reaction). |
|
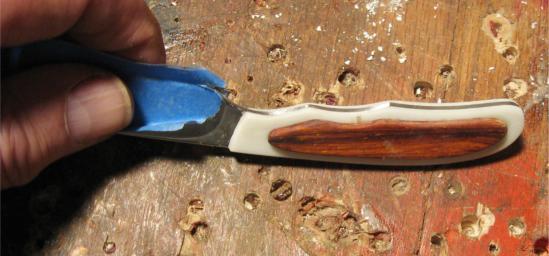
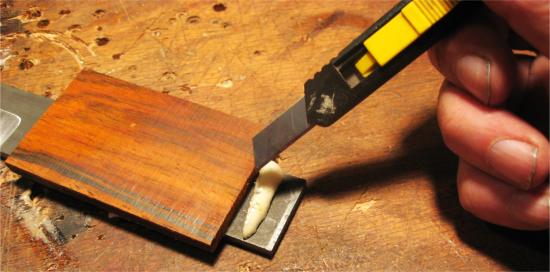
The cured Gorilla Glue can be popped off with a sharp utility blade. Neat how it foams up, huh? I am at a loss how to explain how it holds the scales so tight but just flakes off the exposed metal on the tang. |
|
Cleaning it off your hands is difficult. Acetone makes it worse by removing your natural skin oils but not the glue. Wipe it off as soon as you can and use an abrasive hand soap like Lava. This is the type of staining that will occur on your hands and it will be there for the better part of a week. Best if you just don't get it on your hands. |
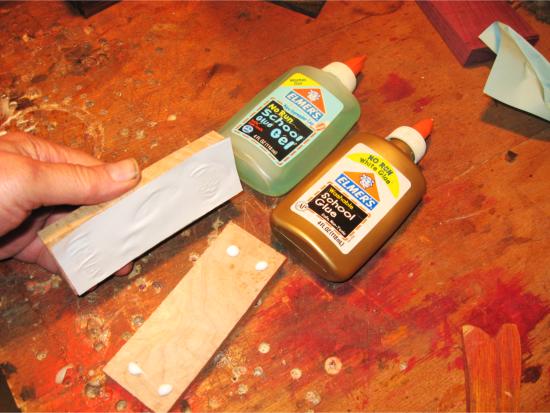
| Carpenters Glues | |
|
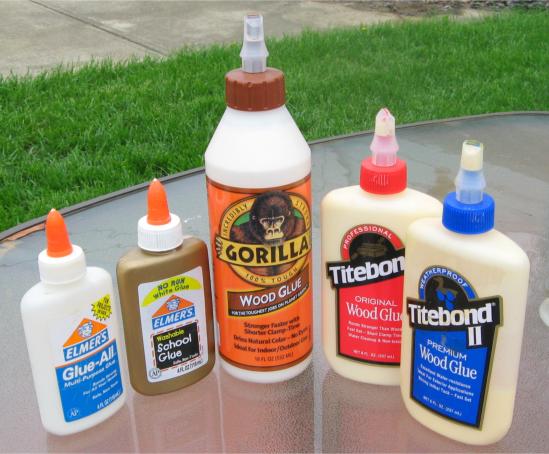
Carpenter's glues do have a limited use in the world of knifemaking, usually for a wood to wood joints. These are going to be the aliphatic types ( the yellow wood glues) or Poly Vinyl Adhesives (PVA's--the typical white Elmer's type of glues). |
|
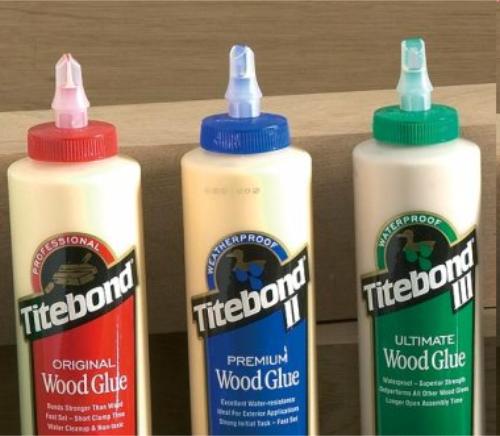
If you're going to use an aliphatic glue to attached wood to wood, use a good type II or even better, type III. These are water resistant or water proof--knives aren't always used in the most friendly environments. I'm showing the Titebond brand here but the others are excellent also. |
|
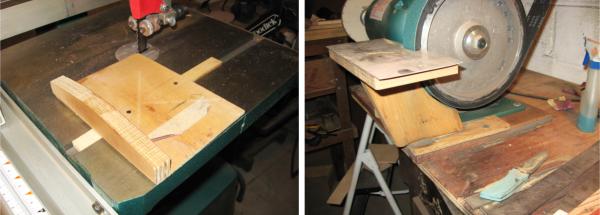
The main place I use carpenter glues in the shop is in the making of jigs or stands made out of wood that can be used with your power tools. I wouldn't use this for anything other than a wood to wood joint and in many cases still use some sort of mechanical fastening like screws |
|
Carpenters glues can be used to glue up the two halves of a handle into one solid block. This is typically done after routing a groove on the inside of the two halves to fit the hidden tang [portion of a knife |
|
I also like using waterproof carpenters glues for leather washer handles, especially since it can be wiped off with a wet rag before the glue dries. (Yes, I know that other folks like using epoxies for this, but I think it's too messy). For more info on leather washer handles, click HERE |
|
If you need to stick two halves of a handle together temporarily for shaping, those washable white school glues are great. Put a piece of paper in between and the halves will pop right apart when you're ready (and you can always use a few drops of water if they need persuading) |
| Contact Cements | |
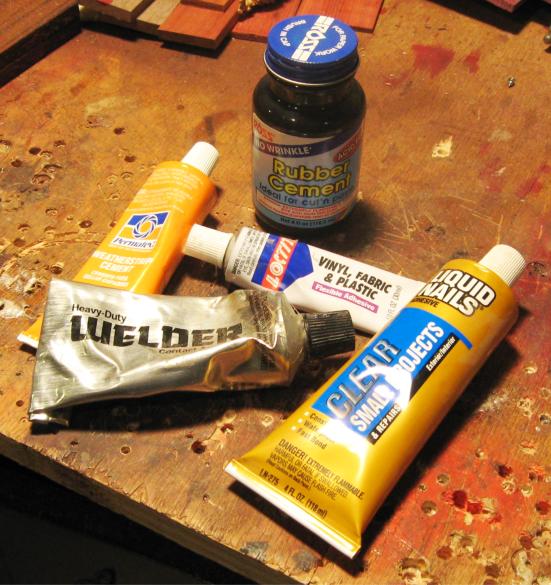
|
There are many types of contact cement and they vary in strength. Rubber cement isn't extremely strong but can be used for temporary bonding. Liquid Nails and similar glues are, strictly speaking, not contact cements, but can be used in the same way. Unless you're setting up a production shop, the small tubes are all you're going to need to buy. |
|
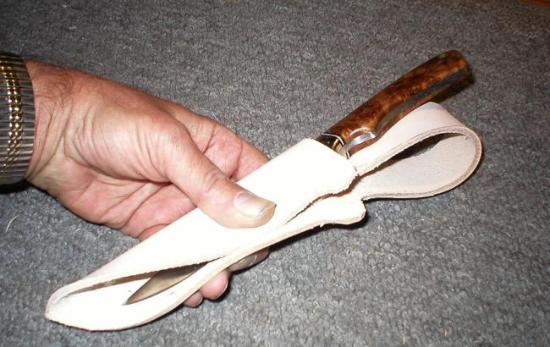
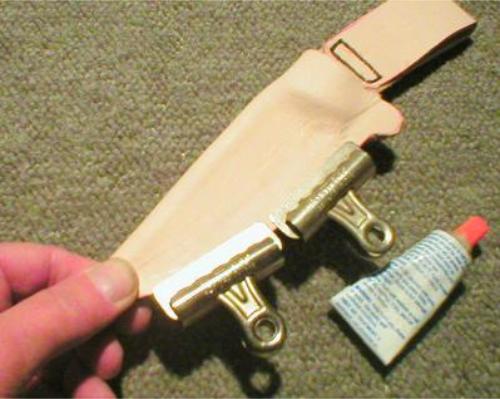
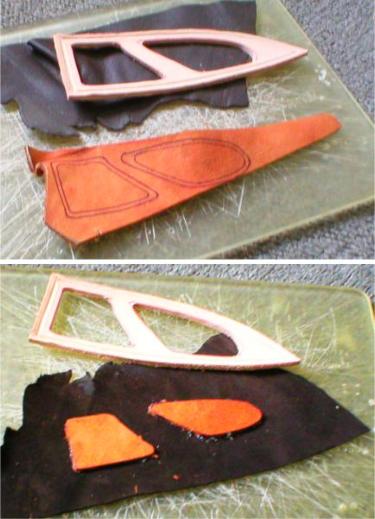
The one single place where contact cements excel in knifemaking is for leather sheath construction. A type called Barge Cement is a super strong kind that a lot of people swear by, but I've had great success with a type called Weatherstrip Cement. As strong as it is, you're still going to want to stitch the edges ( Hey, you might want to pass this down to the grandkids, right?). |
|
The principle with all contact cements is the same: apply a thin layer to both sides, allow it to dry for a minute until it's slightly tacky and then press and hold both sides together. Clamps help to distribute the pressure. |
|
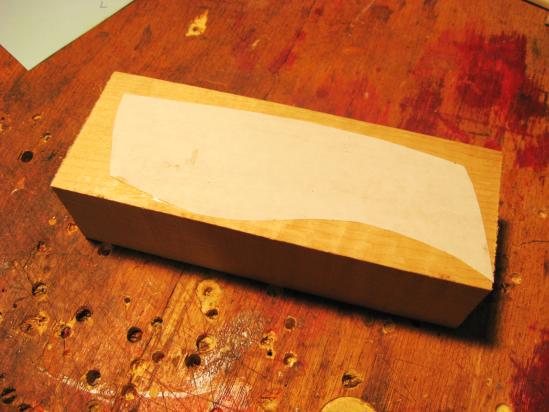
Rubber cement, a weak contact cement, is good for temporarily affixing templates to handle blocks or bar stock. Peels right off when your done. |
| Specialty Glues | |
|
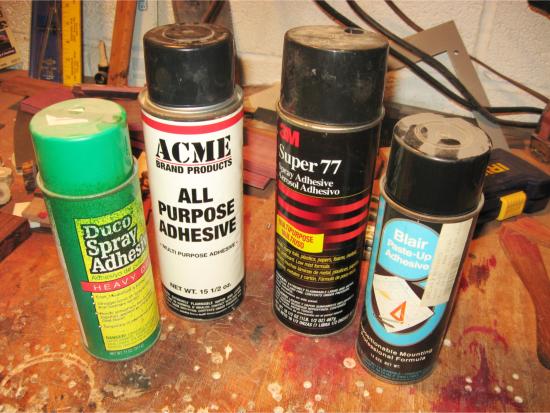
Spray Glues are contact cements that have some special use applications in knifemaking. There are several types ranging from temporary ( sometimes called paste up adhesives) to permanent. The permanent ones are used like contact cements where a light coat is put on both surfaces and then pressed in place. |
|
|
Sprays , especially the temporary ones, are also useful, just like rubber cement, for affixing templates to wood handle blocks or bar stock. |
|
Spray glues are also very handy when working with large flat materials, such as snakeskin or leather used in sheath making. For more detailed info, click HERE |
| Quick Overview | |
| Wood to wood | Just about any of the glues would work here with the exception of the contact or spray cements. I would lean towards the waterproof carpenters glues simply because it's easy to clean up. |
| Metal to metal | Epoxy, Gorilla Glue or for smaller parts, super glue |
| Wood to metal | Epoxy, Gorilla Glue or for smaller parts, super glue |
| Leather | Contact cements |
Hints and Tips Page [1] [2] [3] [4] [5] [6] [7] [8] [9] [10] [11] [12] [13] [14] [15] [16] [17] Next
Got a good tip that you think your fellow knifemakers would like to know about? Drop me a note at pjp2@northcoastknives.com