![]()
Tutorials:
Embellishing Your
Leather Sheath
Click on any of the thumbnails below for a more detailed photo
|
|
Embellishing
your leather sheath |
|
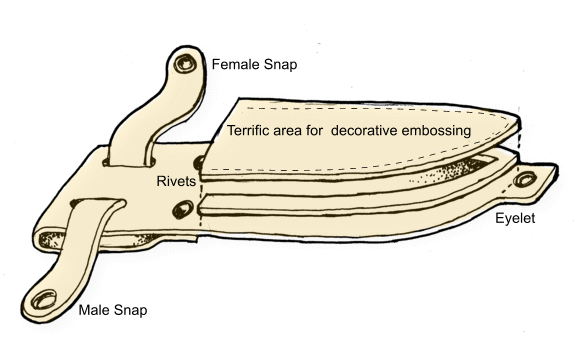 |
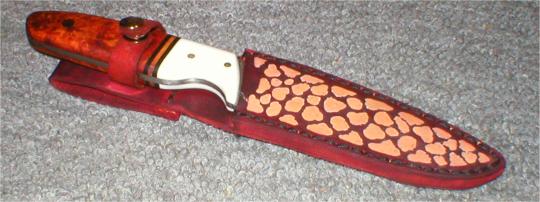
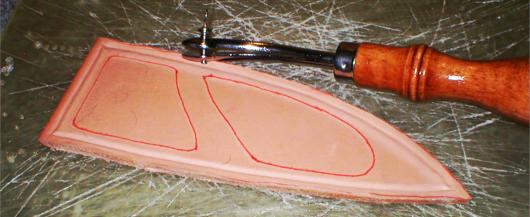
This is a picture of the layered sheath we made in the Leather Sheath Tutorial # 2. This particular tutorial is going to show you several ways to dress up the front panel of this sheath, but these techniques can be applied to a foldover construction sheath or even a kit sheath | |
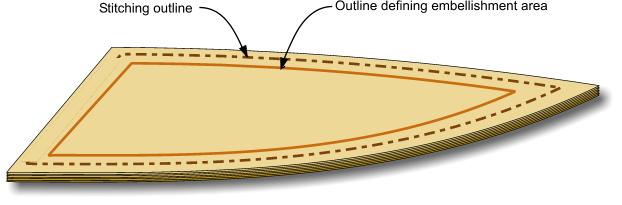 |
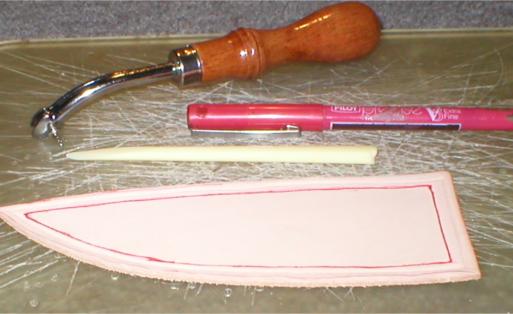
This is common to all of the treatments below: establishing a stitching outline and an inner outline for embellishment. The stitching outline is recessed so the stitching will sit flush with the surface. | |
| Dye Resist | ||
|
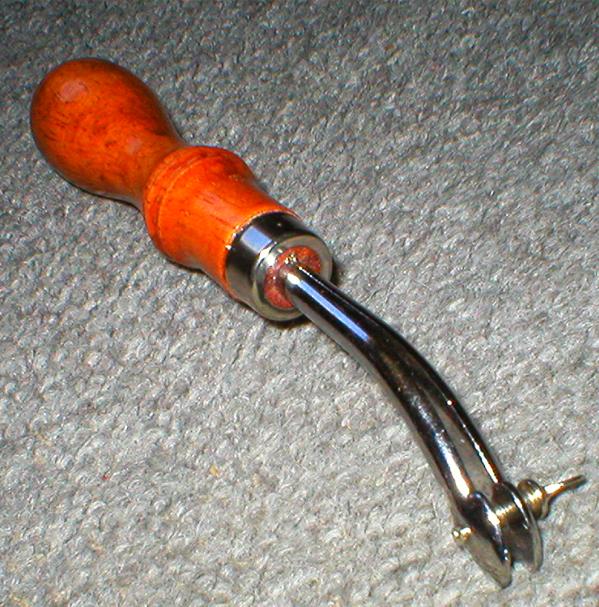
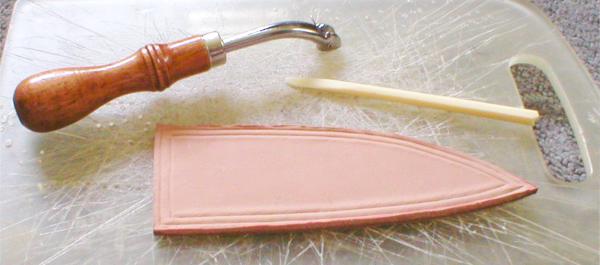
This is called an adjustable creasing tool and comes in very handy for establishing the border outlines that will be used for stitching or for the outlines that you decorative techniques will be done within. No reason this can't be done freehand. I used to use shaped and sharpened end of a plastic chopstick. | |
|
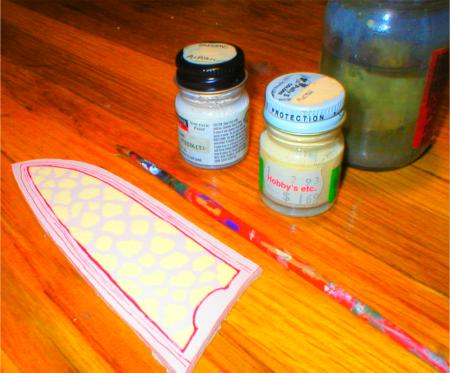
Any surface treatment that will affect how the leather dye soaks in and makes the surface look different will work. I'm using a matt tan acrylic hobby paint here, applied freehand inside the embellishment area outlined in red pen. | |
|
The leather dye is much darker on the unpainted areas, giving a nice contrast. Experiment with different colors. | |
| Simplified Embossing | ||
|
First step is to establish the stitching outline with a creasing tool along the edge. I use a sharpened chopstick to accentuate this. Do this while the leather is wet so it will dry and hold this shape. I then use a red roller ball pen to establish the inner outline that the pattern will be inside of. The red color will disappear under the dye color. | |

|
For the pattern, I'm going to use a small piece of gutter guard. Two bucks will get you a three foot piece and there are several patterns available in plastic or metal. | |
|
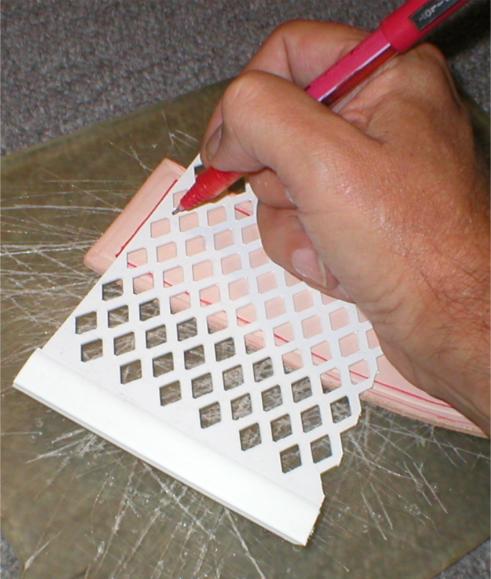
Using the red roller ball pen, I trace the inside of the diamond pattern on the front of the leather sheath. Do this on the leather after it has dries and press hard and make several tracings to emboss the leather | |
|
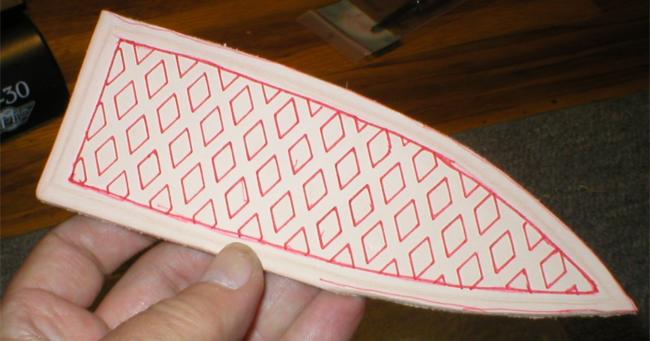
And this is what it should look like when you're done. Check to make sure you haven't missed any spots and use the red roller ball pen to touch up as necessary. | |
|
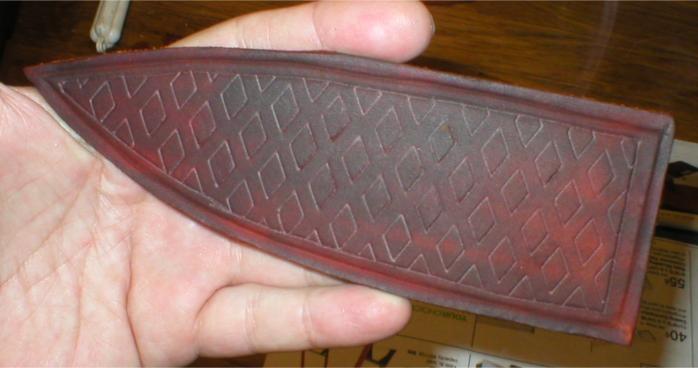
After it's dyed, it should look like this. A subtle effect, but I think it's very attractive. | |
|
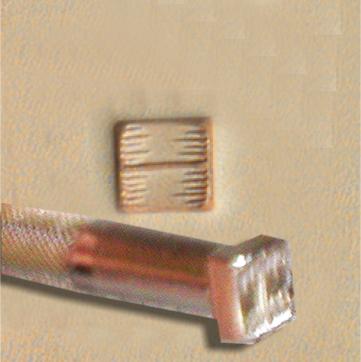
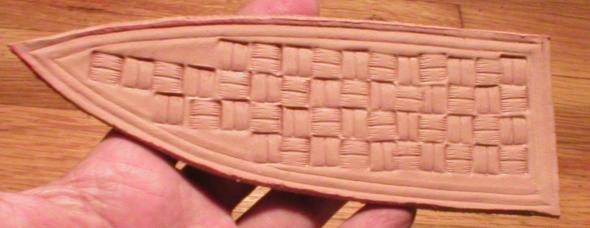
Stamped Embossing For this technique, you're going to need two leather embossing stamps, a basket weave and camouflage. |
||
|
As before, prepare by defining an outer outline where your stitching will go and an inner outline where your pattern will go. I use a creasing tool to establish an outer and inner outline while the leather is wet. I also use a sharpened and shaped chopstick to accentuate these creases. | |
|
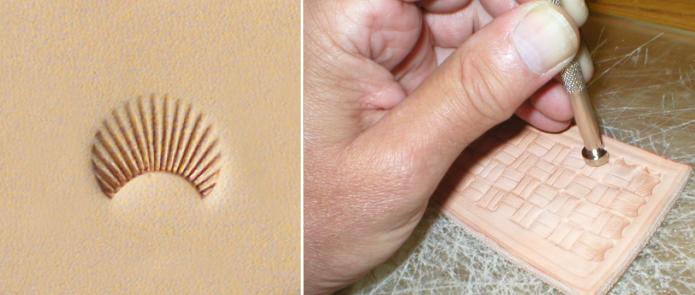
This is called a basket weave stamp and is one of many available at your leather work store ( or check EBay. I see more stamps showing up there). | |
|
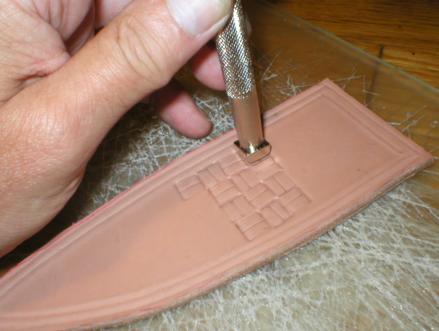
Start stamping in a straight line, rotating the stamp 90 degrees between impressions. Get as close to the inner outline as possible without going over. This performed while the leather is still damp . | |
|
Here, we finished stamping with the basketweave stamp. Since we were careful not to go over the inner outline, there are some blank areas. We'll take care of those in the next step. | |
|
This is called a camouflage stamp. Great name. Available in a wide variety of patterns and sizes. We're going to use this to run around the edge of the inside outline to fill in those areas where we couldn't get the basketweave stamp. | |
|
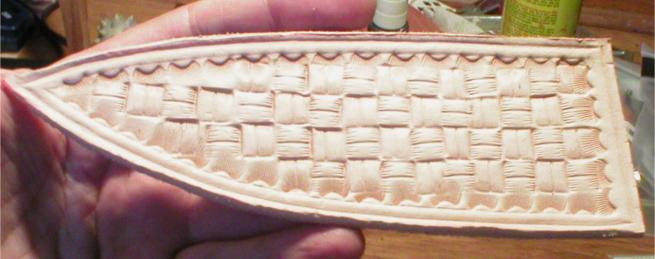
And this is what t should look like when your done. | |
|
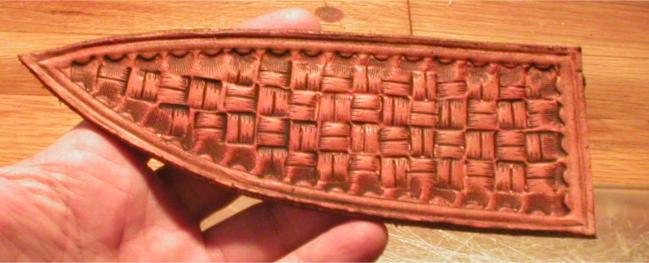
To accentuate the texture I used common brown shoe polish and made sure I rubbed enough in to add more color to the embossed recesses. Not too shabby, I like it. It's a keeper. | |
|
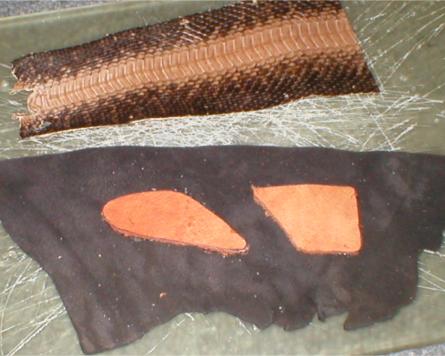
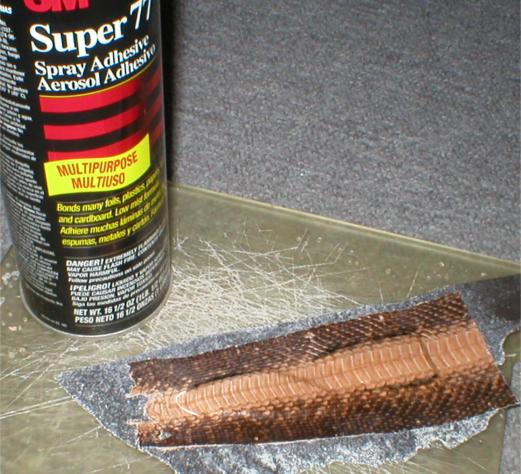
Inlay I'm using a nice little piece of snake skin here but you could use a nice thin piece of naugahide, contrasting leather, or any other number of materials. |
||
|
As in the previous techniques, we use a creasing tool to establish the outer line impression where the stitching will be done and an inner outline for the inlay cutouts. | |
|
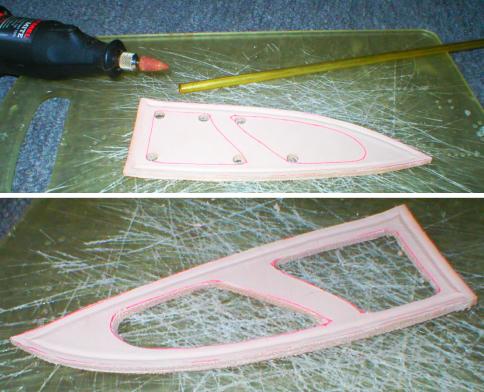
For clean, rounded corners where I'm going to cut out the area for the inlays, I use a piece of sharpened 1/4" brass tubing. The tubing is sharpened from the inside with a conical grinding bit in a Moro-Tool. I then used an X-Acto blade to cut out the rest of the inlay area, | |
|
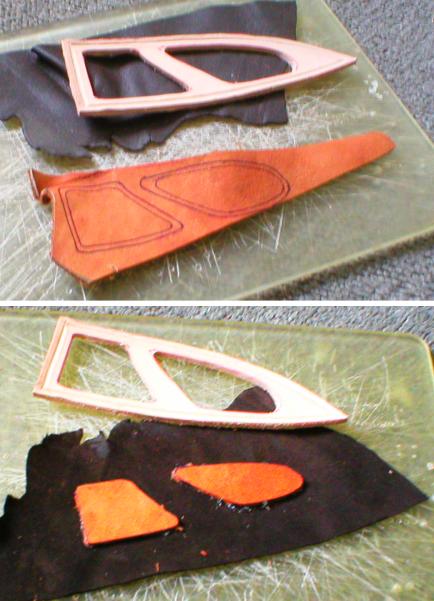
I trace the inlay cutout areas on a slightly thinner piece of leather and cut these out. These should be cut slightly smaller than the inlay cutouts to allow for the thickness of the snakeskin to be used. Use contact cement to glue these to a thin piece of leather using the front of the sheath as a template. | |
|
Inlay backing glued to the thin leather backing. Make sure these match up to the cutouts in the sheath front. | |
|
I used a good quality spray contact cement to glue the snakeskin over the thin piece of backing leather. Use your fingers to gently press the snakeskin around the cutouts. The purpose of these cutouts is to bring the snakeskin closer to the level of the front of the sheath. | |

|
I use the spray contact cement again to coat the back of the sheath front before pressing it in place over our thin leather and snakeskin backing. Wouldn't hurt to put a board with some clamps or weight on this overnight to insure a good, clean tight and uniform fit. | |
|
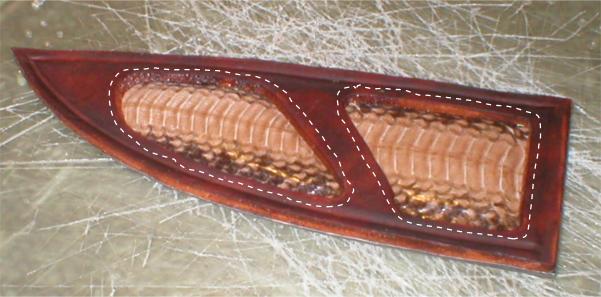
After trimming the backing flush with the front, this is what it should look like. If this is a larger sheath, you should probably consider stitching around the cutouts ( shown by the white dashed lines) for additional strength and durability. | |
| Please note that the above illustrates only the most basic of techniques. Leathercraft is a true art form that requires a lot of practice but can yield results that are truly stunning and can really set off your knife. I'd recommend that you get a few books from the library and experiment . There are many other techniques and this tutorial is meant only as a starting point. Have fun! | ||