Hints and Tips Page 9
Click on any of the thumbnails below for a more detailed photo
![]()
Hints and Tips Page 9
Click on any of the thumbnails
below for a more detailed photo
|
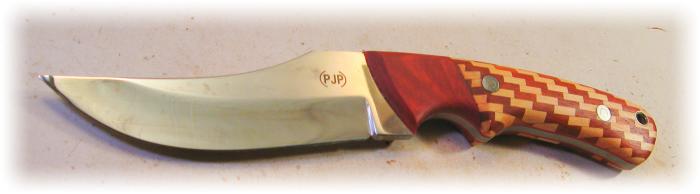
Faux Finishes for Knife
Handles Well, this is going to be a controversial subject. Traditional knifemakers seem to think that half the art and challenge of producing a beautiful knife is finding the absolutely perfect piece of exotic wood for the knife scales. I've actually heard people say that "painting" the wood scales is somehow dishonest or deceptive. I'll leave it up to you to decide, but since I have never seen the "perfect" wood scale ( although many come close), I'd like to advance the proposition that finding a really nice piece of wood for the handle is only the starting point. No reason that you can't be creative here and make a nice piece even better. |
|
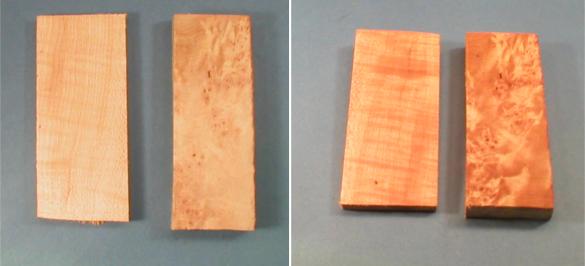
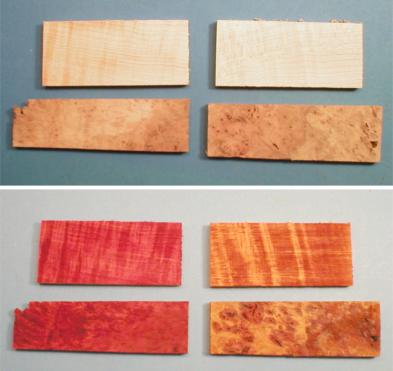
| All of the below examples are going to use a maple with light tiger stripe and maple burl scraps to try a few various techniques. As always, if you want to try some of these techniques, I'd recommend playing with some scraps first instead of jumping in and applying them to your favorite handle. As with any natural product, results are always going to vary. Sometimes you'll be surprised, other times disappointed. Experiment and have fun! | |
|
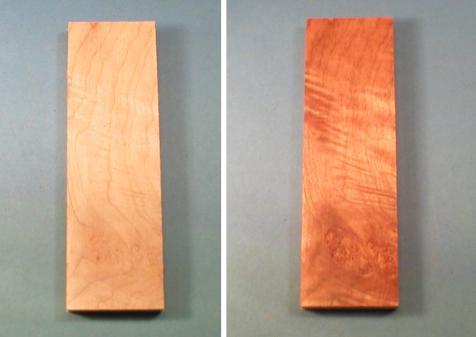
Just so we have a point of reference, let's use a clear finish first. I like using a penetrating oil finish such as Minwax or tung oil. On the left are the bare wood scraps, on the right are the same ones with a clear finish. This does a nice job bringing out the natural look of the wood and accentuating the grain and you may be more than happy with just this finish. |
|
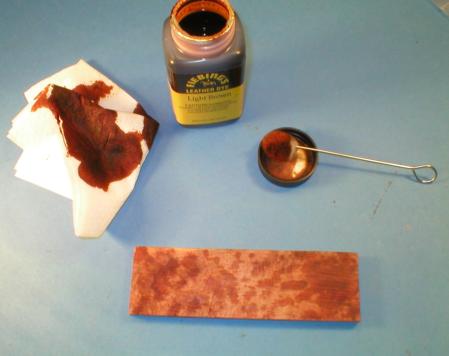
The most common "faux" finish is done using a stain or dye. This evens out much of the coloring on the scales and can enrich the appearance and enhance the unique grain, giving it a totally new look. I like to use leather dyes for their penetration and availability of a wide range of colors. Here I'm using a maroon color and a light brown color. Nice, huh? You can then apply a clear finish over this. |

|
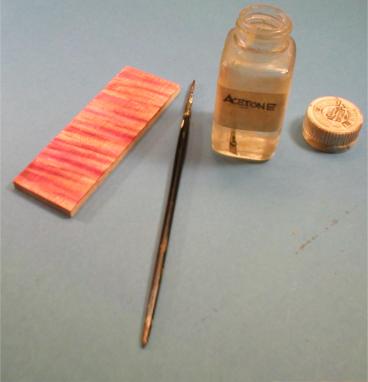
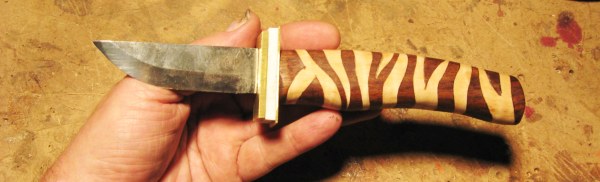
OK, let's try creating our own tiger stripes. I used another piece of maple, stained it with a light brown Colonial Maple stain by Minwax , put a single coat of a clear finish over this and then used a rust colored magic marker ( huge range of colors available at any art supply store) to add a couple of tiger stripes. You could stop now and add another clear finish over this to seal it but I don't think this looks very natural. |
|
Use a small, damp brush dipped in acetone to feather the stripes in. (damp means dab it on a paper towel after dipping it in the acetone). Use strokes the same direction as the stripes. Let it dry and come back to inspect it. Touch up as many times as you think necessary to get the overall effect you want. |
|
|
And here's what it looks like on my Tim Britton Ranger. Hint: to make it look natural, err on the side of being subtle |
|
|
If you have an airbrush, or know someone who has one, another embellishment you can add are highlights ( darklights? ) with a slightly darker shade of stain. If done correctly, the contrast can look really nice. |
|
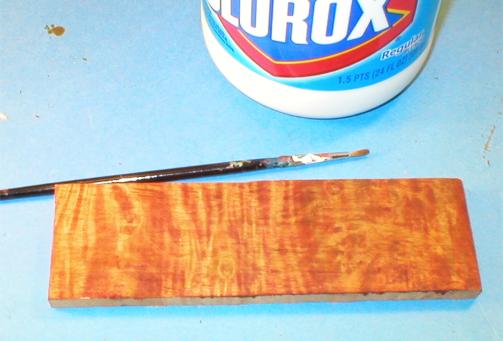
Another "cheat" to introduce some stripes or pattern is to use a brush and some oxyalic acid ( OK, OK, it's bleach) . This piece was stained a solid uniform color before applying the bleach. Again, it's best to be subtle, but if you want a slightly more pronounced look, place it out in the sun for an hour or two. |
|
Let's look at stippled finishes now. We'll start with a piece of maple with a small amount of burl. Using a Pecan Maple stain brings a little bit of the pattern out but it still looks a little bit plain. We're going to try to make it look like a rare burl. |
|
The next step is to dab a slightly darker stain on this. I use a leather dye dauber patted on a paper towel until it's almost dry. This seems to give you a much higher degree of control over the application. Don't go crazy, subtlety is the key here. Stand back to inspect often. |
|
I made this handle and sheath out of ebony. As nice as the wood was, there were still a few brown streaks throughout that I didn't want--this will happen with any natural material. India ink applied with an artists brush gave me a waterproof coloring that looked great under the tung oil finish |
|
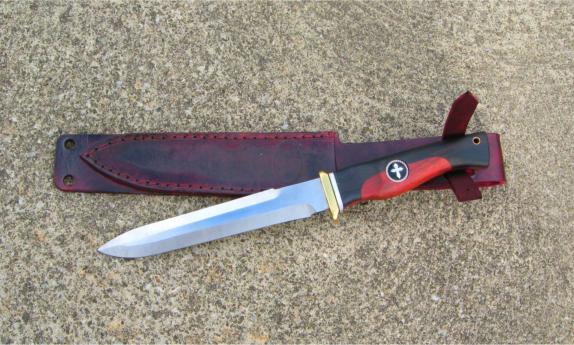
Do bolsters and guards have
to be metal? Brass and nickel silver bolsters and guards have long been traditional, and no one is going to dispute their attractiveness, but for anyone feeling creative, there are a host of other materials that can also be used. I'm seeing corian show up more here and I suspect that it's because it's so durable and available in a large range of nice colors. For some ideas, take a look at these creations. |
|
|
|
Knifemaker Kata Nam heavily modified this Darrel Ralph Delta 5 Chute knife. Here he used black corian bolsters to set off the beautiful horn handles. |
|
Here's my Tim Britton Ranger with modified profile, amboyna scales and white corian bolsters. I really like the effect. |
|
|
The master craftsman at Anza Knives have long used Dymondwood for bolsters and guards on their beautiful and hard working knives. |
| to be continued | |
|
Contrasting Wood Handles Contrasting wood handles aren't exactly new but offer a new venue to try out your creativity. |
|
 |
This is the type of contrasting wood handles I always used to see. These can be absolutely beautiful but can also be improved upon. Let your inner artist loose and pick complimentary woods. |
 |
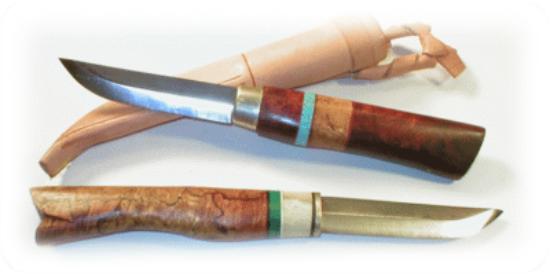
Here's another example of how attractive a contrasting wood handle can be, especially with some gemstone and spacers thrown in. |
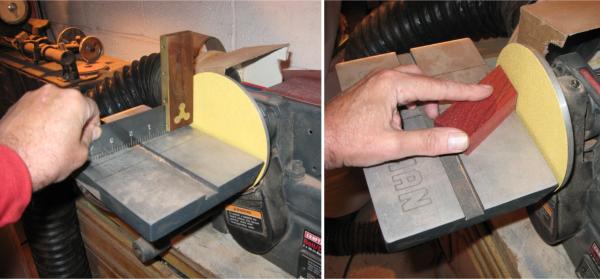 |
Let's start with a simple handle of two types of contrasting wood cut at a 45 degree angle. Before gluing the individual pieces together, you have to make sure that they have absolutely 90 degree surfaces. Use a right angle square to check your sander and then sand. |
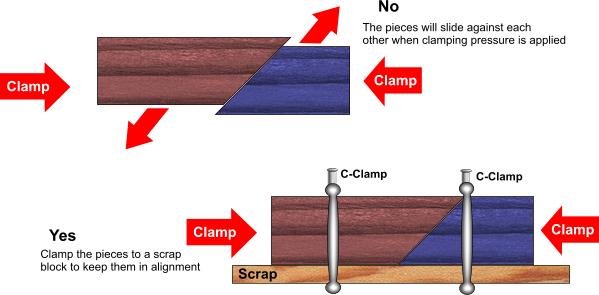 |
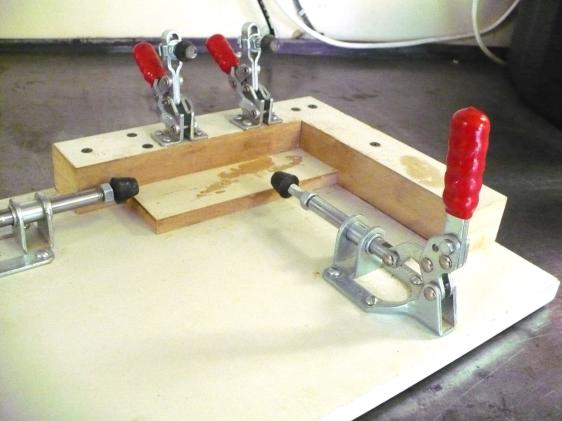
When gluing pieces like this, you're going to find that when clamping, the pieces easily slide out of alignment. You'll need to clamp them to a scrap piece while the glue cures to keep them straight |
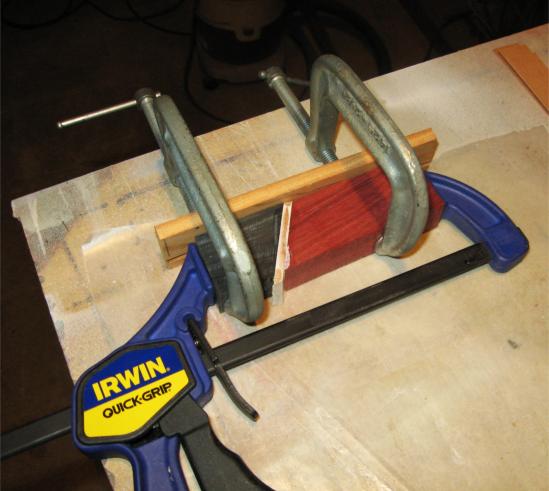 |
And this is what the clamping set up should look like. |
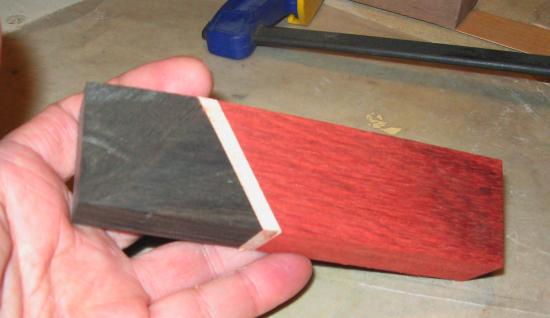 |
And this is what the finished block should look like. I can use this for a hidden tang knife or split it on a bandsaw for scales for a full tang knife |
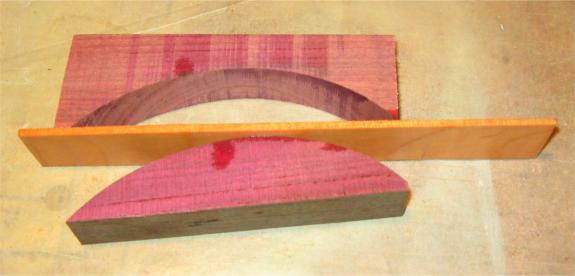 |
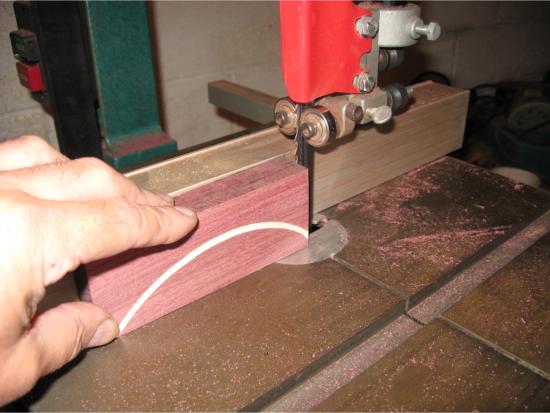
For a contrasting stripe, I cut a gradual curve in a block and get a thin strip of maple ready. The maple was pretty stiff and I soaked it in water overnight to make it more flexible. To minimize internal stress, I clamped it between the blocks and let it dry without glue to form it. |
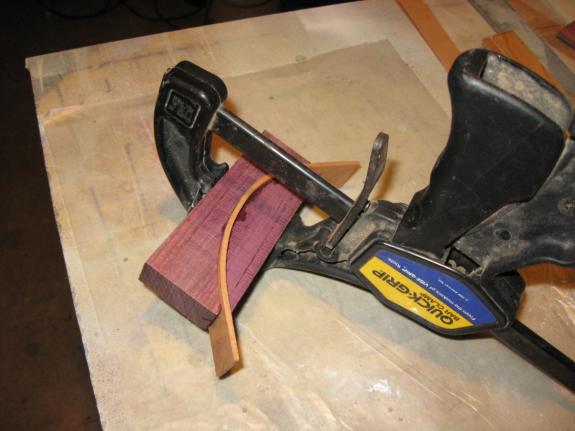 |
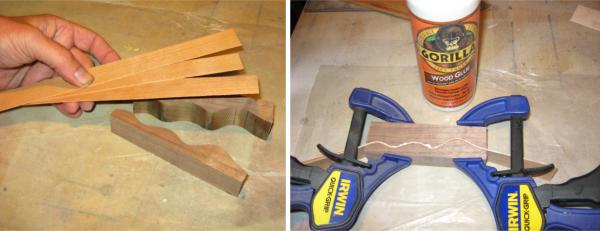
When the strip had dried in the curved form, I took it apart, applied a good waterproof carpenters glue and reclamped it. |
 |
And this is what we end up with. |
 |
In this case, I'm going to use these for scales on a full tang blade design, so I'm going to use my bandsaw to cut the block into two halves |
 |
Form more complex curves, consider using several thin strips of a wood veneer. Your local woodworking store will have several types. Apply glue to each strip and then clamp them all together |
 |
And this is what you should end up with. |
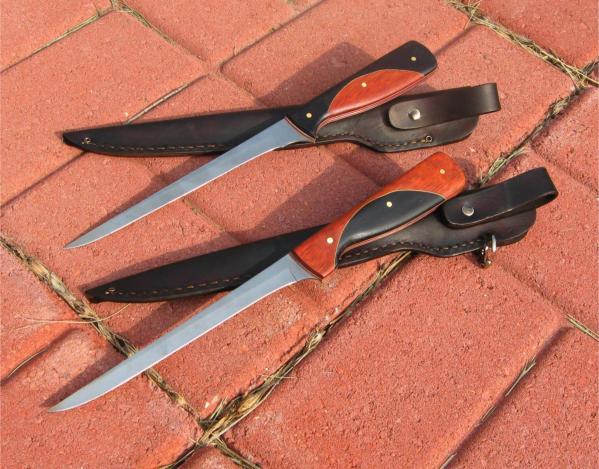 |
Here's another idea: I made two fillet knives at once out of ebony and bloodwood. I cut both blocks at the same time and swapped the "belly" blocks between the two, with a thin strip of veneer between them. |
 |
Another contrasting belly picture, again with ebony and bloodwood stained to accentuate the colors |
|
|
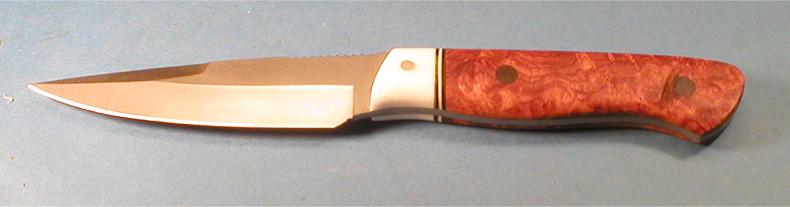
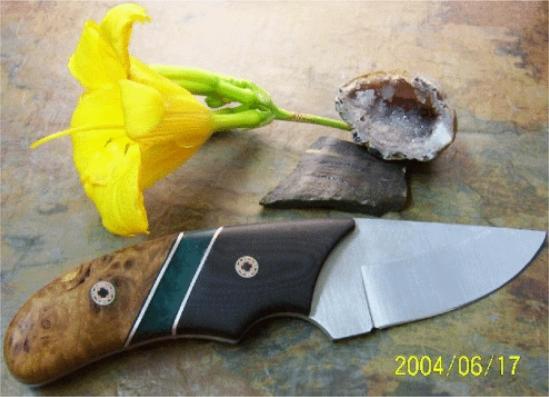
Another nice look for contrasting woods is a natural colored maple burl against a darker colored wood like a cocobolo |
 |
Here are a few more ideas for contrasting wood blocks. As with any other technique, experiment, be creative and have fun. (Kind of nice too, that you may now have a use for some of those small scraps that you used to throw away) |
 |
And if you really want to get serious about this you can always make a jig like knifemaker Tom Hunt of El Dorado Hills did. The clamps are from Woodcrafter and are available in other woodworking supply stores. Professional!! |
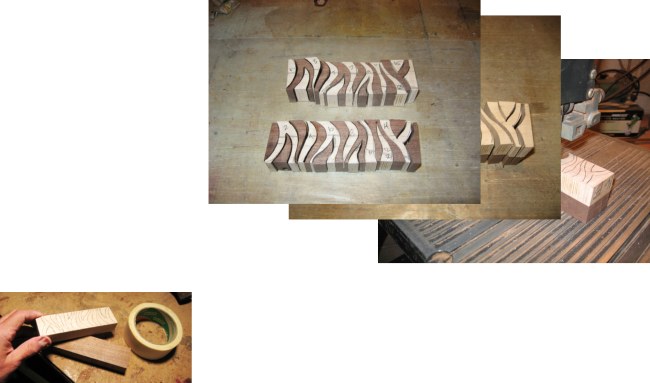 |
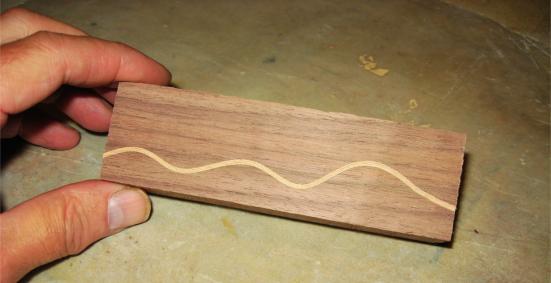
For a tiger stripe style, I use contrasting woods like maple and walnut. I mark the stripes on the maple and use double stick tape to stick the two blocks together temporarily |
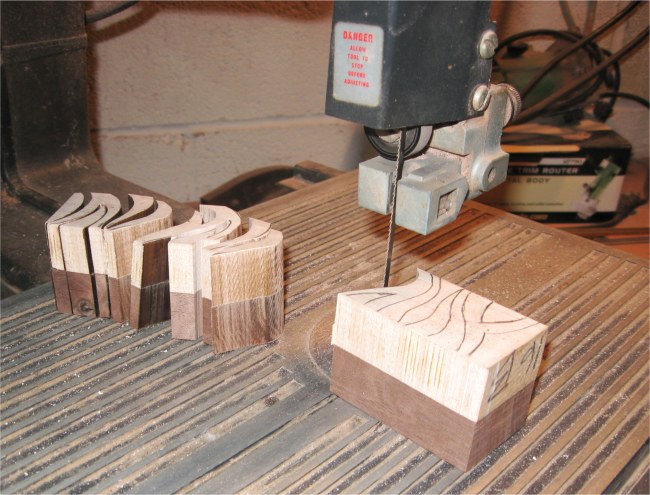 |
I use a thin bandsaw blade to cut the stripes apart. Keep them in order or you'll spend a week trying to figure how they originally fit together. |
|
|
After separating the maple and walnut, alternate the stripes to end up with two handle blocks. Numbering the sections helped me a lot. Clamp and glue. |
 |
This blade isn't done yet ( I still have to shape the guard) but you get a pretty good idea what this pretty little handle is going to look like. |
 |
And if you really want to go crazy.......this is a checkerboard handle made from contrasting bloodwood and maple. Pretty cool, huh? |
Hints and Tips Page [1] [2]
[3] [4]
[5] [6]
[7] [8]
[9] [10]
[11] [12]
[13] [14]
[15] [16]
[17] Next
Got a good tip that you think your fellow knifemakers would like to know about? Drop me a note at pjp2@northcoastknives.com