![]()

Tutorial: First
Project: Filet Knife
| If
you've spent a few minutes going through this web site and decided that
you really want to give this knifemaking hobby a try, this project is a
good one to start off with. It's inexpensive (the blade is about six
bucks and the handle material is about three bucks) and it doesn't require
anything beyond a couple of simple hand tools. Since it doesn't have
metal guards, construction is simplified. Don't be fooled though: you're
still going to end up with a nice looking and hard working filet knife
that you'll be able to proudly show off to your friends.
And I'm going to bet that once you find out how easy it is to produce professional results, you're going to be hooked on this wonderful hobby. The techniques illustrated below can can be used as a starting point for the construction of just about any knife design you might choose. |
Click on any of the thumbnails below for a more detailed photo
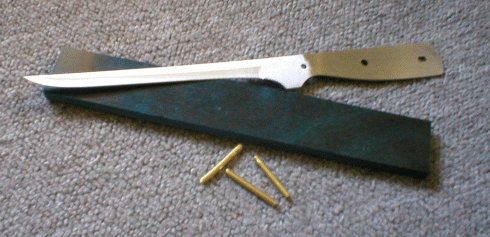
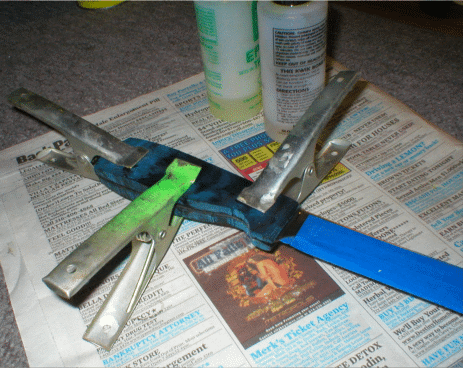
This is all
you're really going to need: the blade ( a 7"
Filet blade), your choice of handle material ( I'm going to use a
piece of Indigo Dymondwood
for it's water resistance) and a couple of 1/8" brass pins.
You're also going to need some epoxy and sandpaper also but I'll cover that in
a minute. |
| |
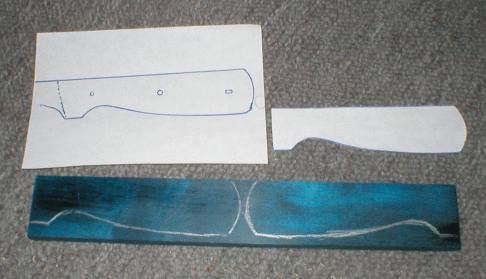 |
Trace the shape
of the knife on a piece of paper to decide the shape of the handle. I cut
this out and trace it on the Dymondwood with a silver pencil to show me
the shape I have to cut out. |
|
|
|
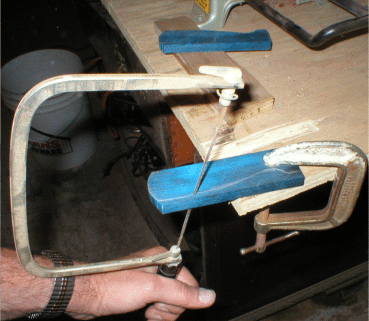
Cut out the handle shapes with a coping saw . C-clamping the piece down to your bench top will make this job a lot easier. If you have a jig saw or a band saw, even better. | |
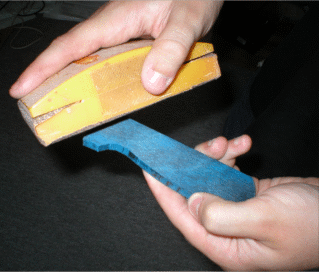 |
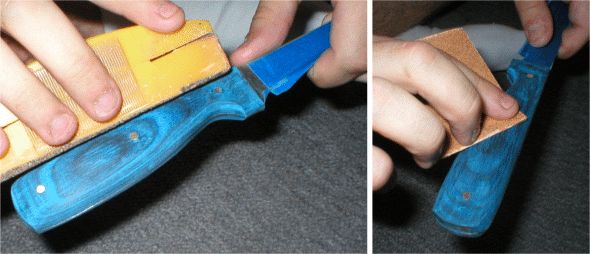
It's much easier to sand the scales now, before they're attached to the handle. Pay especially close attention to putting a nice finish on the front of the scales since these will be hard to sand later without scratching the blade. Test fit these against the blade to make sure you're not sanding off too much and keep comparing to each other to make sure they're the same. | |
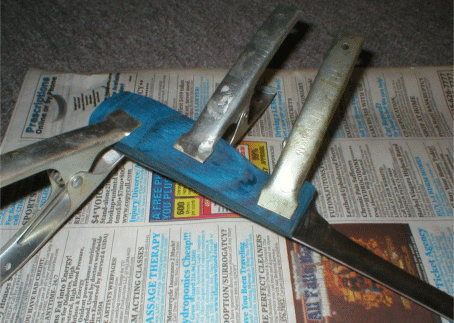 |
Spread a thin layer of a good slow-set epoxy on the inside of the scale to clamp the first side to the handle. Pay close attention to getting these in the correct position before setting aside to wait for the epoxy to cure. Use acetone to clean off any excess epoxy. | |
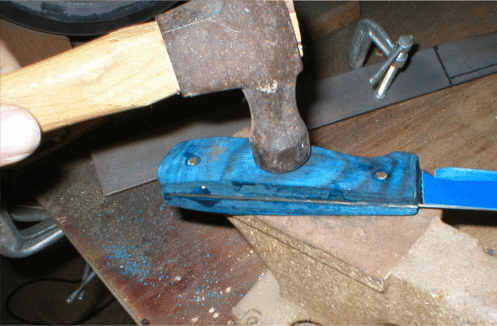
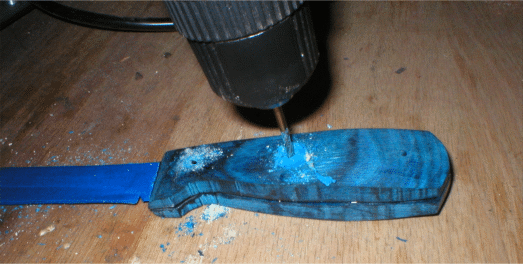
| After the epoxy cures, I use a drill with a 1/8" bit to drill the pin holes from the inside side. I'm not sure why the center hole was larger but it doesn't matter: the epoxy filled it in . | ||
 |
Repeat epoxying the second set of scales on the knife handle. Make sure they're lined up correctly, clamp and set aside to cure. By the way, did you notice the protective tape on the sharp edge of the blade. This is to protect you while handling the knife. Much cheaper than band-aids and cleaning blood spots out of the carpet. | |
|
|
Get our your
drill and 1/8" bit again. Use your previously drilled holes to act as
a guide to drill all the way through the scales you just epoxied on. You
should now have perfectly straight 1/8" holes going all the way
through. a |
|
 |
Cut some 1/8" brass stock for use as pins about 1/8" longer than the thickness of the handle. Chamfer or bevel the ends to allow them to slide in easier ( it should be a snug fit). Peen ( tap them medium hard) with a hammer to compress them so the scales will be held tight. Don't worry about getting them flush, only tight. We'll sand them flush in a moment. Don't overdo it or you might split the scales. | |
 |
Start the final shaping with a sanding block with about 120 grit sandpaper. As the handle begins to shape up, move on up through finer grades of sandpaper, ending up with a 400 or 600 grit. Be patient and check your progress often. | |
|
Although
Dymondwood needs no additional finish, I find that a light coat of Minwax
Wood Finish, a penetrating oil finish, brings out a higher gloss. Let it
dry overnight and buff lightly. This
photo does a nice job showing off the beautiful color of the Indigo
Dymondwood. |
Also: Be sure to see the Tutorial on how to make a custom Kydex sheath for this knife. Click HERE