![]()
Tutorials:
KYDEX Sheaths 2 : Using a Sheath Press

Click on any of the thumbnails
below for a more detailed photo
|
|
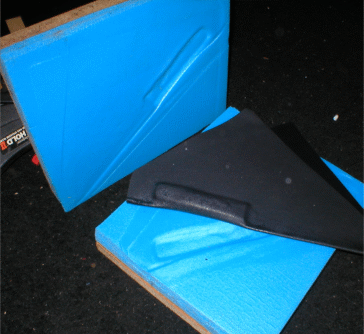
Here's another way of making a custom molded KYDEX sheath: by using a sheath press. The sheath press is cheap and easy to make and can be used to mold dozens of sheaths. It will also give you a little bit more design freedom since individual molds don't have to be made for each and every knife. | |
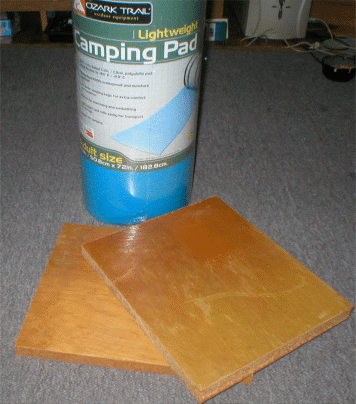 |
To make the press needed to form the KYDEX sheet, all you need is two 12" x 12" boards and some sleeping bed padding ( sometimes called a camp mat). This rigid foam is cheap. I got a lifetime supply for 5 bucks at Wal-Mart. | |
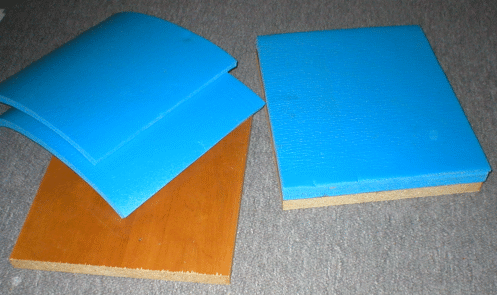 |
Two layers of this semi-rigid foam per side is good. I used a heavy duty spray adhesive to glue the two pieces to each board. This stuff is very easy to cut and cuts cleanly with a sharp razor knife. | |
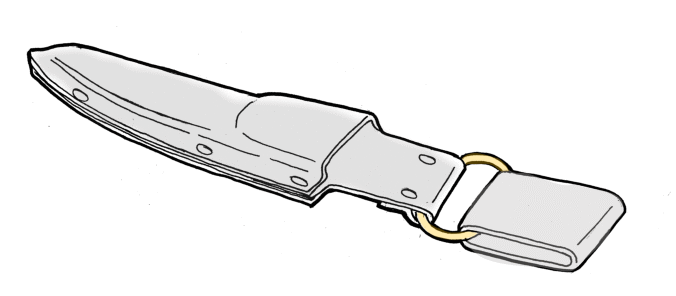 |
This is a picture showing the construction of the sheath we're going to be making and will serve as a roadmap for planning layout and sizes. | |
 |
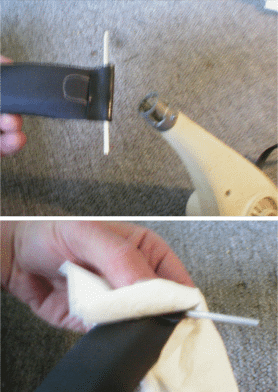
Since the back of this sheath is longer than 12" and the standard size is 12" x 12", we're going to double the sheet diagonally. I use a heat gun to soften a straight fold line and fold it over a cookie sheet that has no lip. Masking tape keeps it from sliding around while heating | |
 |
When softened, fold it over the cookie sheet and use a small flat object to press it flat. | |
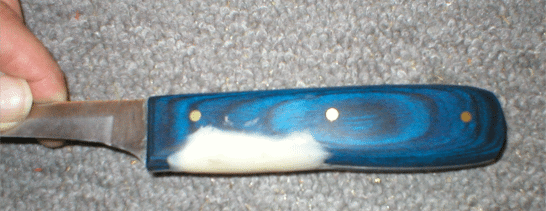 |
This particular blade had an indentation on the bottom to act as a finger guard. I used a piece of Sculpey clay ( available at any art supply store) to make the handle more contiguous so the handle will slip out of the sheath easier without getting hung up. | |
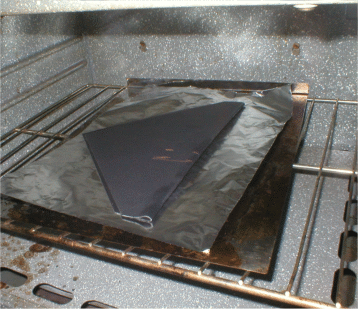 |
"Bake" the doubled over KYDEX sheath in the oven until soft. About 350 degrees for 7 to 12 minutes should do it. Check often while baking. | |
| Hot and soft. Use a pair of tongs to pick it up. | ||
| Open it up and place the knife inside against the fold. Close over the knife making sure the spine of the knife is tight against the fold. Place this on the bottom of the sheath press. | ||
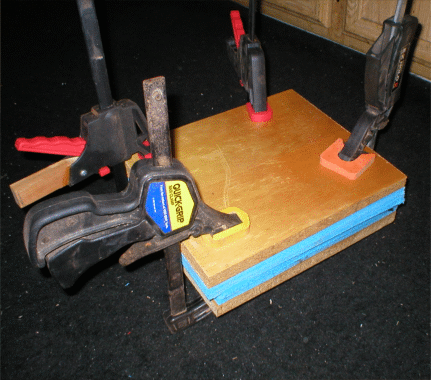 |
The first time I did this, I stood on top of the sheath press for about 10 minutes until it cooled. The results were acceptable, but using clamps like this works a lot better and is less tedious. | |
 |
When it cools, this is what it should look like. | |
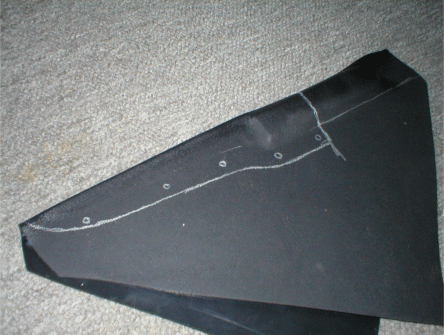 |
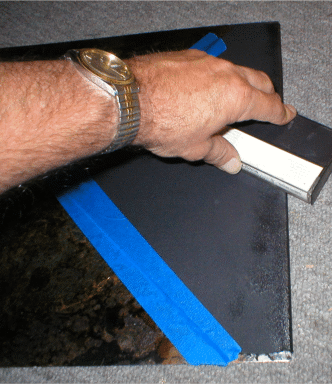
I use a silver pencil to mark where I'm going to gut. The bottom outline was cut on a bandsaw, the top was cut, scored and snapped off with a utility knife. We'll clean up the edges later. | |
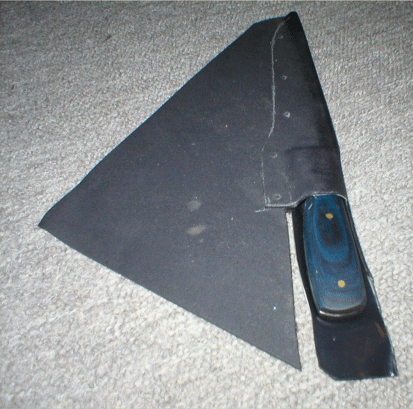
| And this is what it should look like after being cut out. | ||
 |
The sheath was just a little too tight so I used a piece of the leftover KYDEX as a spacer and slip in in between both halves. The fit is still tight but not so tight you can't get it out. I ran a light bead of super glue around it to hold it in place for now. | |
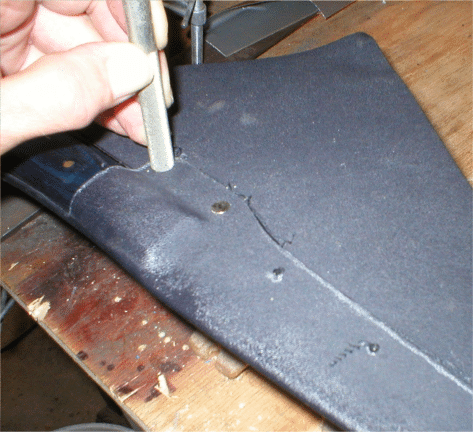 |
Use a 1/8" drill and then rivet the edge of the sheath at a couple of strategic locations. The excess from the spacer will be cut off in a moment. | |
| I cut the excess KYDEX off with a jigsaw ( bandsaw would work well) and then use the belt sander to clean up the edges, sanding down almost to the rivets, defining the profile. | ||
 |
I cut a 1" wide piece of KYDEX from the leftover scrap and start forming the belt loop with a heat gun, bending it over a 1/4" thick piece of scrap wood. | |
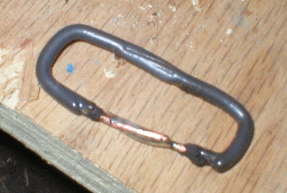 |
I should have gone to a craft store to get a D ring of some kind, but it was late. I used a short piece of 10 gauge insulated romex to form a loop, baring about 1" of copper, overlapped and soldered. | |
 |
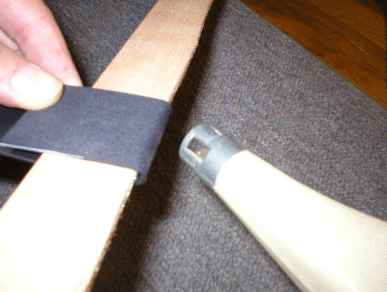
I use a scrap piece of 1/8" aluminum tubing and bend over the excess KYDEX at the top of the knife sheath. | |
 |
After slipping the romex loop in, I drill and rivet this flap to hold the loop tightly in place. | |
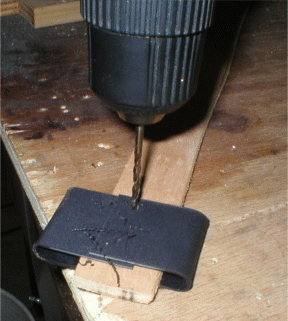 |
I use that 1/4" scrap of wood to prevent drilling the belt loop all the way through. Be careful and stop as soon as you go through the back with a 1/8" drill. | |
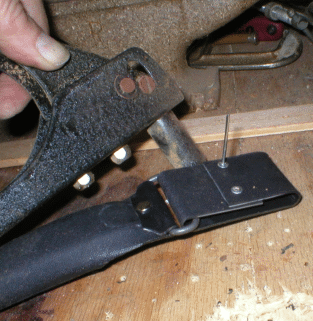 |
Not enough room to get a rivet on the inside so I use 1/8" pop rivets. I like the way rivets look better, but I figured this was on the back where no one would see it. You did remember to slip the romex loop in first before you riveted it, didn't you? | |
| Done. I did trim the sides back a bit for increased access to make it easier to pull it out. Experiment and trim a little bit at a time. | ||
| If you don't want to do the foldover style, another option is to use the sheath press to mold two separate pieces of heat softened KYDEX over the knife. All other construction would be similar. Have fun! | ||
Also: To see the Tutorial on making the filet blade that this sheath was made for, click HERE