![]()
Tutorials:
Converting a Full Tang To a Hidden Tang Blade

Click on any of the thumbnails
below for a more detailed photo
|
|
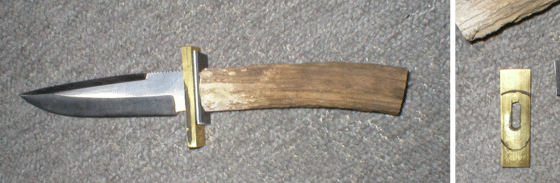
This design started out as the Commando blade, a long time favorite of mine, and as much as I love the blade, I've gotten tired of the parachute design handle. I wanted a little bit more freedom of design . I also wanted to try out a nice little piece of horn I picked up for the handle. To do this, I decided that I would need to convert this to a hidden tang profile | |
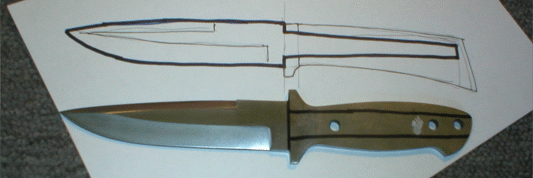 |
Start by sketching out you design on paper. You can experiment easier on paper to decide the final design that you want to end up with. When satisfied, transfer this to the handle with magic marker. | |
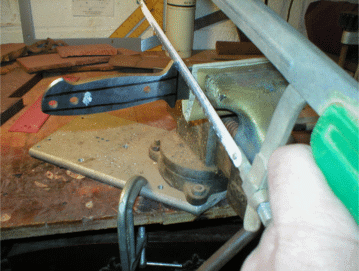 |
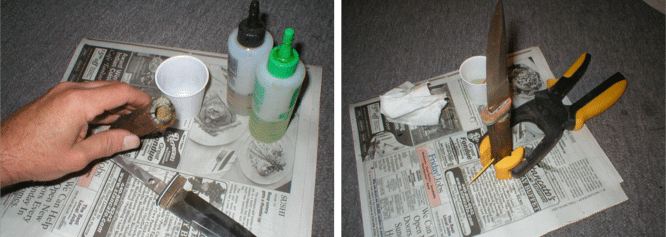
I use a hacksaw with a good blade to cut down to the marked line using the existing guards as a reference. Notice the cardboard wrapped around the knife in the vise to prevent marring the blade. | |
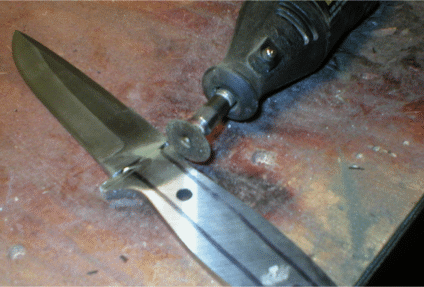 |
I use a fiberglass cutting disk in a Dremel to do most of the cutting. Be patient, this is going to take a while. As durable as these disks are, I used up three of them before I was done. | |
| Whew. If this cutting was done before the blade was hardened and tempered, it would have been a lot easier. This was hard work! | ||
 |
I found a machined brass guard that came close to the size I wanted and I used a couple of files to widen the slot for a good, tight fit. Test fit often during the filing process. | |
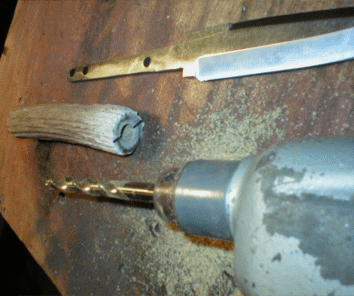 |
I had a short piece of shed horn that I wanted to use for the handle. After cutting it to length, I use a long 3/8" drill bit to start the tang hole, making sure I check the depth ( I don't want to drill all the way through!) . Wiggle the drill a little to widen the hole to the correct width for the tang. | |
 |
Test fit the handle, spacers and guards to make sure the fit is tight and snug. Now is a good time to mark the guard for shaping. | |
 |
Shape the guard to final profile ( I used a bench disk sander) and solder the guard in place. It might not be a bad idea to review the Soldering Tutorial | |
 |
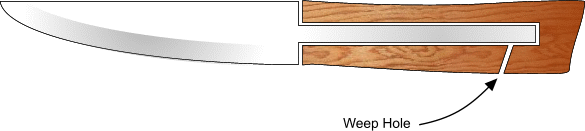
This step, epoxying the handle, is very similar to the technique used for the Puukko construction. Use a good, slow set epoxy, set the tang into the handle, plug the weep hole with a toothpick, and set it aside to cure in a vertical position | |
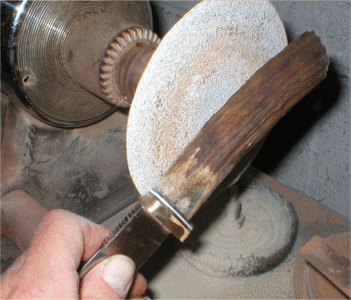 |
I used a flexible disk sander to shape the horn and guard. Be careful and attentive, go slow and stop and check often. | |
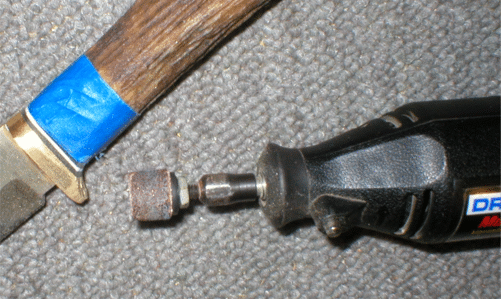 |
I do the final shaping of the guard with a small sanding drum in a Dremel. The tape on the handle protects the horn to keep you from nicking it. | |
| Final step is clean up and polishing with a buffer. | ||
| Then horn section I used was a "shed" and was kind of dull and lackluster due to age and exposure. I stained it with a Minwax Red Mahogany color , drybrushed the highlights and was pretty happy with the outcome. | ||