![]()
Tutorials:
Full
Tang: Page 2
Back
to Page 1

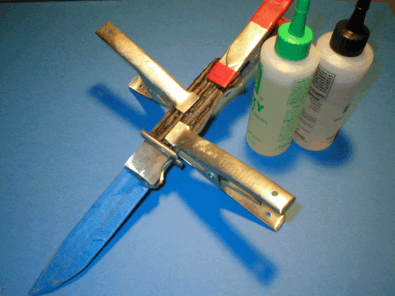
Click on any picture below for a larger view
|
| ||
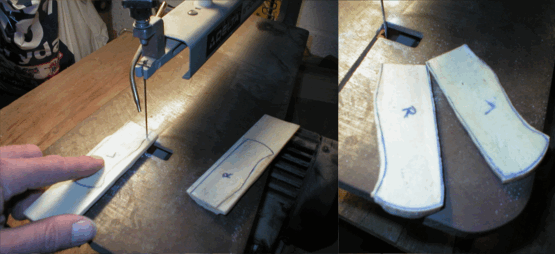 |
Trace the handle on the Imitation stag slabs and cut them down to size on a jig saw or band saw. This will reduce the amount of sanding and shaping that you'll have to do later and will allow you to more easily see the placement we'll do in a moment. You did remember to make opposite left and right hand sides, didn't you? | |
 |
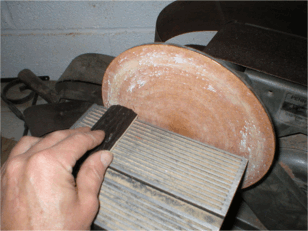
Sand the imitation stag slabs down to the correct profile checking against the knife often. Since this is a natural material there will probably be small variations between the two sides that we'll have to true up and make uniform. Be aware: this stuff is hard! I used a new 120 grit belt and it took me 45 minutes on this simple step.a | |
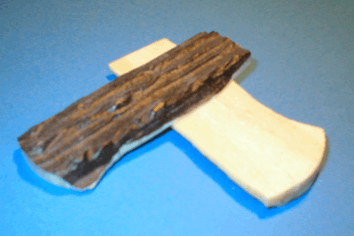 |
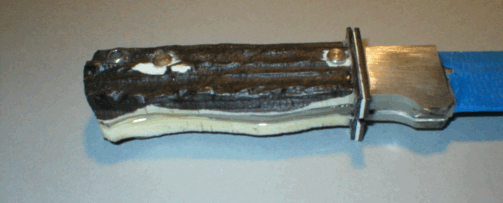
This is what the slabs should look like when rough finished and prior to
attaching to the tang with epoxy and pins.
|
|
 |
Use a good one hour or longer
epoxy to attach the first slab, holding it in place with a couple of
spring clamps. Allow it to cure overnight. a |
|
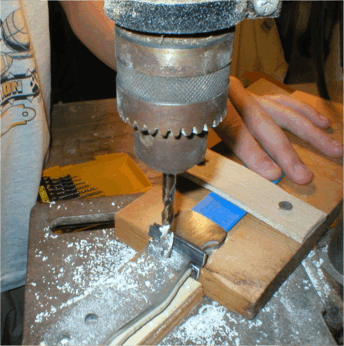 |
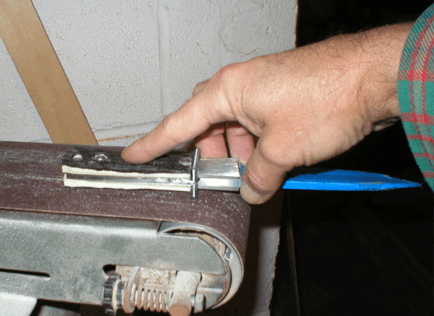
When cured, drill through the
knife tang and through the imitation stag for the pins and thong tubing.
Notice the small jig I made with a few wood scraps to hold the knife
steady while drilling? Never hurts to be a little paranoid. a |
|
 |
Epoxy the opposite side on insuring a good tight fit by using spring clamps again. | |
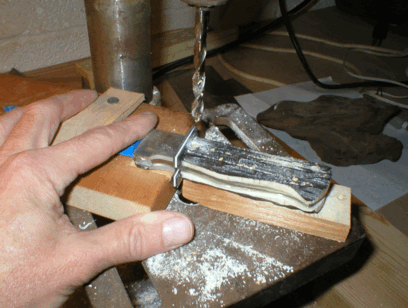 |
When the epoxy is cured. drill the pin and thong holes by drilling through the side that had been previously drilled and the knife tang, through the undrilled newly mounted slab. You have just used the previously drilled holes as a guide to drill the new holes, insuring perfect uniformity of both sides. Great logic, right? Notice the safety jig again. | |
 |
Place the pins in the holes an peen them just as you did the bolster. Go lightly here though. The stag bone is hard and brittle and you don't want to risk splitting it. I placed the thong tubing in the drilled hole at the back and gently flared the outside ends to hold it tight by spinning a phillips head screwdriver on the inside. Again, go gently. | |
 |
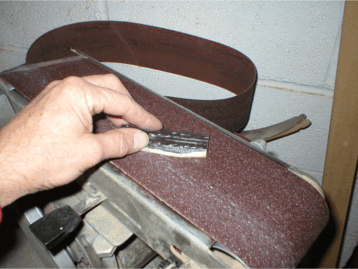
I use a disk sander with a 60 or 80 grit disk as the initial step for fast shaping and stock removal. Disks are cheaper than belts and take off a lot of material. Be careful you don't take too much off too much though. You only want to get close to the final shape. | |
 |
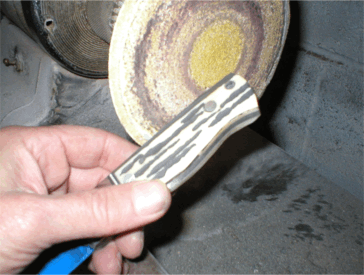
Back to the bench sander for
final shaping. I start with a new 100 grit belt for fast cutting. Even so,
you're going to be here a while: bone stag is hard! Check often that
you're shaping both sides evenly and uniformly, using the previously
sanded guard as a guide. Be patient. This can be be
very zen-like. Use a very fine or worn belt for a smooth, final
sanding. |
|
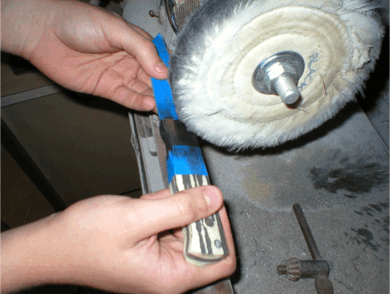 |
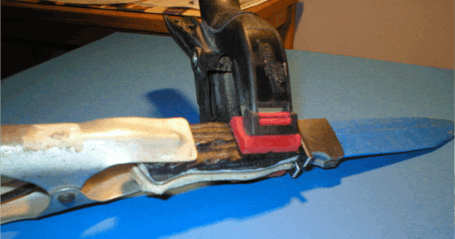
Last step is to
buff out the bolsters to remove any small scratches left by the sanding.
Make sure before you get to this step though, that there are no
large scratches. Buffing will only do so much. Notice the tape on the
handle to prevent getting any buffing compound on the imitation stag. Look
how shiny it's getting! Cool. |
|
 |
Done. This is easily going to be my new favorite blade. You may need to use a little bit of paint thinner to clean any tape residue off of the blade and buffing compound residue off of the bolsters. Oh, and look what I just found: the directions! I suppose I should read them now. |
|
|
Special thanks to Mr. Darrel Ralph for making some of his beautiful blade designs available to the average guy like you and me. |
Take Me Back to Page 1