![]()
Tutorials:
Full Tang Knife :
| Full
tang construction is probably the most common design that you're going to
get involved with. It's a little bit less work and most folks will attest
that it's a much stronger design. All of the steps illustrated may
not be necessary for your particular design, but are fairly typical for
this type of construction.
Also: don't be intimidated by the number of steps I have listed here. Most of these steps are common sense and just take a few seconds each. I just didn't want to overlook or leave anything out. I also wanted to demonstrate that you can be creative in modifying a knife blank and don't have to restrict yourself in changing the look to get what you want. |
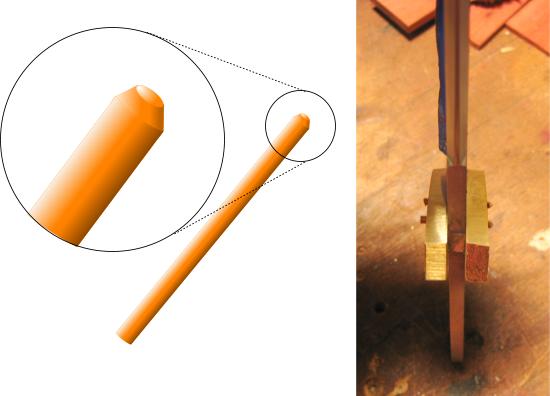
Click on any of the thumbnails below for a more detailed photo
|
I choose
the Commando blade for this
tutorial for it's functional simplicity and....well...because I think I
think it's really sexy, too. The steps I'm going to go through
here can be used ( or modified ) for any full handle design. |
| |
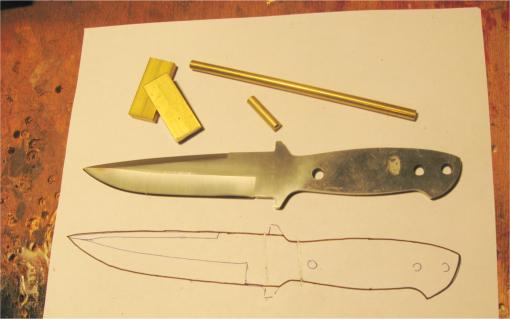 |
Although this design looks just fine without brass bolsters ( and most people who make this blade just use slab scales without bolsters), I'm going to add some anyway. Tracing the design helps me visualize the layout. This also helps to make sure I've got all the hardware I'm going to need also. | |
 |
I can never leave well enough alone. I decided to streamline this design and am going to cut the "ears" off the forward part of the handle with a fiberglass cutting disk in a Dremel. Have patience--this is hardened steel. | |
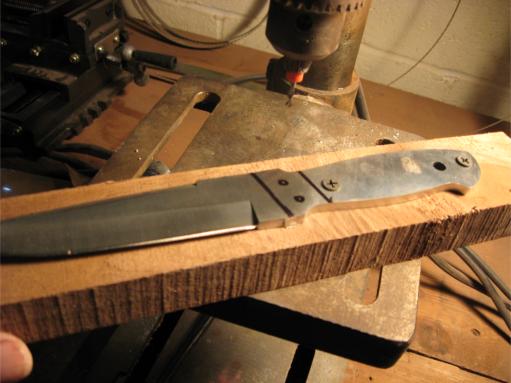 |
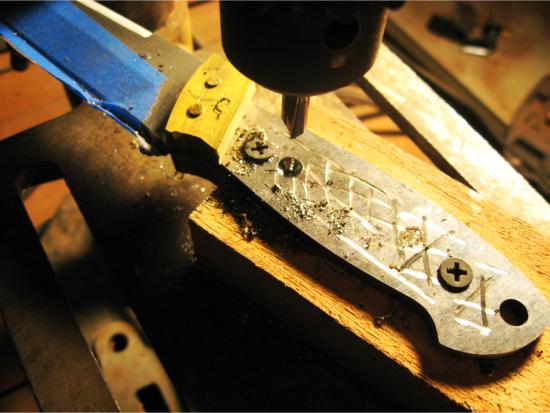
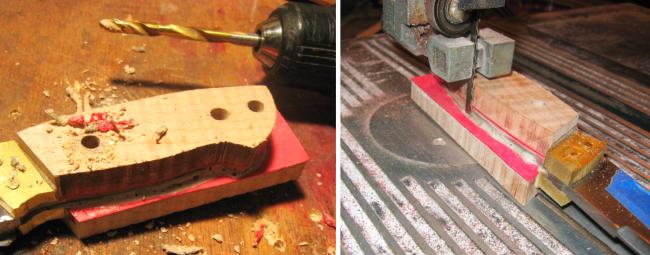
Using a magic marker, I lay out where the bolster and pin holes are going to need to go. I also screw the blade down to a heavy piece of wood in preparation prior to going to the drill press. This is a safety step to make sure the drill press doesn't grab the blade and turn it into a sharp whirling helicopter blade. I like to make my blades with a minimum of excitement but, hey, that's just me. | |
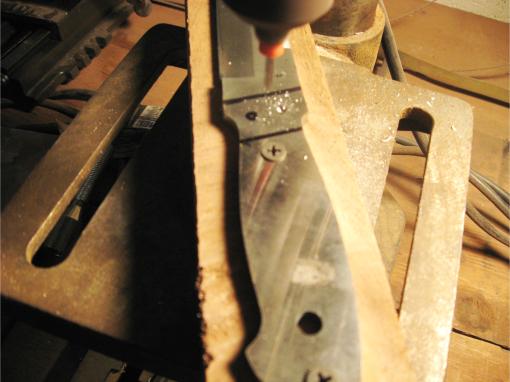 |
I use a carbide drill to make the holes for the pins that will hold the bolsters on. Your regular high speed steel drills just won't cut it here. The carbide drills unfortunately are also very brittle and have a limited life span. | |
 |
After taking the blade off the block is a good time to add some tape to the edges as another safety precaution. Yes, I know you're careful, but just do it to humor me, OK? You'll thank me later. | |
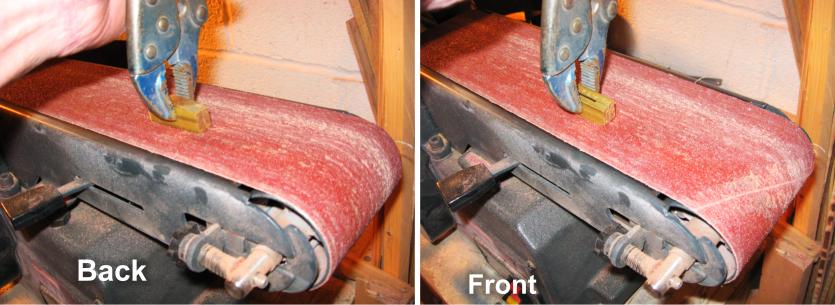 |
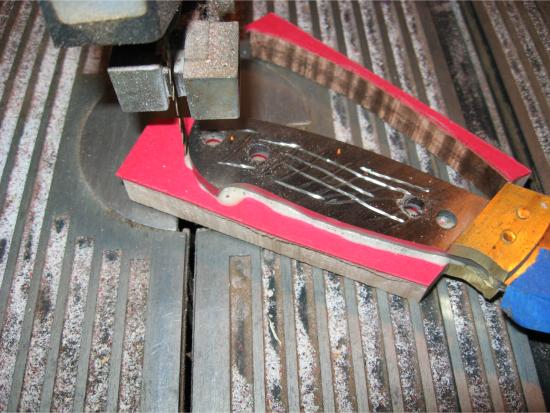
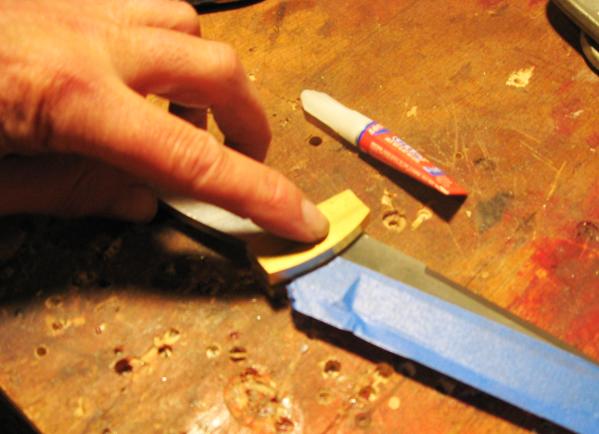
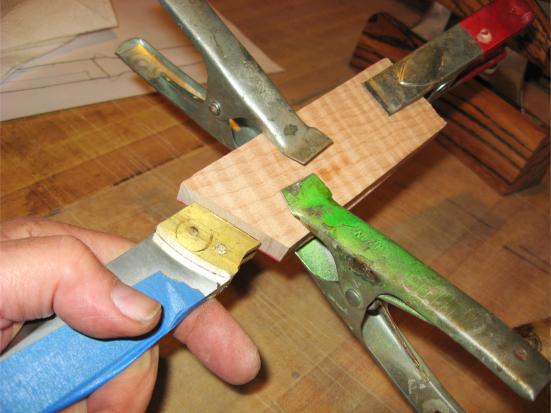
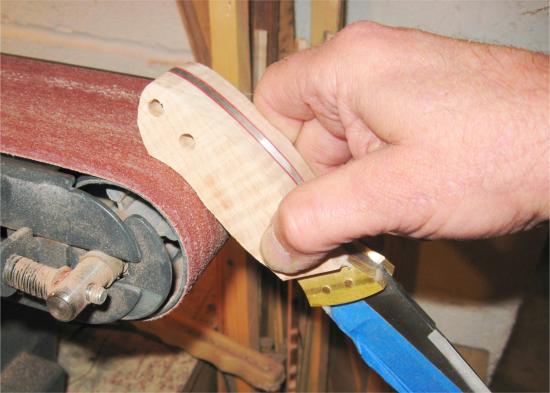
Let's start off by playing with the bolsters. First off, always keep in mind that you are making a left and right hand pair so you don't end up with two identical pieces. Clamping them together helps. Clean up the front edge now since it will be difficult to do this after mounting without scratching the blade. Do initial shaping with 120 grit , move up to 400 and finish with a 600 grit. I like using a belt sander but a sanding block will work fine. | |
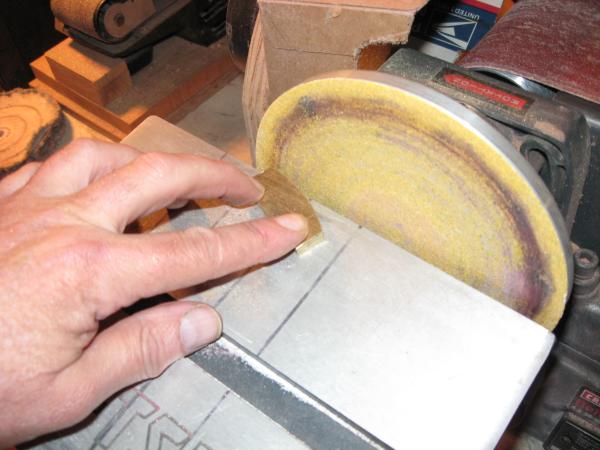 |
I decided to put a little bit of a bevel on the front edge for appearance and use my disk sander with the table tilted slightly. | |
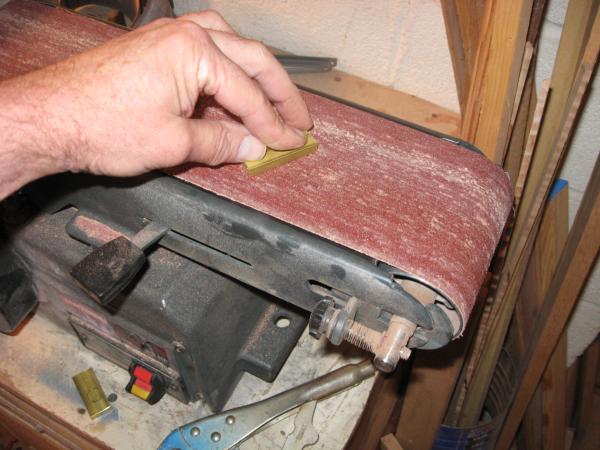 |
File or sand the inside surfaces that will go against the blade to get them flat and to insure a tight, flush fit. Same with the rear edge. 120 grit is all you'll need since these will be hidden. The object here is just to clean them up and give you a sharp, clean edges and a flat back. I'll do the final shaping on the top and bottom later after the scales are installed. | |
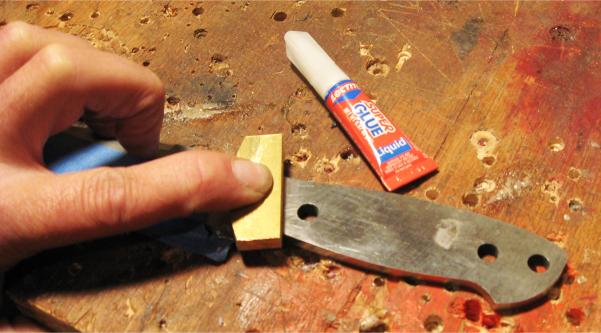 |
I use super glue to hold the bolsters in position while I am getting ready to drill the pin holes. The super glue by itself won't be strong enough to hold the bolsters in place, but sure does help holding them in place during the drilling step. | |
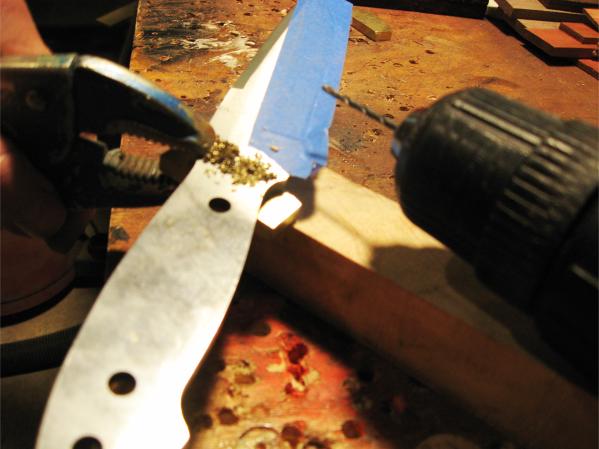 |
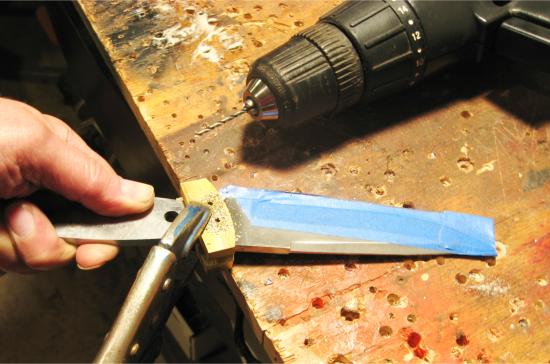
For even more strength, I hold the super glued bolster in place with some vice grips while I drill the pin holes through the blade and through the bolster from backside . You can use a regular high speed steel drill for this--don't use the carbide drill as it will snag on the brass and shatter. | |
 |
Reverse and super glue other bolster on the other side. | |
 |
Flip the knife back again and drill through the bolster that already has the pin holes in it, through the blade and all the way through the new bolster that you just glued on. Don't forget the vice grips. You should now have pin holes perfectly lined up and ready for the pins. | |
 |
Bevel the end of the pin to make it easier to tap it all the way through. If it sticks out either side more than 1/8" of an inch or so, cut it down to that length. | |
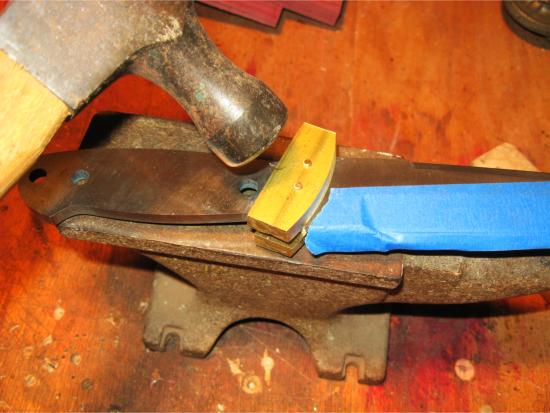 |
peen the pin with a hammer, flipping it back and forth to make sure that you're applying equal pressure to both sides. This compresses the pin and tightens the bolsters to the blade, much like riveting. These will be virtually invisible once we do the final shaping on the bolsters. | |
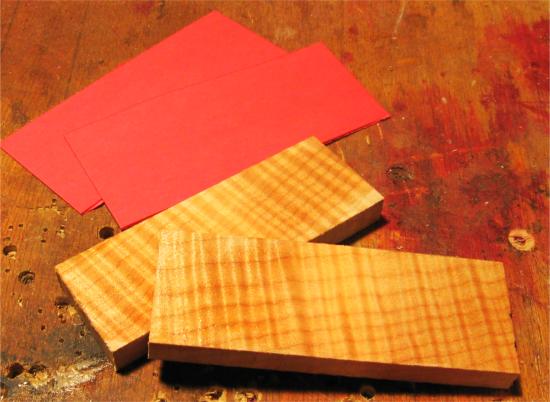 |
OK, with that out of the way, we can start to think about our handle material, or scales. I had some nice tiger maple held aside and I'm going to use a red fiber sheet backing for a little bit of color contrast. | |
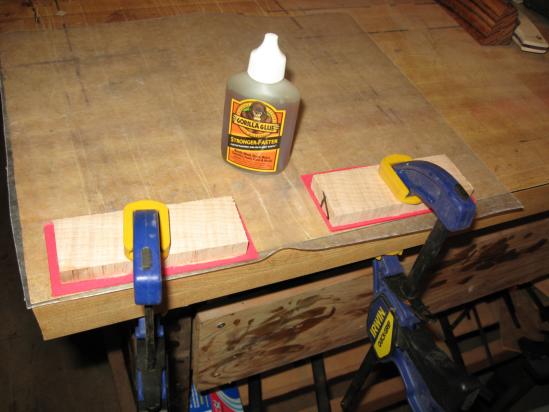 |
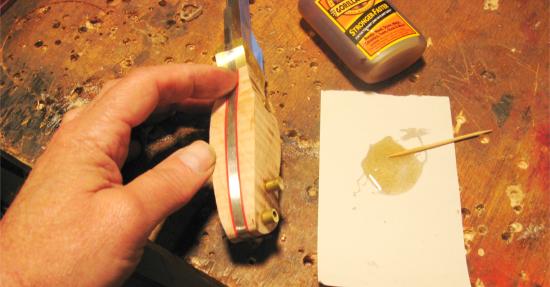
I use a thin layer of Gorilla Glue to mount the tiger maple to the fiber backing sheet and clamp in place so it bonds flat and straight. The Gorilla Glue cures by reacting to moisture so I slightly dampen the scales. Strictly speaking though, even if you think the scales are dry, there's probably still enough moisture to cure the glue. Notice the wax paper underneath. (Epoxy is fine for this, too, by the way) | |
 |
While I'm waiting, I rough up the surface of the tang to give the glue a little more "tooth" to grab onto. | |
 |
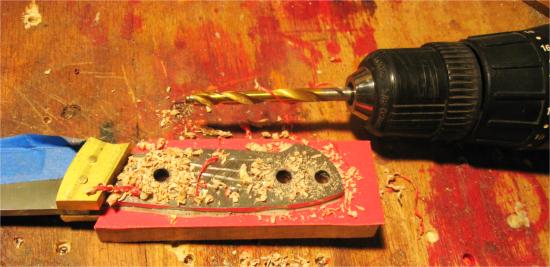
A You know what? I decided that the front pin hole for the scales was too far forward and too close to the bolster. I'm going to drill a new one a fraction of an inch back. (Hey, it's my knife and I can do what I want!) I drill a 1/8" hole first and use this as a pilot hole to drill a new 1/4" hole. Carbide drills are used for both holes. I'm not too worried about this weakening the handle--there's still a lot of metal here. | |
 |
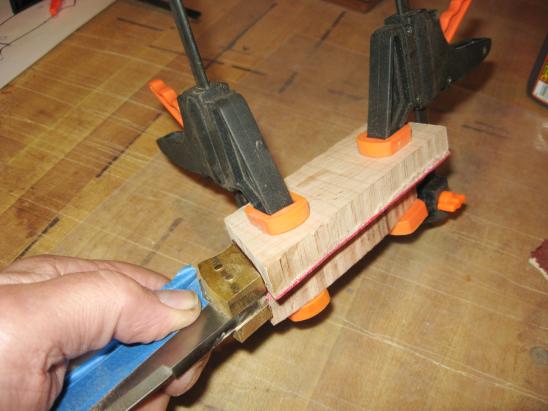
Trim the scales to fit tight against the bolsters. We'll worry about establishing the correct profile later. Use Gorilla Glue again and clamp. Clamping is important since the Gorilla Glue expands slightly and you don't want it to push the scales away. | |
 |
Once cured, go ahead and drill the holes in the scales for the pins and if you're going to use the thong hole, drill this out also . I almost accidentally drilled through the original forward hole instead of the new one I added in the above step but caught myself at the last minute.. | |
|
|
I use a bandsaw to run around the outline of the blade to trim the scales. It doesn't have to be exact, I'm just trying to reduce how much I have to sand off later. | |
|
Go ahead and attach the other set of scales with Gorilla Glue and clamp. | |
 |
After the glue cures, drill the holes for the pins and thong and then trim this side on the bandsaw also. | |
 |
Now is a good time to profile the scales by sanding them flush to the outline of the tang handle. I'm not going to sand the side tapers in yet. | |
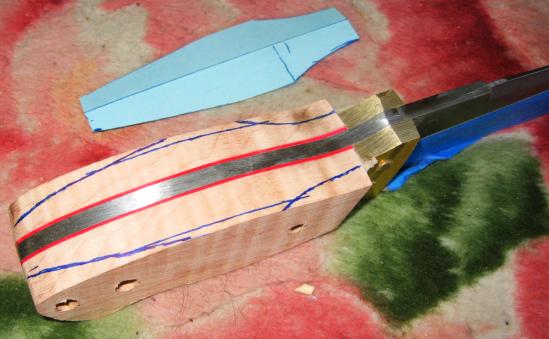 |
Here's why: because of the thickness of the handles, I'm going to bandsaw them first. This will lessen the amount of sanding I have to do and may not be necessary if you use a thinner stock for the handles. I made a paper template to make sure the sides are symmetrical. | |
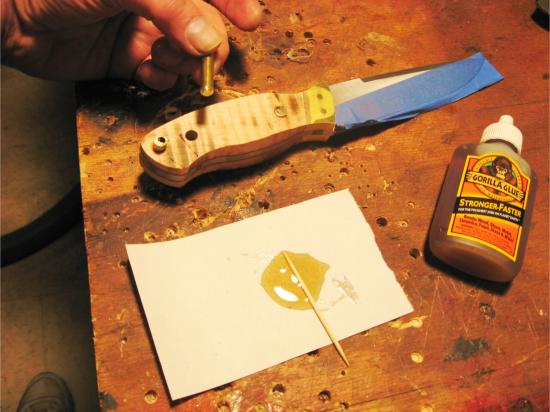 |
After bandsawing ( yes, I know the burn marks mean I need a new bandsaw blade. Thanks.), I start to insert the pins and thong tubing. I use a toothpick to smear a little bit of Gorilla Glue inside the hole to lock these in place. Use a small hammer to tap these into place. Did you notice that I beveled the front to the pins to help get them in? | |
 |
Done. When the glue cures we'll trim the pins and thong tubing off so that only about 3/32" protrudes, prior to peening. | |
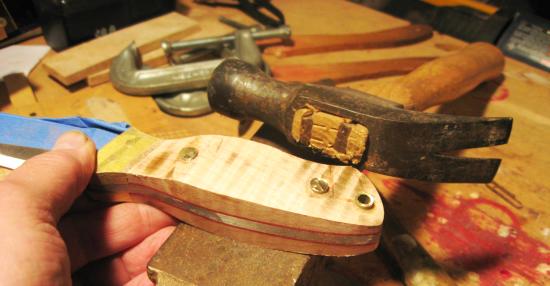 |
When peening the pins in the handle, use a much lighter touch than when you did them on the bolsters--it would be too easy to split the scales. ( So says the Voice of Experience). | |
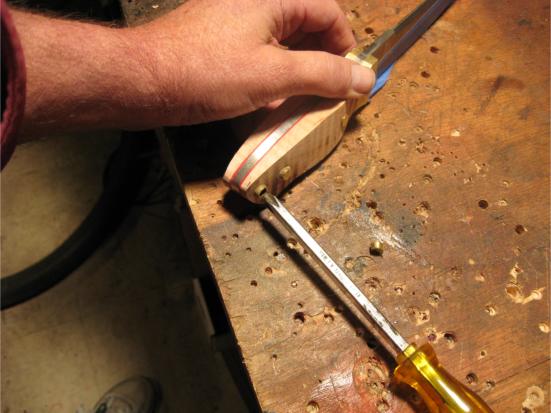 |
To lock the thong tubing in place, you can ream the outside edges to flare them. I use a dull Phillips screwdriver, twisting it while using a little pressure. It doesn't need to be much. |
|
|
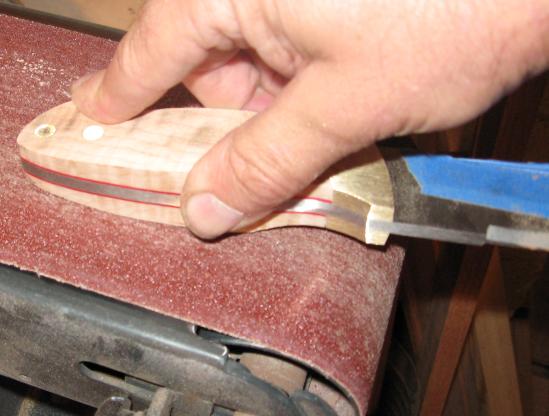
I go back to the belt sander for a minute to sand the pins and thong tubing flush. |
|
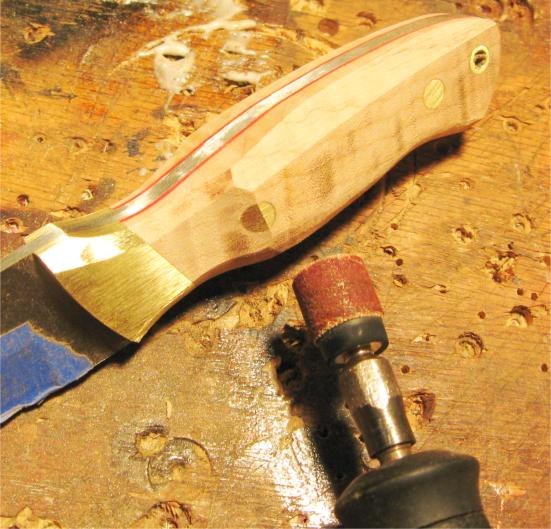 |
I'm such a lazy guy: I use a sanding drum in a Dremel to start to establish the edges to lessen the amount of sanding that needs to be done. This can obviously be done by hand also. |
|
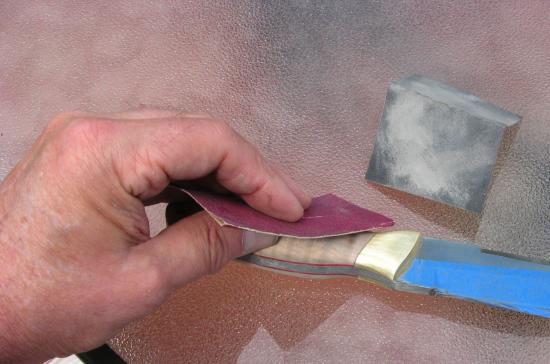 |
Fortunately or unfortunately ( depending on which school of thought you come from) nothing ever replace good old-fashioned hand sanding for the final finish . Start with 120, move on up through 400 and 600 grits. Pay particular attention to polishing out the scratches on the brass bolsters. No amount of buffing will take out the scratches, so you have to do it now. | |
 |
Here's a hint: when done sanding, wet the wood slightly and let it dry. This raises the grain a bit and once you go over it one last time with 400 or 600 grit sandpaper, you'll have a super smooth surface. |
|
 |
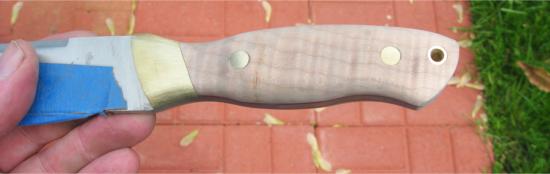
Ah, this is
the step I was waiting for: a little bit of clear finish really accentuates the
tiger stripes in the maple. Yeah, that's what I'm talking about! |
|
 |
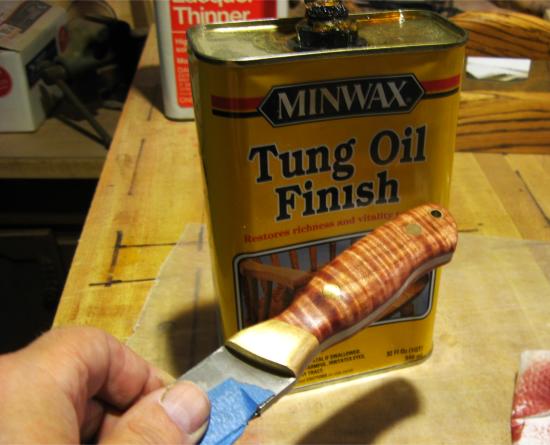
I like tung oil for a finish and wipe on four to six light coats, allowing it to dry in between. Danish oil, walnut oil, or Minwax penetrating oil finish all work well too. They all soak in just a little bit and harden for a really durable, easy to maintain finish. | |
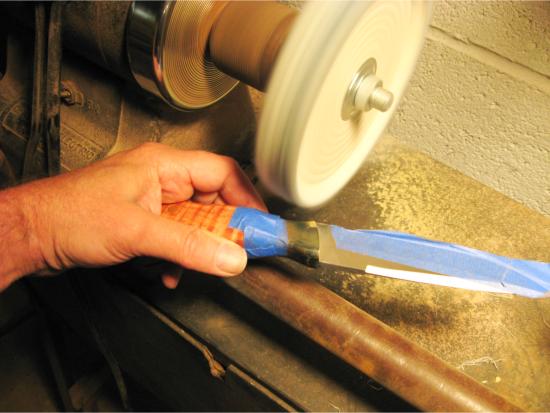 |
Buff the brass bolsters to make them look all bright and shiny. The tape protects the wood handle from the grit that you might accidentally buff into the wood ( very hard to remove without resanding) . Applying the finish to the bare wood before this step helps protect your handles also. Note: believe it or not, this is probably the most dangerous step in this project. Anyone who has been doing this for a while will have some kind of story about how the buff grabbed the blade and threw it. Be very careful and use light pressure! Also note that , in retrospect, this was a VERY stupid thing I did here: taking my hand off while the buff is still spinning in order to take a picture. Use both hands for control!! | |
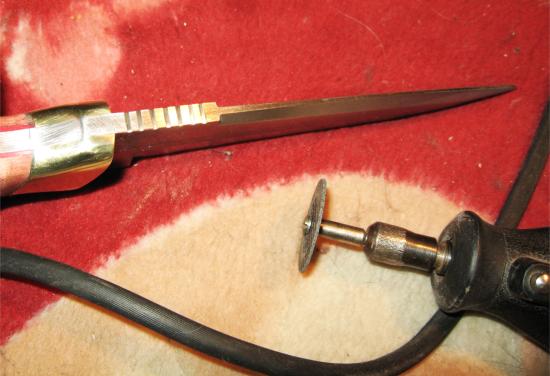 |
For a real custom touch, I like to use a fiberglass cutting wheel to cut a series of shallow grooves in the top of the blade where your thumb is going to sit. It helps make it feel like your thumb just "locks in" for a comfortable, non-slip grip. For a picture of how this fits your hand, click HERE | |
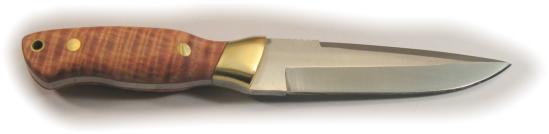
| Wow. This is definitely a keeper. Now I have to figure out what kind of sheath is going to work best. More on that later. |