![]()
Tutorials:
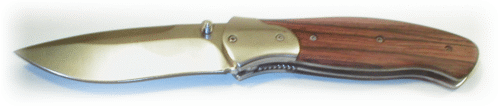
Darrel Ralph Folding Knife: DDR3
Click on any of the thumbnails
below for a more detailed photo
For an exploded view of the DDR3
Assembly, click HERE
|
|
||
| The Darrel Ralph DDR3 kit is an absolutely incredible piece of engineering that now puts the high quality of a Darrel Ralph knife into the price range of us normal guys. All parts are CNC machined for an amazing fit and finish that gives gives you a knife that you're going to really want to show off. This is a serious, hardworking knife though that, despite it's nice looks, will more than earn it's keep and will serve you well for a very long time. I really can't recommend this kit if it's your first time out, but if you've got a little bit of experience, it's a load of fun to assemble and finish. The one handed thumb opening is incredibly smooth. Once you make one of these amazing kits, everything else will feel like it came from the flea market. | ||
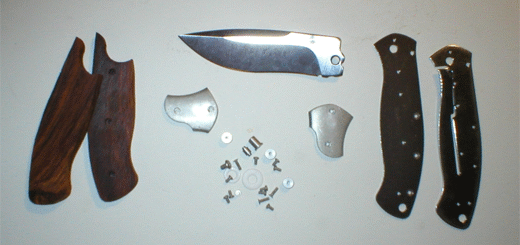 |
Here's what comes in the kit. Wow, that's a lot of tiny screws. Are we making a knife or a watch here? You're going to need a T6 and T8 Torx screwdrivers to assemble this. Shown are the premachined cocbolo scales but since they weren't bookmatched, I decided to use these as a pattern to make my own. | |
 |
I used a tiny drop of water thin super glue to hold the handle stop pin ( part 9) in right liner and the pivot pin (part 10) in the left . Now I don't have to worry about these tiny parts falling out and losing them. | |
 |
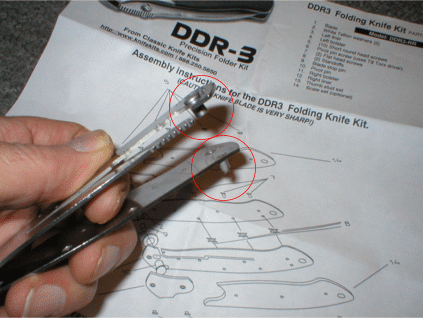
This is a little bit out of order according to the included instructions but I'm temporarily attaching the bolsters to the liners with the T6 Torx screws so I get a good fit with the scales I'm going to make. | |
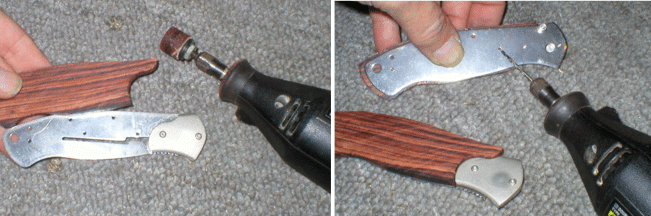 |
I jigsawed the scales to the shape of the premachined scales I bought and used a Dremel with a rotary drum sander for final shaping before using a drop of super glue to temporarily glue the scales to the liners. I then used a super fine drill bit in the Dremel to drill through from the liner side to mark the exact position where those tiny screws will attach the scales to the liner. | |
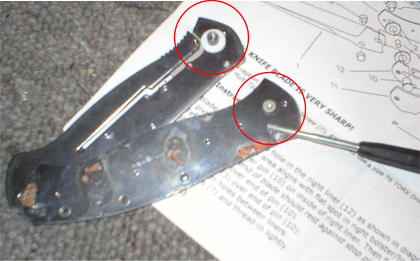 |
Pop the scales back off and remove the right bolster. Slip the teflon washers provided over the center posts. (You'll appreciate later how smooth this makes the opening and closing actions). Scrape off the outside of the liners to get rid of any superglue residue | |
 |
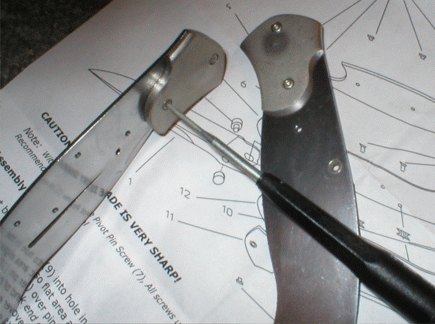
Now is the time to adjust the amount of tension you feel comfortable with by tightening up the pivot pin screw and the pivot pin since these will be trapped under the bolsters after final assembly. Use the T8 Torx screwdriver and add a touch of Loctite or water thin super glue to hold that setting. It's starting to feel like a knife now, isn't it? | |
 |
Assemble the back spacers with T6 screws. Don't tighten them up until all are installed. I used a pin mounted on a dowel to hold the spacers in place while screwing the other ones in place. | |
 |
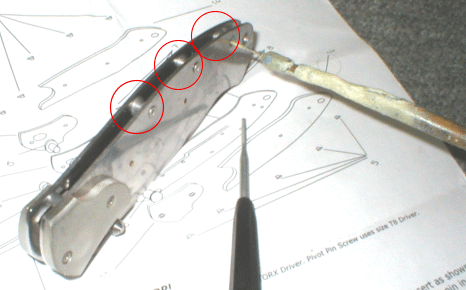
I used a 1/8" bullet point drill bit to drill the holes to clear the head of the screws , following the previously drilled holes. The bullet point drill leaves leaves a good countersunk hole and gives the head of the screws a good internal "lip" to hang on to. | |
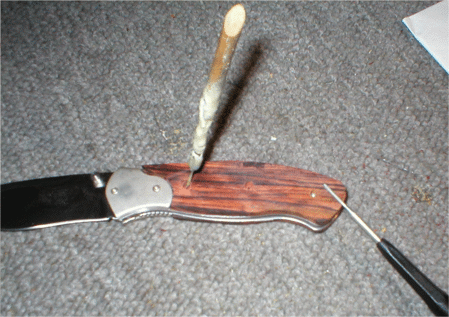 |
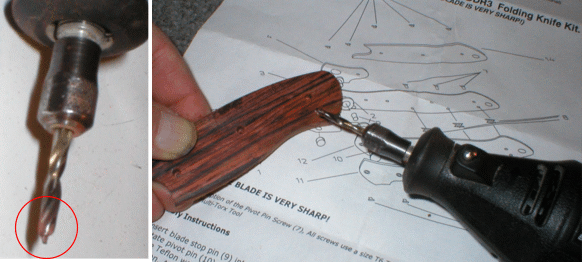
I used the pin mounted on a dowel again to line up the scales while I screwed in the tiny T6 screws to hold the scales on. I also used a little bit of super glue to hold them to the liners. | |
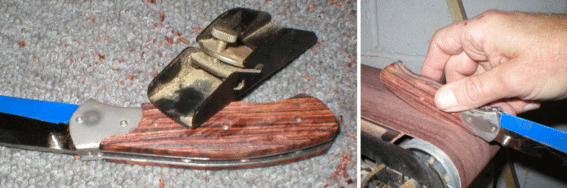 |
A small block plane does the initial shaping of the handle, followed up by a few quick passes on the belt sander. | |
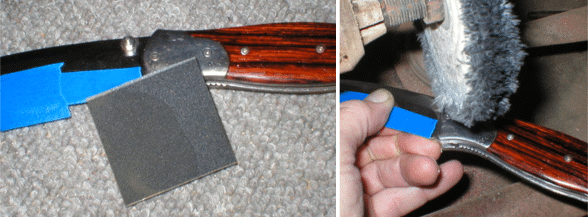 |
Of course nothing beats a final sanding and finishing by hand. I use a wet or dry sandpaper starting with 240, then going to 400 then 600 grit to add a nice finish to the bolsters. Final step is a few minutes on the buffer. | |
| Done. Wow, this is one serious and beautiful knife. I challenge anyone to compare the "walk and talk" of this knife to any other commercially available knife. The action is incredibly smooth ( the "walk") and the blade snaps into place with a loud click ( the "talk") that tells you it's not going to go anywhere. I guarantee that this will be the flagship of your fleet. | ||